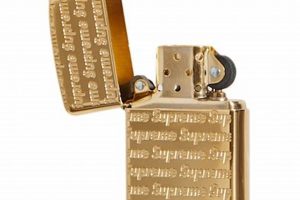
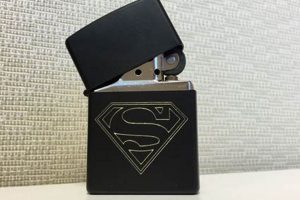
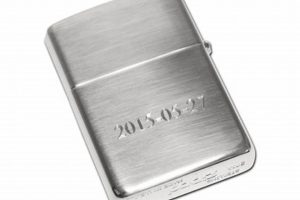
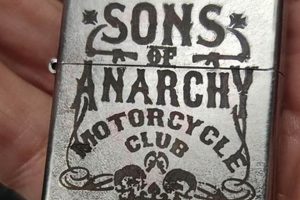
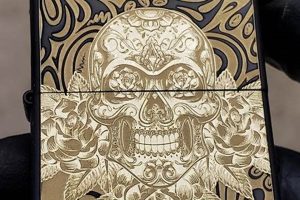
Covering existing engravings on a metal lighter involves techniques that range from simple filling methods to more complex refinishing processes. For instance, a shallow engraving can be filled with a durable epoxy putty, sanded smooth, and then painted. More involved approaches might include sanding down the entire surface or applying a new metal plating.
The ability to modify a lighter’s surface provides opportunities for personalization and restoration. A dated or unwanted inscription can be removed, creating a blank canvas for new artwork or allowing the original lighter finish to be restored. This can increase the item’s sentimental value or even its monetary worth for collectors. Historically, lighters have served as canvases for personal expression, from simple initials to intricate designs reflecting military service or affiliations. The ability to refresh or change these markings adds another layer to this tradition.
The following sections will explore various methods for covering existing engravings, outlining the necessary tools, materials, and safety precautions. Techniques will range from quick fixes for minor imperfections to complete surface overhauls for a fresh start.
Tips for Modifying Engraved Lighters
Modifying an existing engraving requires careful consideration of the desired outcome and the appropriate techniques. The following tips provide guidance for achieving professional-looking results.
Tip 1: Assess the Engraving Depth: Deep engravings require more substantial filling compared to shallow etchings. The chosen method should match the engraving’s characteristics.
Tip 2: Select Appropriate Fillers: Epoxy putty is suitable for most applications, offering durability and a smooth finish. Automotive body filler can be used for larger areas but requires more sanding.
Tip 3: Prepare the Surface: Thorough cleaning with a degreaser ensures proper adhesion of fillers and paints. Light sanding may improve bonding further.
Tip 4: Apply Filler Carefully: Overfilling can necessitate excessive sanding, so apply filler precisely and build up layers if necessary. Allow sufficient drying time between applications.
Tip 5: Sand Smoothly and Evenly: Progressive grits of sandpaper, starting coarse and moving to fine, will achieve a professional finish. Wet sanding can minimize scratches.
Tip 6: Prime Before Painting: Primer provides a consistent base for paint adhesion, ensuring even color and coverage.
Tip 7: Choose Durable Paints: Enamel paints formulated for metal offer excellent durability and resistance to chipping. Consider heat-resistant paints for lighter casings.
Tip 8: Consider Professional Refinishing: For complex engravings or a high-value lighter, professional refinishing may be the best option. This ensures optimal results and preserves the lighter’s integrity.
By following these tips, one can successfully modify existing engravings, achieving a personalized or restored finish that enhances the lighter’s appearance and potential value.
These techniques offer various approaches to lighter modification. Selecting the appropriate method based on the desired outcome and skill level ensures a successful and satisfying result.
1. Surface Preparation
Surface preparation is crucial for successfully modifying an engraved lighter. A properly prepared surface ensures optimal adhesion of fillers and paints, ultimately determining the longevity and aesthetic quality of the final result. Neglecting this step can lead to uneven surfaces, poor paint adhesion, and a less-than-professional appearance.
- Cleaning:
Removing dirt, grease, and residue is paramount. A degreaser or isopropyl alcohol effectively removes contaminants that hinder adhesion. Thorough cleaning ensures a pristine surface for subsequent steps. For example, residual lighter fluid can compromise the bond between the existing surface and the applied filler.
- Sanding:
Sanding the engraved area creates a slightly roughened surface, promoting mechanical adhesion. This is particularly important for smooth surfaces or deep engravings. Using progressively finer grits of sandpaper ensures a smooth finish. For instance, starting with a 200-grit and finishing with a 400-grit sandpaper can create an ideal surface profile.
- Masking (Optional):
If specific areas of the lighter require protection during the modification process, masking tape provides a clean barrier. This is particularly useful when working with intricate designs or preserving the original finish on portions of the lighter. Precise masking ensures that only the intended areas are modified.
- Chemical Etching (For Metal Plating):
If the modification involves applying a new metal plating, chemical etching may be required to prepare the base metal. This process ensures proper bonding of the new plating to the lighter’s surface. This step is more advanced and requires specialized chemicals and safety precautions.
Each aspect of surface preparation contributes significantly to the final outcome. Proper cleaning, sanding, masking (if necessary), and chemical etching (for re-plating) create a receptive surface for fillers, paints, or new metal plating. Careful attention to these details ensures a durable and aesthetically pleasing modification, transforming the lighter into a personalized or restored piece.
2. Filling Techniques
Filling techniques are central to covering existing engravings on a Zippo lighter. The chosen method significantly impacts the final appearance and durability of the modification. Effective filling creates a smooth, even surface for subsequent painting or refinishing, effectively obscuring the previous design.
- Epoxy Putty:
Epoxy putty, a two-part adhesive, offers excellent adhesion and durability. Its malleable consistency allows for precise application, filling engravings of varying depths. Once cured, it can be sanded and polished to a smooth finish, creating an ideal base for paint. This makes it suitable for detailed or intricate engravings where precision is paramount.
- Automotive Body Filler:
Automotive body filler, commonly used for car repairs, provides a cost-effective solution for filling larger, less intricate engravings. It requires careful application and sanding to achieve a smooth finish. Its quick drying time allows for efficient project completion but necessitates prompt and precise application. This filler is ideal for covering broader areas or less defined engravings.
- Metal Filler (Soldering/Welding):
For a more permanent solution, particularly with deep engravings, metal fillers applied through soldering or welding offer a seamless integration with the existing metal. This approach requires specialized tools and skills. The filled area can be sanded and polished to match the surrounding surface. This technique is best suited for individuals with metalworking experience.
- Other Specialized Fillers:
Specialized fillers, such as jeweler’s wax or resin-based fillers, cater to specific needs. Jeweler’s wax, for example, allows for intricate detailing and is ideal for filling fine engravings. Resin-based fillers provide a strong, durable bond and can be pigmented to match the lighter’s finish. The choice depends on the specific requirements of the modification.
The selection of an appropriate filling technique hinges on factors like engraving depth, desired finish, and available resources. Each method offers distinct advantages and suitability for specific applications. Careful consideration of these factors ensures a seamless and durable coverage of the original engraving, creating a suitable foundation for subsequent personalization.
3. Material Selection
Material selection is paramount when modifying an engraved Zippo lighter. The chosen materials directly influence the durability, aesthetics, and overall success of the modification. Careful consideration of material properties, compatibility with the lighter’s base metal, and the desired final appearance is essential for achieving a professional and lasting result.
- Fillers:
Filler choice depends on the engraving depth and desired finish. Epoxy putty provides a versatile solution for various engraving depths, offering a balance of durability and ease of application. Automotive body filler suits broader, shallower engravings but requires more extensive sanding. Metal fillers, applied via soldering or welding, offer the most permanent solution for deep engravings but demand specialized skills. Selecting the appropriate filler ensures a smooth, even base for subsequent finishing processes.
- Abrasives:
Abrasives, such as sandpaper, play a crucial role in achieving a smooth, uniform surface. Different grits, ranging from coarse to fine, are used progressively to refine the filled area. For example, a coarser grit (e.g., 200-grit) effectively shapes and levels the filler, while finer grits (e.g., 400-grit and above) create a polished finish suitable for painting or plating. Appropriate abrasive selection ensures the desired surface texture and minimizes imperfections.
- Primers and Paints:
Primers promote adhesion and provide a uniform base for paint application, ensuring consistent color and coverage. Durable enamel paints formulated for metal offer resistance to chipping and wear. Heat-resistant paints are particularly relevant for lighter casings, protecting the finish from the heat generated during use. Choosing compatible primers and paints ensures a long-lasting, aesthetically pleasing finish.
- Cleaning and Degreasing Agents:
Proper surface preparation relies on effective cleaning and degreasing agents. Isopropyl alcohol or specialized metal degreasers remove contaminants like oils, fingerprints, and residual lighter fluid, ensuring optimal adhesion of fillers and paints. Thorough cleaning is crucial for achieving a professional and durable modification.
The interplay of these material choices significantly influences the final outcome of modifying an engraved Zippo lighter. Selecting appropriate materials for each stage, from filling and sanding to priming and painting, ensures a durable, aesthetically pleasing, and personalized final product. A thoughtful approach to material selection reflects a commitment to quality and craftsmanship, resulting in a modification that enhances the lighter’s value and personal significance.
4. Finishing Processes
Finishing processes are the crucial final steps in successfully covering an existing engraving on a Zippo lighter. These processes determine the final appearance, durability, and overall quality of the modification. Proper finishing ensures the applied filler and any subsequent design elements integrate seamlessly with the lighter’s surface, resulting in a professional and lasting modification.
- Sanding and Polishing:
Sanding and polishing create a smooth, even surface after the filling process. Progressive grits of sandpaper, starting coarse and moving to fine, refine the filled area, eliminating imperfections and creating a uniform texture. Polishing compounds further enhance the smoothness and shine, preparing the surface for painting or other finishing techniques. For instance, wet sanding with progressively finer grits minimizes scratches and creates a polished finish suitable for high-gloss paints.
- Priming:
Priming creates a consistent base for paint adhesion, ensuring uniform color and coverage. Primer fills microscopic imperfections in the sanded surface, promoting a smooth and even paint application. Specialized metal primers enhance adhesion and provide additional protection against corrosion. Using a primer specifically designed for metal surfaces ensures optimal paint adhesion and longevity.
- Painting:
Painting allows for personalization and customization. Durable enamel paints designed for metal surfaces offer resistance to chipping and wear. Heat-resistant paints are particularly suitable for lighter casings, protecting the finish from the heat generated during use. Multiple coats of paint, applied thinly and evenly, ensure a professional, long-lasting finish. Applying thin coats allows each layer to dry thoroughly, minimizing the risk of runs or drips.
- Clear Coat Application (Optional):
Applying a clear coat provides an additional layer of protection and enhances the finish’s gloss and durability. Clear coats protect the underlying paint from scratches, UV damage, and wear, preserving the design’s integrity. Multiple thin coats of clear coat, applied after the paint has fully cured, provide optimal protection and enhance the overall appearance. This step adds a layer of defense against the wear and tear a lighter typically experiences.
These finishing processes, executed meticulously, transform a filled and sanded surface into a refined, personalized, and durable final product. Each stage, from sanding and polishing to priming, painting, and applying a clear coat, plays a critical role in achieving a professional-grade modification that effectively covers the original engraving. The culmination of these finishing techniques effectively integrates the modification with the existing lighter, resulting in a seamless and aesthetically pleasing outcome.
5. Design Considerations
Design considerations play a pivotal role in successfully covering an existing engraving on a Zippo lighter. The desired aesthetic outcome significantly influences the methods and materials employed. For example, completely obscuring the previous engraving requires a different approach than incorporating it into a new design. The complexity of the new design also dictates material choices. A simple, single-color overlay may necessitate only paint, while a more intricate design might involve layering paints, stencils, or even etching techniques. The size and placement of the new design elements further inform decisions regarding surface preparation and finishing processes. Careful consideration of these factors ensures the chosen techniques align with the desired aesthetic goals.
Understanding the interplay between design considerations and material properties is crucial. Intricate designs requiring fine details necessitate materials that allow for precise application and control. Conversely, bolder designs might benefit from materials that offer greater coverage and durability. If the original engraving is deep, the design must accommodate this topography, potentially incorporating the existing texture into the new aesthetic. Furthermore, the lighter’s intended use influences design choices. A lighter intended for everyday carry might prioritize a durable, scratch-resistant finish, while a collector’s piece might emphasize aesthetic detail over practicality. Balancing design complexity with material suitability ensures a successful and satisfying outcome.
Effectively integrating design considerations into the modification process optimizes both the aesthetic and functional aspects of the final product. A well-considered design complements the lighter’s form and function, enhancing its overall value and personal significance. Potential challenges, such as material incompatibility or design complexity exceeding skill level, should be addressed during the planning phase. Successfully navigating these considerations transforms a simple act of covering an engraving into an opportunity for creative expression and personalized craftsmanship, demonstrating a thoughtful approach to design and execution.
Frequently Asked Questions
This section addresses common inquiries regarding the process of modifying engravings on metal lighters.
Question 1: Can deep engravings be completely filled?
Deep engravings can be filled, but the method depends on the depth and the desired finish. Epoxy putty may require multiple applications for very deep engravings. Alternatively, metal fillers, applied through soldering or welding, provide a more permanent solution for significant depth.
Question 2: What type of paint is most durable for lighter casings?
High-quality enamel paints specifically designed for metal surfaces offer excellent durability. Heat-resistant paints are recommended due to the lighter’s function. Applying a clear coat provides additional protection against wear and tear.
Question 3: Is professional refinishing necessary for all engraved lighters?
Professional refinishing offers optimal results, particularly for complex engravings or high-value lighters. However, with appropriate materials and techniques, many modifications can be successfully completed at home.
Question 4: Can the original lighter finish be restored after removing an engraving?
Restoring the original finish depends on the extent of the modification. Minor engravings can often be filled and blended seamlessly. However, significant alterations may require professional re-plating or refinishing to fully restore the original appearance.
Question 5: What safety precautions should be observed during the modification process?
Adequate ventilation is essential when working with paints, solvents, and epoxy. Eye protection and gloves should be worn throughout the process. Following manufacturer instructions for all materials ensures safe handling and application.
Question 6: How can one ensure a smooth, even finish after filling an engraving?
Using progressively finer grits of sandpaper is key to achieving a smooth finish. Wet sanding minimizes scratches. Applying a primer before painting further enhances smoothness and promotes paint adhesion.
Addressing these common concerns clarifies essential aspects of the modification process, guiding individuals toward informed decisions and successful outcomes.
This information serves as a foundational guide for undertaking lighter modification projects. Further research into specific materials and techniques can enhance proficiency and ensure optimal results.
Conclusion
Modifying existing engravings on metal lighters involves a nuanced understanding of surface preparation, filling techniques, material selection, and finishing processes. Achieving a professional and durable result requires careful consideration of each step. The depth of the original engraving, the desired aesthetic outcome, and the individual’s skill level influence the appropriate methodology. Whether filling a minor imperfection or completely resurfacing the lighter, attention to detail and adherence to best practices are essential for success.
The ability to modify engravings offers opportunities for personalization, restoration, and creative expression. From sentimental restorations to artistic reinterpretations, the techniques explored provide a pathway to transforming a functional object into a personalized statement. The potential for customization extends the lifespan of these durable items, fostering a connection between object and owner. Ultimately, the careful execution of these techniques preserves the legacy of these iconic lighters, allowing them to continue serving as canvases for personal expression and enduring symbols of practical artistry.


