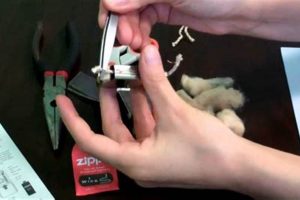
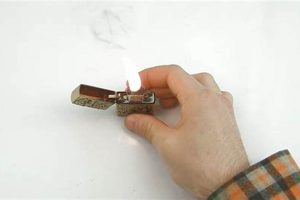
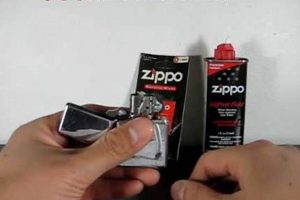
Proper wick installation is essential for optimal Zippo lighter performance. This involves carefully inserting the wick through the chimney tube, ensuring it extends to the bottom of the fuel chamber and is appropriately arranged around the felt pad to facilitate fuel absorption. A correctly installed wick will draw fuel efficiently, producing a consistent flame.
A well-maintained wick is crucial for reliable ignition and a clean burn, preventing fuel leakage and extending the lighter’s lifespan. Historically, Zippo lighters have been known for their dependability, and correct wick placement contributes significantly to this reputation. Optimizing the wick setup allows the lighter to function as intended, providing a dependable source of flame in various conditions.
The following sections will provide a detailed, step-by-step guide to replacing and arranging the wick in a Zippo lighter, ensuring its longevity and reliable operation.
Tips for Zippo Wick Installation
Optimal lighter function relies on proper wick installation and maintenance. These tips offer guidance for achieving reliable performance and extending the lifespan of a Zippo lighter.
Tip 1: Use the correct replacement wick. Authentic Zippo wicks are designed specifically for these lighters and ensure proper fuel flow and combustion.
Tip 2: Completely remove the old wick. Ensure all remnants of the previous wick are removed from the chimney tube and felt pad before installing a new one.
Tip 3: Thread the wick through the chimney insert. Carefully feed the new wick through the chimney insert, ensuring it extends to the bottom of the lighter’s fuel chamber.
Tip 4: Arrange the wick within the fuel chamber. Gently weave the wick back and forth through the holes in the felt pad, creating an even distribution for optimal fuel absorption.
Tip 5: Trim the wick to the correct height. Once arranged, trim the wick so it sits just below the top of the chimney insert, preventing excessive flame height and fuel consumption.
Tip 6: Saturate the wick with lighter fluid. After installation, allow the wick to fully absorb lighter fluid before igniting the lighter.
Tip 7: Exercise caution when working with lighter fluid. Lighter fluid is flammable. Ensure proper ventilation and avoid open flames during the process.
Adhering to these guidelines will ensure consistent, reliable performance and extend the life of the lighter.
By understanding and implementing these wick installation techniques, one can maintain optimal lighter function for years to come.
1. Remove old wick.
Wick replacement in a Zippo lighter necessitates complete removal of the existing wick. This seemingly simple step is foundational to the overall process and directly impacts the lighter’s subsequent performance. Residual wick material can obstruct fuel flow, leading to inconsistent flame height and hindering the saturation of the new wick. A clogged lighter, resulting from incomplete wick removal, can become unreliable and potentially hazardous.
Consider a scenario where a user attempts to install a new wick without fully removing the old one. The remaining fragments can intertwine with the new wick, preventing it from absorbing fuel properly. This can lead to a weak flame or failure to ignite altogether. Furthermore, old wick material can decompose over time, contaminating the fresh lighter fluid and potentially affecting the lighter’s mechanism. Efficient removal ensures a clean start, maximizing the effectiveness of the new wick.
Thorough removal of the old wick is therefore not merely a preliminary step but a crucial component of proper wick setup. It ensures unrestricted fuel flow, facilitates even saturation of the new wick, and contributes to the overall longevity and reliability of the Zippo lighter. Neglecting this step can compromise the entire process, leading to suboptimal performance and potential malfunctions. This underscores the importance of meticulous attention to detail when servicing a Zippo lighter.
2. Insert new wick.
Wick insertion represents a critical stage in the Zippo lighter setup process. A correctly inserted wick is the conduit for fuel delivery from the reservoir to the flint wheel, enabling ignition. This step directly influences flame consistency and overall lighter functionality. An improperly inserted wick can result in fuel starvation, inconsistent burning, or complete failure to ignite. Conversely, precise wick placement ensures a reliable, consistent flame, crucial for the lighter’s intended purpose.
The relationship between wick insertion and successful lighter setup is one of direct causality. The wick acts as a capillary, drawing fuel upwards to sustain the flame. If the wick is not inserted fully into the lighter’s fuel chamber, it cannot effectively absorb and transport the fuel. For instance, a wick that is too short will fail to reach the fuel reservoir, rendering the lighter unusable. Similarly, a wick that is not properly threaded through the chimney can kink or become obstructed, impeding fuel flow. Practical application demonstrates that precise wick insertion is paramount for consistent and reliable lighter operation.
In summary, correct wick insertion is not merely a step in the setup process; it is fundamental to the lighter’s operation. Challenges associated with wick insertion, such as ensuring proper length and avoiding kinks, can be overcome with careful attention to detail. This understanding emphasizes the importance of precise execution during this critical stage of Zippo lighter setup, ultimately contributing to the lighter’s long-term functionality and reliability.
3. Arrange around felt.
Proper arrangement of the wick around the felt pad is a crucial element in setting up a Zippo lighter. The felt pad serves as a reservoir, holding the lighter fluid and allowing the wick to absorb it. Distributing the wick evenly throughout the felt pad ensures consistent fuel delivery to the flame. This arrangement maximizes the wick’s contact with the fuel-saturated felt, promoting efficient absorption and a steady, reliable burn. Failure to distribute the wick correctly can lead to localized fuel depletion, resulting in an uneven flame or premature extinguishing.
The interaction between the wick and the felt pad directly impacts lighter performance. The felt, a porous material, retains lighter fluid, while the wick, acting as a conduit, draws the fluid upwards for combustion. An example illustrating this importance is observing a lighter with its wick bunched in one area of the felt. This lighter will likely exhibit an uneven flame, burn through fuel more quickly in the concentrated area, and potentially fail to ignite consistently. Conversely, a lighter with its wick evenly distributed will burn more efficiently and reliably.
Optimal lighter function relies on the symbiotic relationship between the wick and the felt pad. Distributing the wick correctly ensures even fuel absorption, contributing significantly to a consistent flame and extending the lighter’s functional lifespan. Challenges associated with this process, such as ensuring even distribution within the confined space, can be mitigated with careful manipulation of the wick. This understanding underscores the importance of meticulous wick arrangement for reliable and long-lasting lighter performance.
4. Trim wick height.
Trimming the wick to the correct height is a crucial final step in setting up a Zippo lighter. Wick height directly influences flame size, fuel consumption, and overall lighter performance. An excessively long wick will produce a large, unruly flame, consuming fuel rapidly and potentially creating a safety hazard. Conversely, a wick that is too short may struggle to ignite or produce a flame too small for practical use. Correct wick height ensures a controlled, efficient flame, optimizing both performance and fuel economy.
The relationship between wick height and lighter function is demonstrably significant. Consider a scenario where a user installs a new wick but neglects to trim it. The resulting flame may be excessively large, producing soot and depleting fuel quickly. This not only wastes fuel but also poses a burn risk. In contrast, a properly trimmed wick yields a consistent, manageable flame ideal for lighting cigarettes, candles, or starting fires. This practical example underscores the impact of wick height on lighter functionality and user experience.
Precise wick trimming, therefore, is not merely a cosmetic consideration but a functional necessity. It represents the final step in optimizing the lighter for reliable, efficient use. Challenges associated with trimming, such as ensuring a straight cut and avoiding fraying, can be overcome with careful attention to detail. This understanding highlights the practical significance of correct wick trimming within the broader context of Zippo lighter setup, contributing directly to the lighter’s safety, performance, and longevity.
5. Saturate with fuel.
Fuel saturation of the wick is the crucial final step in the Zippo lighter setup process, bridging the gap between mechanical preparation and functional ignition. A dry wick, even when correctly installed, cannot sustain combustion. Saturation ensures the wick is primed for ignition, enabling the lighter to fulfill its intended purpose. This process involves allowing the wick to absorb an adequate amount of lighter fluid, ensuring consistent and reliable flame production upon striking the flint wheel. Failure to saturate the wick renders the entire setup process futile, highlighting the critical nature of this seemingly simple step.
The relationship between fuel saturation and lighter functionality is one of direct enablement. A wick acts as a conduit, drawing fuel upwards to sustain the flame. However, this capillary action is only effective when the wick is sufficiently saturated. Consider a newly installed wick in a dry state. Attempting to ignite such a lighter would result in a brief, sputtering flame, if any at all. This is because the dry wick lacks the necessary fuel to sustain combustion. Conversely, a fully saturated wick provides a consistent fuel supply, enabling reliable and sustained flame production. This practical illustration underscores the direct link between fuel saturation and successful lighter operation.
Complete wick saturation is, therefore, not merely a recommendation but a functional requirement for a Zippo lighter. This seemingly straightforward step is the culmination of the setup process, connecting proper wick installation with reliable ignition. Challenges associated with saturation, such as overfilling and potential leakage, can be mitigated with careful fluid management. Understanding the importance of this final step emphasizes the interconnected nature of each stage in the Zippo lighter setup process, highlighting the practical significance of complete fuel saturation for reliable and consistent performance.
Frequently Asked Questions
This section addresses common inquiries regarding Zippo lighter wick setup, providing concise and informative responses to facilitate proper maintenance and optimal performance.
Question 1: What type of wick should be used in a Zippo lighter?
Authentic Zippo wicks are recommended for optimal performance and compatibility. Using generic wicks may result in inconsistent burning or damage to the lighter.
Question 2: How often should the wick be replaced?
Wick replacement frequency depends on usage. A noticeably darkened, frayed, or brittle wick indicates the need for replacement. Regular inspection is advised.
Question 3: How can one prevent the wick from fraying?
Careful handling during installation and trimming helps prevent fraying. Using sharp scissors for trimming and avoiding excessive bending or twisting of the wick are recommended.
Question 4: What causes uneven burning or a low flame?
Uneven burning or a low flame can result from improper wick installation, insufficient fuel, or a clogged lighter. Checking wick placement, fuel level, and ensuring the lighter is clean can address these issues.
Question 5: Is it necessary to replace the felt pad when replacing the wick?
Felt pad replacement isn’t always necessary with each wick change. However, if the pad is excessively worn, compressed, or contaminated, replacement is advisable for optimal fuel retention.
Question 6: How can one avoid overfilling the lighter with fuel?
Slow, controlled filling and observing the fuel level through the felt pad openings help prevent overfilling. Overfilling can lead to leakage and fire hazards.
Addressing these common concerns contributes to a more comprehensive understanding of Zippo lighter wick setup, promoting proper maintenance practices and ensuring reliable performance.
By understanding these aspects of wick setup and maintenance, users can ensure their Zippo lighters provide reliable service for years to come.
Conclusion
Proper wick setup in a Zippo lighter is essential for reliable function. Careful execution of each step, from removing the old wick to saturating the new one with fuel, directly impacts the lighter’s performance and longevity. Key aspects highlighted include the importance of complete wick removal, proper insertion through the chimney, even distribution around the felt pad, accurate trimming, and thorough fuel saturation. Each element contributes to a consistent flame, efficient fuel consumption, and extended lighter lifespan. Neglecting any of these steps can compromise functionality, underscoring the interconnectedness of the entire process.
Mastery of these seemingly simple yet crucial steps empowers users to maintain their Zippo lighters effectively, ensuring dependable performance over time. A well-maintained lighter represents not only a reliable tool but also a testament to the enduring design of this classic device. Continued attention to these fundamental maintenance procedures will contribute significantly to the sustained functionality and prolonged lifespan of a Zippo lighter, solidifying its reputation for dependable performance.


