Restoring a Zippo lighter to optimal working condition sometimes requires replacing its wick. This involves carefully removing the old, charred wick and inserting a fresh one, ensuring proper fuel flow and a consistent flame.
A well-maintained wick is essential for a Zippo lighter’s reliable performance. It draws fuel from the reservoir to the flint wheel, enabling ignition and a clean burn. Over time, the wick becomes carbonized and frayed, impeding fuel flow and resulting in a diminished flame or difficulty in lighting. Regular replacement ensures consistent functionality and extends the lifespan of the lighter.
The following steps outline the process of wick replacement, offering a straightforward guide to maintaining a classic Zippo lighter.
Tips for Zippo Wick Replacement
These tips offer guidance for a smooth and successful wick replacement process.
Tip 1: Gather necessary materials. This includes a fresh Zippo wick, tweezers or small pliers, and a flathead screwdriver (if needed).
Tip 2: Prepare the lighter. Ensure the lighter is unfilled and cold to avoid any risk of fire. Remove the insert from the lighter casing.
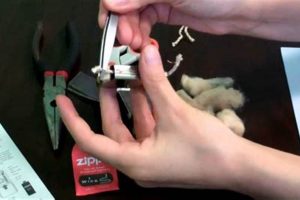
Tip 3: Access the wick. Use the tweezers or pliers to gently pull the old wick out from the top of the insert. If necessary, a small flathead screwdriver can help lift the wick out of the chimney.
Tip 4: Install the new wick. Feed the new wick down through the chimney, ensuring it reaches the felt pad at the bottom of the insert. Leave a small portion of the wick protruding from the top.
Tip 5: Trim the wick. Using scissors, trim the exposed wick to approximately 1/8 inch above the chimney.
Tip 6: Reassemble the lighter. Insert the lighter unit back into the casing.
Tip 7: Refuel the lighter. Once reassembled, add Zippo lighter fluid according to the manufacturer’s instructions.
Following these tips will help ensure proper wick installation and restore optimal lighter function.
By addressing wick replacement proactively, one can maintain a Zippo lighter’s performance and longevity.
1. Empty lighter
Emptying a Zippo lighter of fuel is the foundational first step in wick replacement. This crucial safety measure prevents the risk of fire during the procedure. A lighter containing fuel poses a significant hazard when disassembled and exposed to open flame or sparks.
- Safety Precaution
Emptying the lighter mitigates the risk of accidental ignition of residual fuel. This is paramount for safe handling and manipulation of the lighter components. Attempting to replace the wick without emptying the lighter first invites potentially serious consequences.
- Facilitates Component Access
With the fuel reservoir empty, the internal components, including the wick, become accessible for manipulation. This allows for careful removal of the old wick and proper insertion of the new one without fuel obstruction or contamination.
- Prevents Fuel Contamination
A new wick can absorb and retain residual fuel, potentially impacting its performance and lifespan. Emptying the lighter ensures the new wick remains clean and free of old fuel, promoting optimal function.
- Reduces Fumes
Emptying the lighter minimizes exposure to fuel vapors during the replacement process. This improves the overall safety and comfort of the procedure, particularly in confined spaces.
Prioritizing the emptying of the lighter establishes a safe and efficient foundation for wick replacement. This fundamental step directly impacts the success and safety of the entire process, ensuring proper function and mitigating potential hazards.
2. Remove Insert
Removal of the insert is integral to wick replacement in a Zippo lighter. The insert, containing the wick, flint wheel, and rayon balls soaked in lighter fluid, requires extraction from the outer casing to access and replace the wick. Without removing the insert, the wick remains inaccessible, precluding replacement. This step directly enables access to the wick and facilitates the entire replacement process.
Consider a scenario where the wick within a Zippo lighter has become completely charred, preventing the lighter from igniting. Replacing the wick becomes necessary to restore functionality. However, the wick resides within the insert, shielded by the outer casing. Only by removing the insert can one access the wick and initiate the replacement process. This illustrates the essential, causal relationship between removing the insert and successfully replacing the wick. Attempts to bypass this step render wick replacement impossible.
The practical significance of understanding this connection lies in the ability to effectively maintain a Zippo lighter. Recognizing that insert removal is a prerequisite for wick replacement empowers users to conduct the procedure correctly and restore the lighter to working order. Failure to grasp this fundamental step inhibits proper maintenance and potentially renders the lighter unusable. Mastery of this process contributes to the longevity and reliable performance of the Zippo lighter.
3. Extract old wick
Extracting the old wick is a critical stage in the process of replacing a Zippo lighter’s wick. This step directly follows the removal of the insert and precedes the insertion of the new wick. Without proper extraction of the old wick, the lighter cannot function optimally. This stage necessitates precision and care to avoid damaging the lighter’s internal components.
- Necessity of Removal
The old wick, typically charred and shortened due to repeated use, must be removed to make way for a fresh wick. A deteriorated wick impedes fuel flow, resulting in a weak flame or failure to ignite. Extraction clears the path for optimal fuel delivery to the flint wheel.
- Method of Extraction
Tweezers or small pliers provide the necessary grip and control to extract the old wick. Gentle pulling prevents damage to the surrounding components. If the wick is tightly lodged, a small flathead screwdriver can assist in carefully lifting it from the chimney. Forceful removal risks distorting the chimney or other internal parts.
- Complete Removal
Ensuring complete removal of the old wick is essential. Remnants of the old wick can interfere with the proper seating and function of the new wick. Thorough extraction prevents fuel flow issues and ensures a consistent flame. Inspecting the chimney after removal confirms complete extraction.
- Handling the Old Wick
The extracted wick, often saturated with fuel and potentially hot, should be handled with caution. Proper disposal prevents accidental ignition and minimizes exposure to fuel residue. Placing the old wick in a non-flammable container prior to disposal is recommended.
Successful extraction of the old wick sets the stage for proper insertion of the new wick and ultimately, restoration of the Zippo lighter’s functionality. Careful execution of this stage contributes significantly to the overall success of the wick replacement process and ensures the lighter’s continued performance.
4. Insert new wick
Inserting the new wick represents a pivotal stage in the process of replacing a Zippo lighter’s wick. This action directly follows the extraction of the old wick and precedes trimming the excess. The successful insertion of the new wick is inextricably linked to the overall functionality of the lighter. Without a properly inserted wick, fuel cannot reach the flint wheel, rendering the lighter inoperable. This stage demands careful execution to ensure proper fuel flow and a consistent flame.
Consider a scenario where a Zippo lighter fails to ignite reliably. Diagnosis reveals a worn and frayed wick. While extracting the old wick addresses part of the problem, the lighter remains non-functional until a new wick is properly inserted. The act of inserting the new wick bridges the gap between a non-working lighter and a restored one. This underscores the crucial role of wick insertion in the overall repair process. Furthermore, improper insertion, such as failing to ensure the wick reaches the fuel reservoir, will result in continued malfunction. This highlights the direct, causal relationship between correct wick insertion and the lighter’s operation.
The practical implication of understanding this connection lies in the ability to effectively maintain and repair a Zippo lighter. Recognizing the essential role of wick insertion empowers users to perform the replacement process correctly and restore the lighter to optimal working condition. Careful threading of the wick through the chimney, ensuring it reaches the felt pad at the base, is critical. This precision ensures unimpeded fuel flow and a reliable flame. Failure to insert the wick correctly undermines the entire replacement effort and renders the lighter useless. Mastery of this stage contributes directly to the longevity and reliable performance of the Zippo lighter.
5. Trim excess wick
Trimming the excess wick is a crucial final step in the Zippo lighter wick replacement process. This seemingly minor action plays a significant role in the lighter’s functionality and safe operation. Following proper wick insertion, trimming ensures an optimal flame height and prevents potential safety hazards. Neglecting this step can lead to an excessively large flame, sooting, and potential damage to the lighter.
- Flame Height Regulation
Trimming the wick to the correct length, typically about 1/8 inch above the chimney, regulates the flame height. An untrimmed wick results in an excessively large, uncontrolled flame, making the lighter difficult to use and potentially dangerous. A properly trimmed wick produces a consistent, manageable flame ideal for lighting cigarettes, candles, or starting fires.
- Soot Prevention
Excessive wick length contributes to incomplete fuel combustion, resulting in soot buildup on the lighter and surrounding surfaces. Trimming the wick minimizes soot production, maintaining the lighter’s appearance and preventing clogging of the chimney.
- Safety Considerations
An overlong wick poses a safety risk due to the potential for an excessively large flame. This increases the risk of burns or accidental ignition of flammable materials. Trimming the wick mitigates this risk and ensures safe lighter operation.
- Fuel Efficiency
A properly trimmed wick contributes to efficient fuel consumption. An excessively long wick burns more fuel than necessary, reducing the time between refills. Trimming optimizes fuel usage, extending the period between refueling.
The seemingly simple act of trimming the excess wick represents a critical final step in the Zippo wick replacement process. This action directly impacts the lighter’s performance, safety, and longevity. Proper trimming ensures a controlled flame, minimizes soot production, reduces safety risks, and optimizes fuel efficiency. Understanding the importance of this step contributes significantly to the successful maintenance and operation of a Zippo lighter.
6. Refuel and reassemble
Refueling and reassembling a Zippo lighter represent the culmination of the wick replacement process. These final steps, though seemingly straightforward, are crucial for restoring the lighter to full functionality and ensuring safe operation. Without proper refueling and reassembly, the newly installed wick remains useless, and the lighter cannot perform its intended function. These concluding actions directly connect the wick replacement process to the practical use of the lighter.
- Refueling Procedure
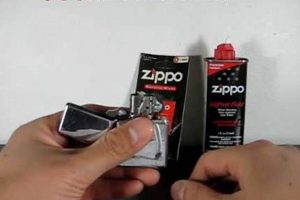
Proper refueling involves using genuine Zippo lighter fluid and following the manufacturer’s instructions. Adding the correct amount of fluid saturates the rayon balls within the insert without overfilling, which can lead to leakage. Using the appropriate fuel ensures optimal performance and prevents damage to the lighter’s components. Incorrect fuel types can damage the wick and other internal parts, negating the entire wick replacement process.
- Insert Reinsertion
Careful reinsertion of the insert into the outer casing is essential for proper lighter function. The insert must be correctly aligned and securely seated within the casing. Failure to properly reinsert the insert can prevent the lighter from opening and closing smoothly or even damage the components. This step directly links the internal workings of the lighter, including the new wick, to the external mechanism that allows for striking the flint wheel.
- Leakage Prevention
After refueling, checking for leaks is a critical safety precaution. Leaking fuel poses a fire hazard and can damage the lighter’s finish. Confirming the absence of leaks ensures safe handling and operation of the lighter. This step underscores the importance of careful refueling and proper assembly in maintaining a safe and functional lighter.
- Functional Test
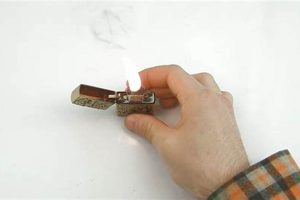
Following reassembly, a functional test verifies the success of the entire wick replacement process. Attempting to ignite the lighter confirms proper wick installation, fuel flow, and flint wheel operation. A successful ignition indicates a correctly executed wick replacement, refueling, and reassembly process. Failure to ignite points to a potential issue in one of the preceding steps, requiring further inspection and troubleshooting. This final check connects the entire process to the practical outcome of a functional lighter.
Refueling and reassembling the Zippo lighter are not merely concluding steps but essential components of the wick replacement process. Proper execution of these final actions directly impacts the lighter’s functionality, safety, and longevity. They bridge the gap between a disassembled lighter with a new wick and a fully operational tool. Understanding the importance of correct refueling and reassembly ensures the successful culmination of the wick replacement process and the restoration of the lighter to its intended purpose.
Frequently Asked Questions
This section addresses common inquiries regarding Zippo lighter wick replacement.
Question 1: How often should one replace a Zippo wick?
Wick replacement frequency depends on lighter usage. Heavier use necessitates more frequent replacement. Generally, replacing the wick every few months ensures optimal performance. A noticeably diminished flame or difficulty in lighting indicates a need for replacement.
Question 2: Can any type of wick be used in a Zippo lighter?
Genuine Zippo wicks are recommended for optimal performance and compatibility. Using non-standard wicks may impede fuel flow and compromise lighter function. Authentic wicks are specifically designed for Zippo lighters, ensuring proper fit and function.
Question 3: What tools are required for wick replacement?
Wick replacement typically requires tweezers or small pliers for wick extraction and scissors for trimming. A small flathead screwdriver can be helpful in certain situations. These tools facilitate safe and efficient wick replacement.
Question 4: What indicates a need for wick replacement?
A weak or inconsistent flame, difficulty in lighting, or a noticeably shortened, charred wick indicates a need for replacement. These signs suggest impaired fuel flow due to a deteriorated wick.
Question 5: Is it necessary to empty the lighter before replacing the wick?
Emptying the lighter of fuel before wick replacement is a crucial safety precaution. This prevents the risk of fire during the process. Residual fuel poses a significant fire hazard when the lighter is disassembled.
Question 6: What happens if the wick is not trimmed correctly?
Incorrect wick trimming can lead to an excessively large flame, increased soot production, and greater fuel consumption. It can also pose a safety hazard. Proper trimming ensures a controlled flame and optimal lighter performance.
Addressing these common inquiries provides a comprehensive understanding of Zippo lighter wick replacement procedures and best practices. Proper maintenance ensures reliable performance and extends the lifespan of the lighter.
This concludes the comprehensive guide to replacing a Zippo lighter wick. The guidance provided equips individuals with the knowledge and skills necessary to maintain their lighters in optimal working condition.
How to Replace the Wick on a Zippo Lighter
Replacing a Zippo lighter wick is a straightforward process involving a series of well-defined steps: emptying the lighter of fuel, removing the insert, extracting the old wick, inserting the new wick, trimming the excess wick, and finally, refueling and reassembling the lighter. Each step is crucial for successful restoration of lighter functionality and safe operation. Understanding the rationale behind each action, from safety precautions to performance optimization, empowers users to maintain their lighters effectively.
Proper wick replacement ensures the longevity and reliable performance of a Zippo lighter. Regular maintenance, including wick replacement, allows this iconic lighter to function optimally for years to come. Through diligent care and attention to detail, a Zippo lighter can continue to provide a dependable source of flame, upholding its legacy of practicality and durability.


