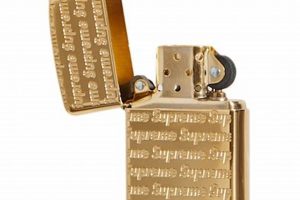
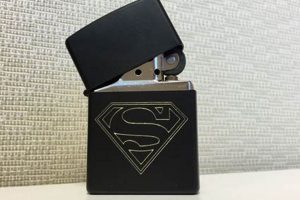
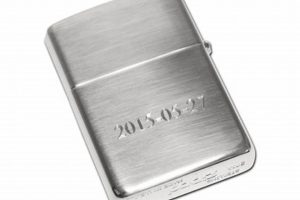
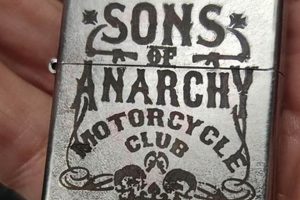
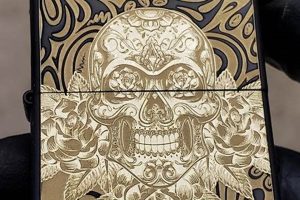
Personalizing a Zippo lighter through engraving offers a way to create a unique, bespoke item. This process involves transferring a design onto the lighter’s metal surface using specialized tools and techniques. For instance, one might engrave initials, a meaningful date, or a symbolic image onto the lighter’s casing.
The ability to customize a Zippo lighter adds sentimental value, transforming a practical item into a cherished keepsake or a personalized gift. Historically, soldiers often engraved their lighters with unit insignia, names, or important dates as a tangible reminder of their service. This tradition continues today, demonstrating the enduring appeal of personalized items. The practice also allows for artistic expression and the creation of truly one-of-a-kind pieces.
Achieving professional-quality results requires careful consideration of several factors, including the choice of engraving method, appropriate tools, and necessary safety precautions. The following sections will explore these aspects in detail, offering guidance for those seeking to personalize their own Zippo lighters.
Tips for Engraving a Zippo Lighter at Home
Several key considerations contribute to a successful engraving project. Adhering to these guidelines will enhance the quality of the final product and ensure a safe working environment.
Tip 1: Select Appropriate Tools. Rotary tools with diamond-tipped burrs are recommended for achieving clean, precise lines. Alternative methods, such as hand engraving tools, require greater skill and practice. Research different tool options to determine the best fit for one’s experience level and desired outcome.
Tip 2: Prepare the Lighter. Thoroughly clean the Zippo surface with a suitable solvent to remove any oils or residues. This step ensures optimal adhesion for stencils or transfer paper if used.
Tip 3: Secure the Lighter. A vise or clamp can be employed to hold the Zippo firmly in place during the engraving process. This prevents slippage and ensures consistent results.
Tip 4: Transfer the Design. Utilize stencils, transfer paper, or freehand sketching to apply the desired design onto the lighter’s surface. Precision in this stage is crucial for achieving a satisfactory final product.
Tip 5: Practice on Scrap Metal. Before engraving the Zippo, practicing on a similar metal surface allows for refinement of technique and adjustment of tool settings. This minimizes the risk of errors on the final piece.
Tip 6: Employ Proper Safety Precautions. Eye protection and a dust mask are essential when using rotary tools. Adequate ventilation is also recommended to minimize inhalation of metal particles.
Tip 7: Engrave with Controlled Movements. Maintain a steady hand and apply consistent pressure while engraving. Avoid rushing the process, as this can lead to uneven lines or slippage.
Tip 8: Finish and Protect. Once the engraving is complete, clean the lighter again to remove any metal debris. A protective coating or sealant can be applied to preserve the engraved design and prevent tarnishing.
Careful preparation and execution, combined with attention to safety, are essential for achieving professional-looking results. These tips provide a solid foundation for successfully personalizing a Zippo lighter at home.
With these tips in mind, one can proceed to the practical application of these techniques, transforming an ordinary Zippo lighter into a personalized and cherished possession.
1. Preparation
Preparation forms the crucial foundation for successful Zippo engraving. A well-prepared lighter and work area significantly influence the quality and precision of the final result. This stage encompasses several key aspects: cleaning the Zippo’s surface, securing the lighter, and preparing the chosen design. Neglecting these steps can lead to uneven engraving, slippage, and ultimately, a compromised final product. For instance, residual oils or fingerprints on the lighter’s surface can interfere with the engraving tool’s precision and create imperfections in the design. Similarly, an unsecured lighter can shift during the engraving process, resulting in misplaced lines or an incomplete design.
Cleaning the Zippo typically involves using a solvent like isopropyl alcohol to remove any grease, fingerprints, or debris. This ensures the engraving tool maintains consistent contact with the metal surface. Securing the lighter requires a vise or clamp to hold it firmly in place, preventing movement during the engraving process. Finally, preparing the design involves choosing the desired image or text and transferring it onto the Zippo’s surface using stencils, transfer paper, or freehand sketching. Each of these preparatory steps contributes directly to the overall success of the engraving process. An adequately prepared surface allows for clean, sharp lines, while a securely held lighter ensures the design is executed accurately.
In summary, meticulous preparation is essential for achieving professional-quality results when engraving a Zippo lighter. This preliminary stage establishes the groundwork for a precise and controlled engraving process, minimizing the risk of errors and ensuring the desired outcome. A clean, secure lighter, coupled with a clearly transferred design, forms the bedrock for creating a personalized, well-executed, and lasting piece.
2. Tool Selection
Tool selection is paramount when engraving a Zippo lighter at home. The correct tools determine the precision, efficiency, and overall quality of the engraving. Choosing appropriate tools impacts not only the final aesthetic but also the ease and safety of the process. This section explores key tool categories and their respective roles in achieving optimal engraving results.
- Rotary Tools
Rotary tools offer versatility and control for intricate designs. Equipped with various bits and attachments, including diamond-tipped burrs, these tools provide the precision needed for fine lines and detailed artwork. Variable speed settings allow for adjustments based on the intricacy of the design and the user’s experience level. For example, a diamond burr enables clean, sharp incisions in the metal, resulting in a professional finish. Rotary tools, however, require careful handling due to their high speed and potential for creating metal dust.
- Hand Engraving Tools
Traditional hand engraving tools, such as gravers and chisels, offer a more tactile and deliberate approach. These tools require greater skill and practice but allow for nuanced control over line depth and texture. Hand engraving is often preferred for creating a classic, handcrafted look. For instance, a skilled engraver can use a graver to achieve varying line thicknesses and create unique textures, adding depth and character to the design. This method, however, can be more time-consuming and demands a higher level of expertise.
- Stencils and Templates
Stencils and templates provide a framework for precise design transfer. These tools ensure consistent letterforms, patterns, or complex artwork. Stencils can be purchased pre-made or created custom using vinyl cutters or other methods. Using stencils simplifies the engraving process, particularly for intricate designs or repetitive patterns. For example, a stencil can ensure uniformity when engraving initials or a logo. This eliminates the need for freehand drawing and reduces the risk of errors.
- Safety Equipment
Safety equipment is essential for protecting the engraver during the process. Eye protection shields against metal shards and dust, while a dust mask prevents inhalation of fine metal particles. Gloves provide a secure grip and protect hands from vibration and potential injury. Appropriate safety measures minimize the risk of accidents and ensure a safe working environment. For instance, wearing a dust mask prevents respiratory irritation from metal dust generated during engraving. Prioritizing safety is paramount throughout the entire process.
Selecting appropriate tools directly influences the outcome of the engraving process. The choice between rotary tools and hand engraving tools depends on the desired aesthetic and the engraver’s skill level. Utilizing stencils and templates aids in achieving precise and consistent designs. Prioritizing safety equipment ensures a secure and protected working environment. Careful consideration of these factors contributes to a successful and rewarding engraving experience, resulting in a personalized Zippo lighter of lasting value.
3. Design Transfer
Design transfer represents a critical stage in the process of engraving a Zippo lighter at home. Successful transfer ensures the desired image or text is accurately replicated onto the lighter’s surface, forming the blueprint for the subsequent engraving process. The precision and clarity of the transferred design directly influence the final engraved product. A poorly transferred design can lead to inaccuracies during engraving, compromising the overall aesthetic and diminishing the personalized value of the lighter. Conversely, a crisp, accurately positioned design sets the stage for a successful and satisfying engraving outcome.
Several methods facilitate effective design transfer. Stencils, whether commercially produced or custom-made, offer a reliable means of transferring intricate designs or repetitive patterns. The stencil adheres to the Zippo’s surface, providing a clear guide for the engraving tool. Transfer paper, coated with a waxy substance, allows designs printed on regular paper to be transferred by tracing over the lines with pressure. This method suits simpler designs and offers more flexibility for customization. Freehand drawing directly onto the lighter’s surface with a specialized marker provides the greatest level of artistic freedom but demands a steady hand and precise execution. For example, transferring a family crest using a stencil ensures accuracy and symmetry, while personalized text might be more effectively transferred using freehand drawing or transfer paper.
The choice of transfer method depends on the complexity of the design, available resources, and the engraver’s skill level. Regardless of the chosen method, careful execution is paramount. Ensuring proper adhesion of stencils or transfer paper prevents slippage during engraving. Precise tracing or drawing guarantees accurate replication of the design onto the Zippo’s surface. Thorough preparation and attention to detail during this stage significantly contribute to the overall success of the engraving process, facilitating a clean, accurate, and ultimately satisfying finished product. A well-executed design transfer establishes a solid foundation for the subsequent engraving steps, ensuring the final engraved Zippo reflects the intended design with clarity and precision.
4. Engraving Technique
Engraving technique represents the core skill set required for successfully personalizing a Zippo lighter at home. It encompasses the practical application of tools and methods to transfer a design onto the lighter’s metal surface. Mastery of engraving technique directly influences the quality, precision, and overall aesthetic of the final product. Appropriate technique minimizes errors, ensures clean lines, and allows for intricate details. Conversely, inadequate technique can lead to uneven engraving, misplaced lines, and a compromised final product. The relationship between engraving technique and the overall process is one of cause and effect: skilled execution of technique results in a high-quality engraved piece.
Several factors contribute to effective engraving technique. Maintaining consistent pressure and speed while using a rotary tool ensures uniform depth and prevents slippage. Controlling the direction and angle of the engraving tool allows for precise line work and intricate detailing. Practicing on scrap metal before working on the Zippo itself allows one to refine technique and gain confidence. For instance, when engraving a complex design, varying the pressure and speed of the rotary tool allows for greater control over line thickness and depth, creating a more dynamic and visually appealing result. Similarly, understanding the optimal angle for holding the engraving tool relative to the metal surface minimizes burrs and ensures clean, sharp lines.
Mastery of engraving technique requires practice, patience, and attention to detail. Challenges may include maintaining consistent pressure, controlling tool vibration, and achieving smooth curves. Overcoming these challenges requires dedicated practice and a willingness to learn from mistakes. Understanding the nuances of engraving technique transforms the process from a mere mechanical task into an act of creative expression. This understanding allows one to produce personalized Zippo lighters that showcase not only a design but also the skill and precision involved in its creation. The ability to execute clean lines, intricate details, and uniform depth transforms a standard Zippo lighter into a personalized keepsake, reflecting both the chosen design and the engraver’s skill.
5. Safety Measures
Safety measures are integral to the process of engraving a Zippo lighter at home. Engraving involves the use of tools and materials that present potential hazards if not handled properly. Implementing appropriate safety precautions mitigates these risks, ensuring a secure working environment and preventing potential injuries. The relationship between safety measures and engraving is one of prevention and protection: prioritizing safety prevents accidents and protects the engraver from harm. Ignoring safety protocols can lead to eye injuries from metal shards, respiratory issues from inhaled metal dust, or cuts from sharp tools. For example, failing to wear eye protection while using a rotary tool can result in eye irritation or more serious injury from projected metal fragments. Similarly, neglecting to wear a dust mask exposes the engraver to fine metal particles, potentially causing respiratory problems. Understanding the potential hazards associated with each step in the engraving process and implementing appropriate safety measures is paramount. This proactive approach fosters a safe and productive working environment, minimizing the likelihood of accidents.
Specific safety measures include wearing appropriate eye protection, such as safety glasses or a face shield, to guard against flying metal debris. A dust mask or respirator prevents the inhalation of metal dust generated during the engraving process. Wearing gloves provides a secure grip on tools and protects hands from vibrations and sharp edges. Ensuring adequate ventilation in the work area further reduces the risk of inhaling metal dust. Proper tool handling techniques, such as maintaining a firm grip and using tools only for their intended purpose, minimize the risk of slips and cuts. For example, using a vise to secure the Zippo lighter prevents it from moving during engraving, reducing the risk of the tool slipping and causing injury. Regularly inspecting tools for damage and replacing worn or damaged parts also contributes to a safer working environment. Each safety measure plays a crucial role in minimizing specific hazards, contributing to a comprehensive safety protocol.
Prioritizing safety not only protects the engraver from physical harm but also contributes to a more focused and productive work environment. Knowing that appropriate safety measures are in place allows one to concentrate on the creative and technical aspects of engraving without distraction. This focus enhances precision, improves the quality of the engraving, and contributes to a more satisfying overall experience. Challenges in implementing safety measures can include discomfort from wearing protective gear or a perceived inconvenience. However, the potential consequences of neglecting safety far outweigh any temporary discomfort. Ultimately, integrating safety measures into every step of the engraving process is essential for responsible and successful Zippo personalization. This proactive approach transforms the engraving process from a potentially hazardous activity into a safe and rewarding creative endeavor.
6. Finishing Touches
Finishing touches represent the final stage in the process of engraving a Zippo lighter at home, bridging the gap between a completed engraving and a polished, preserved final product. These steps, while seemingly minor, significantly impact the longevity and aesthetic appeal of the engraved design. They protect the engraved surface from wear and tear, enhance the visibility of the design, and contribute to the overall professional quality of the finished piece. Neglecting finishing touches can lead to premature tarnishing of the metal, fading of the engraved design, and a less refined final appearance. Conversely, careful attention to these final steps ensures the engraved Zippo remains a cherished keepsake for years to come.
- Cleaning
Cleaning the engraved Zippo removes metal dust, debris, and fingerprints left during the engraving process. This enhances the clarity of the design and prepares the surface for subsequent finishing steps. Utilizing a soft cloth and a mild cleaning solution, such as isopropyl alcohol, effectively removes residue without damaging the engraved design. This step is crucial for achieving a pristine final product, as residual debris can detract from the overall aesthetic and interfere with the application of protective coatings. For instance, removing metal dust from crevices within the engraved design enhances its visibility and prevents the accumulation of tarnish-causing agents.
- Polishing (Optional)
Polishing enhances the reflectivity of the metal surface and can further accentuate the engraved design. Metal polishes designed for use on brass or chrome, depending on the Zippo’s finish, can be applied with a soft cloth. This step is particularly beneficial for lighters with a high-polish finish, restoring their original luster and creating a striking contrast with the engraved design. However, caution should be exercised to avoid over-polishing, which can diminish the depth of the engraving. For example, polishing a brushed chrome Zippo after engraving can create a visually appealing contrast between the polished surface and the matte finish within the engraved lines.
- Protective Coating
Applying a protective coating, such as a clear lacquer or sealant, safeguards the engraved design and the lighter’s surface from oxidation and tarnish. This protective layer acts as a barrier against environmental factors, preserving the finish and preventing discoloration. Choosing a sealant appropriate for the Zippo’s metal type ensures compatibility and maximizes protection. For example, applying a clear lacquer to a brass Zippo prevents the formation of patina and preserves the brightness of the metal. This step is crucial for maintaining the long-term aesthetic appeal of the engraved lighter.
- Final Inspection
A final inspection provides an opportunity to assess the overall quality of the engraving and finishing work. This involves examining the clarity and evenness of the engraved lines, checking for any imperfections in the finish, and ensuring the protective coating is evenly applied. This meticulous review ensures the engraved Zippo meets the desired standards of quality and craftsmanship. For instance, inspecting the engraved design under magnification can reveal minor imperfections that might be addressed with further polishing or touch-up engraving. This final check guarantees a finished product that reflects the care and attention to detail invested in the entire process.
These finishing touches, while often overlooked, play a vital role in the overall success of personalizing a Zippo lighter. They transform a completed engraving into a refined, protected, and enduring keepsake. From cleaning and polishing to applying protective coatings and conducting a final inspection, each step contributes to the long-term preservation and aesthetic enhancement of the engraved design. These final steps reflect the dedication to craftsmanship and ensure the personalized Zippo remains a treasured possession for years to come, showcasing not only the chosen design but also the care taken in its creation and preservation.
Frequently Asked Questions
This section addresses common inquiries regarding at-home Zippo engraving, providing concise and informative responses to clarify potential uncertainties and misconceptions.
Question 1: What type of engraving tool is recommended for beginners?
A rotary tool with diamond-tipped burrs offers good control and versatility for beginners. Diamond burrs are durable and effective on metal surfaces, providing clean lines with relative ease.
Question 2: Can one engrave a Zippo without specialized tools?
While specialized tools yield optimal results, some individuals employ alternative methods like etching with a Dremel and specific etching solutions. However, these methods often require more practice and may not achieve the same level of precision.
Question 3: How can deep engraving be achieved on a Zippo?
Deep engraving requires multiple passes with the engraving tool, gradually increasing the depth with each pass. Careful control of the tools pressure and speed is crucial to prevent slippage and maintain consistent depth. Practicing on scrap metal is recommended before attempting deep engraving on the Zippo.
Question 4: What are the common mistakes to avoid during the engraving process?
Common mistakes include applying inconsistent pressure, moving the tool too quickly, and neglecting to secure the Zippo properly. These errors can lead to uneven lines, slippage, and an unsatisfactory final product. Thorough preparation and practice can mitigate these risks.
Question 5: How can one transfer a complex design onto a Zippo for engraving?
Complex designs are best transferred using stencils or specialized transfer paper. Stencils provide a precise outline for the engraving tool to follow, ensuring accurate replication of intricate details. Transfer paper allows for the transfer of printed designs onto the Zippos surface.
Question 6: What safety precautions are essential when engraving a Zippo at home?
Essential safety precautions include wearing eye protection to prevent metal shards from causing injury, using a dust mask to avoid inhaling metal particles, and wearing gloves to provide a secure grip and protect hands. Adequate ventilation is also recommended to minimize exposure to metal dust.
Careful consideration of these frequently asked questions, combined with a thorough understanding of the engraving process, facilitates a successful and rewarding experience, culminating in a personalized Zippo lighter of lasting quality and sentimental value.
Further resources and tutorials can provide additional guidance and support for those embarking on at-home Zippo engraving.
Conclusion
Personalizing a Zippo lighter through engraving offers a unique avenue for creative expression. Successfully achieving this customization requires careful consideration of several key factors. Tool selection significantly impacts the precision and intricacy of the engraving. Appropriate design transfer methods ensure accurate replication of the chosen image or text. Mastery of engraving technique, achieved through practice and attention to detail, yields professional-quality results. Adherence to safety measures protects the engraver from potential hazards associated with the process. Finally, applying finishing touches preserves the engraved design and enhances its longevity. Each step plays a vital role in the overall process, contributing to the creation of a personalized keepsake.
The ability to engrave a Zippo lighter at home empowers individuals to transform an ordinary object into a unique, personalized item. Whether commemorating a special occasion, expressing artistic flair, or creating a meaningful gift, the process of engraving offers a tangible connection between craftsmanship and personal expression. This exploration of tools, techniques, and safety considerations provides a foundation for those seeking to embark on this rewarding endeavor, ultimately adding a personal touch to a timeless classic.


