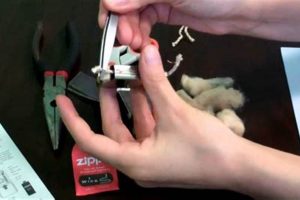
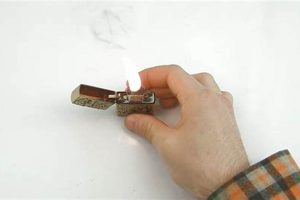
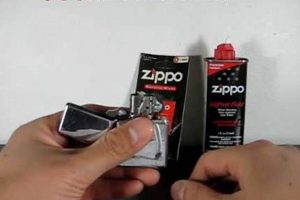
Replacing the wick in a large Zippo-style lighter involves removing the insert unit from the lighter casing, pulling out the old wicking material with pliers, inserting new wicking through the chimney, and trimming it to the appropriate length. This process also includes replacing the rayon balls and felt pad which hold the lighter fluid.
Maintaining a fresh wick ensures reliable ignition and a consistent flame height. A deteriorated wick can lead to difficulties in lighting, a weak flame, or excessive fuel consumption. While the size of the lighter may present slight variations in the procedure, the underlying principles remain consistent. The practice has remained largely unchanged since the introduction of these types of lighters, demonstrating the effectiveness of the design.
The following sections will detail the necessary tools, the step-by-step replacement procedure, and troubleshooting tips for common issues encountered during the process. This guide will cover selecting the correct replacement wick and other materials, safely handling the lighter fluid, and properly disposing of the old components.
Tips for Wick Replacement in Large Zippo-Style Lighters
The following tips offer guidance for a smooth and successful wick replacement process, ensuring optimal lighter performance.
Tip 1: Select the correct wick size. Using a wick that is too thick or too thin can impede fuel flow and affect flame height. Consult the lighter’s manufacturer recommendations for the appropriate wick size.
Tip 2: Employ proper tools. Needle-nose pliers are essential for gripping and pulling the old wick. Small flathead screwdrivers can assist in packing the rayon balls and adjusting the felt pad.
Tip 3: Work in a well-ventilated area. Lighter fluid is flammable. Avoid open flames and ensure adequate ventilation during the replacement process.
Tip 4: Exercise caution with lighter fluid. Avoid spills and skin contact. Keep lighter fluid away from children and pets.
Tip 5: Trim the wick correctly. The wick should extend slightly above the chimney. An excessively long wick can produce a large, sooty flame. A wick that is too short may be difficult to ignite.
Tip 6: Pack the rayon balls firmly but not too tightly. This ensures proper fuel absorption and flow to the wick. Overpacking can restrict fuel flow.
Tip 7: Ensure the felt pad sits snugly beneath the flint wheel assembly. This prevents fuel leakage and ensures proper flint operation.
Adhering to these tips will contribute to a successful wick replacement and prolong the life of the lighter. Proper maintenance ensures consistent performance and a reliable flame.
By understanding the process and exercising caution, individuals can maintain their large Zippo-style lighters effectively.
1. Remove Insert
Removal of the insert unit is the foundational step in replacing the wick of a large Zippo-style lighter. The insert houses the wick, flint assembly, and fuel chamber. Without removing the insert, access to the wick and other internal components is impossible. This step allows for complete replacement of the wick and ensures proper maintenance of the lighter. Consider a scenario where one attempts to change the wick without removing the insert: the task becomes impractical, potentially damaging the lighter. This highlights the crucial role of insert removal in the overall process.
The insert’s removal provides an opportunity to inspect other components, such as the flint wheel and the felt pad, for wear or damage. These parts contribute to the lighter’s functionality and should be checked during wick replacement. For example, a worn felt pad can lead to fuel evaporation, while a damaged flint wheel can prevent sparking. Addressing these issues during maintenance ensures optimal lighter performance. Removing the insert facilitates comprehensive maintenance, extending the lighter’s lifespan.
In summary, removing the insert is not merely a step, but a prerequisite for accessing and replacing the wick. This action enables comprehensive maintenance, ensuring the lighter’s longevity and optimal functionality. Challenges may include resistance due to age or accumulated debris; however, careful and deliberate handling mitigates potential damage. This procedure is inextricably linked to the overall process of wick replacement and essential for effective lighter maintenance.
2. Extract old wick
Extracting the old wick is a crucial step in the process of replacing the wick in a large Zippo-style lighter. This action prepares the lighter for the installation of a new wick, ensuring proper fuel delivery and consistent flame performance. Without proper removal of the old wicking material, the new wick cannot function correctly.
- Necessary Tools
Appropriate tools facilitate efficient wick extraction. Needle-nose pliers provide the necessary grip and control for removing the often tightly packed wicking material. Using improper tools can damage the lighter’s internal components, highlighting the importance of selecting the correct equipment. For example, attempting to remove the wick with tweezers might result in slippage or breakage, leaving remnants inside the lighter.
- Safety Precautions
Safety considerations are paramount. Lighter fluid residue on the old wick presents a flammability hazard. Working in a well-ventilated area away from open flames is essential. Improper handling could result in accidental ignition of the residual fuel. Additionally, avoiding contact with skin and eyes minimizes the risk of irritation from the lighter fluid.
- Complete Removal
Complete extraction of the old wick is critical. Any remaining fragments can obstruct the new wick, preventing optimal fuel flow and potentially causing malfunctions. A partially removed wick may lead to uneven burning or difficulties in lighting the lighter. Therefore, careful inspection after removal is necessary to ensure all traces of the old wick are gone.
- Disposal
Proper disposal of the old wick and associated materials is environmentally responsible. Saturated with lighter fluid, the old wick should be disposed of according to local regulations concerning flammable materials. Discarding the used wick improperly poses environmental risks. This emphasizes the importance of responsible disposal practices.
Successfully extracting the old wick sets the stage for the subsequent installation of the new wick. Each step in the replacement process contributes to the overall functionality and longevity of the lighter. Overlooking this critical phase compromises the entire procedure, underscoring its significance in the overall maintenance of a large Zippo-style lighter.
3. Insert new wick
Inserting the new wick is the core element of replacing the wick in a large Zippo-style lighter. This stage directly impacts the lighter’s functionality, determining fuel flow and flame characteristics. A correctly installed wick is essential for reliable ignition and consistent performance. This process involves several crucial considerations to ensure optimal results.
- Wick Material and Preparation
Selecting the correct wick material is crucial. Zippo-style lighters typically use a woven fiberglass wick designed for kerosene-based lighter fluid. The wick should be the correct length and diameter for the specific lighter model. Prior to insertion, the wick material often requires gentle fluffing or straightening to ensure optimal fuel absorption and capillary action. Using an incorrect material or improperly preparing the wick can negatively affect fuel flow and hinder the lighter’s performance. For instance, a wick that is too tightly packed may restrict fuel flow, leading to a weak flame or difficulty in ignition.
- Threading the Wick
The new wick must be carefully threaded through the chimney and into the lighter’s fuel chamber. This often involves using needle-nose pliers to grasp the wick and guide it through the narrow opening. Precision is necessary to avoid fraying or damaging the wick. Incorrect threading can obstruct fuel flow and prevent the lighter from functioning. An improperly positioned wick may also lead to uneven burning or excessive fuel consumption. Observing the path of the old wick can provide a helpful guide during this process.
- Securing the Wick
Ensuring the wick is correctly positioned within the fuel chamber is essential. The bottom end of the wick should be in contact with the lighter’s packing material (typically rayon balls), which holds the fuel. The wick should be neither too loose nor too tight within the chamber. Proper positioning allows for consistent fuel delivery to the wick. A loose wick can cause the flame to flicker or extinguish easily, while a wick that is too tight restricts fuel flow and may result in a weak flame.
- Initial Fuel Saturation
After the wick is inserted and positioned, initial saturation with lighter fluid is necessary. This primes the wick for its first use and ensures a consistent flame upon ignition. Adding the correct amount of fuel is essential to avoid overfilling, which can lead to leaks. Once the wick is saturated, the lighter should be allowed to sit briefly before its first use to allow the fuel to distribute evenly. This pre-saturation step ensures the lighter is ready for immediate use and helps to prevent dry burns, which can damage the wick.
The insertion of the new wick serves as the central action within the larger context of replacing the wick in a large Zippo-style lighter. Each facet of wick insertion material selection, threading, securing, and saturation contributes significantly to the lighter’s subsequent performance. Mastery of this stage ensures a functional and reliable lighter, emphasizing the significance of this step within the overall maintenance procedure.
4. Trim wick
Trimming the wick is an essential final step in the process of replacing the wick in a large Zippo-style lighter. This seemingly minor action significantly influences the lighter’s functionality, affecting flame height, fuel consumption, and overall performance. A properly trimmed wick ensures a clean, controlled flame, while an incorrectly trimmed wick can lead to various issues.
- Optimal Flame Height
The primary purpose of trimming the wick is to achieve the desired flame height. A wick that extends too far beyond the chimney will produce a large, unsteady flame, consuming fuel rapidly and potentially producing soot. Conversely, a wick that is trimmed too short may be difficult to ignite or produce a weak, insufficient flame. The ideal trim length allows for a consistent, manageable flame suitable for the lighter’s intended use.
- Fuel Efficiency
Wick length directly impacts fuel consumption. An excessively long wick draws up more fuel than necessary, leading to rapid depletion of the lighter’s fuel reservoir. A properly trimmed wick optimizes fuel usage, extending the time between refills. This consideration is particularly relevant for large Zippo-style lighters, which typically hold a greater volume of fuel.
- Preventing Sooting
An over-extended wick often results in a sooty flame. This sooty residue can accumulate on the lighter’s chimney, affecting its appearance and potentially clogging the mechanism. Trimming the wick to the correct length minimizes soot production, maintaining the lighter’s cleanliness and functionality. This preventative measure contributes to the lighter’s longevity.
- Safety Considerations
Trimming the wick also contributes to safe lighter operation. A long, uncontrolled flame poses a greater risk of accidental burns or ignition of nearby materials. A properly trimmed wick ensures a safer, more controlled flame, minimizing potential hazards. This aspect of wick trimming highlights the importance of this step beyond mere functionality.
In conclusion, trimming the wick is an integral component of the wick replacement process in large Zippo-style lighters. This seemingly simple action has profound effects on the lighter’s performance, impacting flame characteristics, fuel efficiency, and overall safety. A correctly trimmed wick optimizes the lighter’s functionality, ensuring reliable and safe operation. Neglecting this final step compromises the entire process of wick replacement, underscoring its significance in maintaining a well-functioning lighter.
5. Replace rayon balls
Replacing the rayon balls is integral to changing the wick in a large Zippo-style lighter. These small, absorbent spheres hold the lighter fluid, ensuring a consistent supply to the wick. Without properly replacing these rayon balls, the new wick cannot effectively draw fuel, rendering the lighter non-functional. This step directly impacts the lighter’s ability to ignite and maintain a consistent flame. Consider a scenario where the rayon balls are not replaced: the new wick, despite being correctly installed and trimmed, will not receive adequate fuel, resulting in difficulty lighting or a weak, sputtering flame.
The material and density of the rayon balls play a crucial role in fuel retention and delivery. They are designed to absorb and hold a significant amount of lighter fluid while allowing for a controlled release to the wick. Over-packing or under-packing the fuel chamber with these balls can negatively impact performance. Over-packing restricts fuel flow to the wick, resulting in a weak flame. Under-packing, conversely, reduces the lighter’s overall fuel capacity and may lead to more frequent refills. Practical application demonstrates that the correct density of rayon balls ensures optimal fuel delivery and maximizes the time between refills.
In summary, replacing the rayon balls is not merely a supplementary action but a fundamental component of the wick replacement process. Their function is directly tied to the new wick’s ability to draw fuel, impacting the lighter’s performance. Challenges in this process may include correctly packing the fuel chamber and selecting the appropriate rayon ball material; however, addressing these challenges ensures the longevity and functionality of the lighter. This procedure is inextricably linked to the overall goal of a successful wick replacement and emphasizes the interconnectedness of each component within the lighter’s mechanism.
6. Saturate with fuel
Saturating the wick with fuel is the crucial final step in the process of changing a giant Zippo wick. This stage bridges the gap between the mechanical replacement of the wick and the lighter’s practical functionality. Without proper fuel saturation, the newly installed wick remains inert, rendering the entire replacement process futile. This underscores the critical link between wick saturation and the overall success of the wick replacement procedure.
- Fuel Type and Compatibility
The type of fuel used plays a critical role in the saturation process. Zippo-style lighters are designed for use with specific kerosene-based lighter fluids. Using other fuels can damage the wick, hinder performance, or create safety hazards. Employing the correct fuel ensures optimal wick saturation and safe operation. For example, using gasoline in a Zippo-style lighter can lead to uncontrolled flames and potential damage to the lighter’s components.
- Saturation Method
The method employed to saturate the wick influences the efficiency and cleanliness of the process. Slowly and carefully adding fuel directly to the wick material minimizes spills and ensures even distribution. Overly rapid or careless pouring can lead to fuel overflowing the lighter’s reservoir, creating a fire hazard and wasting fuel. Best practices involve filling the lighter’s fuel reservoir to the recommended level, allowing the wick to absorb the fuel naturally through capillary action.
- Safety Precautions
Fuel saturation requires adherence to safety protocols. Lighter fluid is flammable, and proper handling is paramount. Working in a well-ventilated area away from open flames is essential to minimize fire risks. Additionally, avoiding contact with skin and eyes prevents irritation. Proper storage of the lighter fluid after saturation further enhances safety. For instance, storing the lighter and fuel in a cool, dry place away from children and pets mitigates potential hazards.
- Testing and Adjustment
Post-saturation testing verifies the effectiveness of the wick replacement process. Igniting the lighter confirms fuel delivery to the wick and allows for observation of flame characteristics. Adjustments to the flame height may be necessary after initial saturation by trimming the wick further, if needed. This final check ensures the lighter functions as intended. For example, a weak or sputtering flame after saturation may indicate insufficient fuel delivery or an improperly trimmed wick, requiring further adjustment.
In conclusion, saturating the wick with fuel is the culminating step in the process of changing a giant Zippo wick. It connects the mechanical aspects of wick replacement to the lighter’s practical use. Each facet of this stage, from fuel selection and saturation method to safety precautions and post-saturation testing, plays a crucial role in ensuring the lighter’s functionality and safe operation. This final step highlights the interconnectedness of each stage in the wick replacement process and underscores the importance of precise execution for optimal lighter performance.
Frequently Asked Questions
This section addresses common inquiries regarding the replacement of wicks in large Zippo-style lighters. Clarity on these points contributes to a smoother, more successful replacement process.
Question 1: What type of wick is suitable for a large Zippo-style lighter?
Woven fiberglass wick designed for kerosene-based lighter fluid is typically recommended. Compatibility with the specific lighter model should be confirmed.
Question 2: How often should the wick be replaced?
Wick replacement frequency depends on usage. A darkened, frayed, or brittle wick indicates the need for replacement. Regular inspection is advised.
Question 3: Can any type of lighter fluid be used?
Use of kerosene-based lighter fluid specifically designed for Zippo-style lighters is strongly recommended. Other fuels may damage the wick or create safety hazards.
Question 4: What tools are necessary for wick replacement?
Needle-nose pliers are essential for gripping and manipulating the wick. A small flathead screwdriver can be helpful for packing the rayon balls.
Question 5: What causes a weak or inconsistent flame?
Several factors can contribute to this issue, including a clogged wick, insufficient fuel, or an improperly trimmed wick. Systematic troubleshooting is recommended.
Question 6: How can fuel spills be avoided during the saturation process?
Slow, controlled pouring directly into the wick material minimizes spills. Using a funnel can further aid in preventing overflow.
Understanding these common points of concern allows for a more informed and efficient approach to wick replacement. Careful consideration of these factors contributes to a safer and more successful outcome.
For further assistance or specific inquiries beyond the scope of these FAQs, consulting the lighter manufacturer’s documentation or contacting customer support is recommended.
Conclusion
Proper wick replacement in a large Zippo-style lighter involves a systematic approach encompassing insert removal, old wick extraction, new wick insertion and trimming, rayon ball replacement, and fuel saturation. Each step contributes significantly to the lighter’s functionality and longevity. Careful execution of these procedures, coupled with adherence to safety precautions, ensures a consistent flame and safe operation.
Maintaining a functional lighter requires diligence and an understanding of its components. Regular maintenance, including wick replacement, preserves the lighter’s performance and extends its lifespan. This careful attention to detail ensures reliable operation and underscores the value of proper lighter care.


