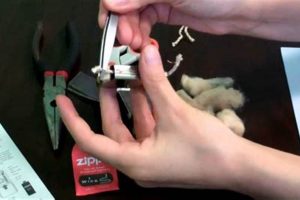
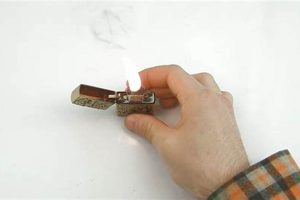
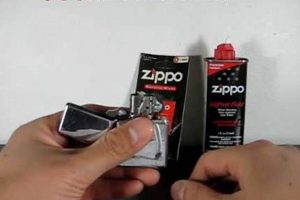
Replacing the wick in a large Zippo lighter involves removing the insert unit from the lighter casing, unscrewing the bottom felt pad, carefully pulling out the old wicking material, inserting the new wick through the same path, trimming the wick to the appropriate length, and replacing the felt pad and insert. An example of this process would be replacing a worn, charred wick with a fresh length of Zippo-brand replacement wicking to restore the lighter’s functionality.
Maintaining a fresh wick ensures reliable ignition and a clean flame. A saturated, deteriorated wick can lead to poor fuel flow, impacting the lighter’s ability to light or causing a sputtering, uneven burn. Regular wick replacement, alongside other routine maintenance like refilling fluid and replacing flints, prolongs the life and reliable operation of the lighter. This practice has been essential since the introduction of Zippo lighters, contributing to their renowned durability and longevity.
The following sections will delve into a detailed, step-by-step guide to replacing the wick in a large Zippo lighter, covering necessary tools, proper techniques, and tips for optimal performance.
Tips for Replacing a Large Zippo Lighter Wick
These tips offer guidance for a smooth and successful wick replacement process, ensuring optimal lighter performance.
Tip 1: Use Genuine Zippo Wicks: Employing genuine Zippo replacement wicks ensures proper fit and function. Using non-standard materials can impede fuel flow and negatively impact the lighter’s reliability.
Tip 2: Work on a Clean Surface: A clean, well-lit workspace prevents loss of small components and facilitates a more efficient process.
Tip 3: Handle the Insert Carefully: The lighter insert contains delicate components. Avoid applying excessive force or bending any parts during removal or reinstallation.
Tip 4: Don’t Overpack the Wick: When inserting the new wick, avoid overpacking the wicking material into the cotton chamber. This can restrict fuel flow and hinder proper ignition.
Tip 5: Trim the Wick Correctly: Trimming the wick to the appropriate length is crucial. A wick that is too long can produce an excessively large flame, while one that is too short may not ignite reliably.
Tip 6: Replace the Flint While You’re At It: Replacing the flint during a wick change is a convenient way to ensure consistent spark and optimal lighter functionality. This preventative maintenance minimizes future disruptions.
Tip 7: Consult Official Resources if Needed: If uncertainties arise during the replacement process, refer to official Zippo documentation or online resources for clarification and visual guidance.
Following these tips will help ensure a successful wick replacement, restoring the lighter to its optimal working condition and extending its lifespan.
By understanding the importance of regular maintenance and implementing these practical tips, one can maintain a Zippo lighter’s performance for years to come.
1. Access lighter insert
Accessing the lighter insert is the foundational step in replacing a Zippo wick. Without removing the insert from the outer casing, the internal components, including the wick, remain inaccessible. This action initiates the entire replacement process. The insert houses the wick, flint, and packing material, all essential for the lighter’s operation. Consider a scenario where the wick is charred and requires replacement. Unless the insert is accessed, the old wick cannot be removed, nor can a new one be installed. The inability to access the insert directly prevents wick replacement.
The insert’s removal allows for careful examination and manipulation of the wick. It provides the necessary space to pull the old wick free and thread the new one through the cotton packing. Think of the lighter casing as a protective shell. While it shields the internal mechanism, it also necessitates removal for maintenance. Accessing the insert allows direct interaction with the wick and facilitates proper installation techniques, crucial for optimal fuel flow and a consistent flame.
In summary, accessing the lighter insert is not merely a step but a prerequisite for wick replacement. Its importance lies in providing access to the core components of the lighter, enabling the necessary manipulation and replacement of the wick. Failure to properly access the insert renders wick replacement impossible, highlighting its fundamental role in lighter maintenance.
2. Remove old wick
Removing the old wick is integral to changing a large Zippo lighter wick. A deteriorated wick impedes proper lighter function. The old wick, often charred and saturated with fuel, restricts fuel flow to the flint, resulting in difficulty igniting or maintaining a consistent flame. Extraction of the old wick is a necessary precursor to installing a new one. Consider a clogged pipe; until the blockage is removed, flow cannot be restored. Similarly, the old wick acts as an obstruction, hindering the lighter’s performance. Its removal is not merely a step, but a fundamental requirement for successful wick replacement.
The process involves carefully pulling the old wick out from the bottom of the insert. This action requires precision to avoid damaging other components within the lighter’s mechanism. For instance, pulling too forcefully could dislodge the cotton packing surrounding the wick, further complicating the replacement process. A practical example of the importance of this step can be illustrated by a clogged fuel line in an engine. Just as a mechanic must remove the blockage for the engine to function correctly, the old wick must be extracted for the lighter to operate as intended. Failure to remove the old wick renders subsequent steps ineffective, highlighting its critical role.
In conclusion, removing the old wick is a critical stage in the wick replacement process. Its significance lies in eliminating the source of impaired function, paving the way for the installation of a new wick and the restoration of the lighter’s performance. The process requires careful execution to avoid further complications, underscoring the practical importance of this step within the overall procedure.
3. Insert new wick
Inserting a new wick represents the core action within the process of replacing a large Zippo lighter wick. This action directly addresses the original problem of a depleted or damaged wick, which hinders the lighter’s functionality. The cause-and-effect relationship is clear: a worn wick leads to poor performance, and inserting a new wick restores functionality. This step is analogous to replacing a worn-out part in a machine; the new component revitalizes the overall system. Without a fresh wick, the lighter remains unusable, making this step crucial for achieving the objective of a functional lighter. Consider a lamp with a burnt-out bulb; the lamp remains non-functional until a new bulb is installed. Inserting the new wick is the equivalent of replacing the bulb, restoring the lighter’s ability to ignite.
Practical application of this step requires careful threading of the wick through the lighter’s insert. The new wick material must be guided through the same path as the old one, ensuring proper contact with the flint wheel and adequate fuel saturation. This process demands precision; a poorly inserted wick can lead to uneven burning, fuel leakage, or failure to ignite. The wick’s placement within the insert directly impacts fuel flow and, consequently, the lighter’s performance. One can envision the wick as the conduit for fuel delivery; its correct positioning ensures consistent and reliable operation. A misaligned wick, like a kinked fuel line, disrupts the flow and compromises functionality.
In summary, inserting the new wick is the pivotal action in the wick replacement process. This step directly addresses the root cause of lighter malfunction and restores the intended functionality. Precision during insertion is essential for optimal performance, highlighting the practical significance of understanding this process. The successful completion of this stage dictates the overall success of the wick replacement endeavor, solidifying its importance within the broader context of lighter maintenance.
4. Trim wick correctly
Trimming the wick correctly is integral to the process of changing a large Zippo lighter wick. An improperly trimmed wick directly affects lighter performance, impacting both functionality and fuel efficiency. A wick that extends too far beyond the chimney results in an excessively large flame, rapid fuel depletion, and potential safety hazards. Conversely, a wick trimmed too short may struggle to ignite or produce a flame insufficient for reliable use. This step is crucial in achieving the ultimate goal of a properly functioning lighter following a wick replacement. The relationship between wick length and flame size is analogous to adjusting the gas flow on a stove burner; precise adjustment is key for optimal performance. Consider the wick as the delivery mechanism for fuel to the flame; its length directly dictates the flame’s size and intensity.
The practical application of wick trimming involves cutting the wick to the appropriate length using scissors or nail clippers. The recommended length typically leaves the wick slightly below the top of the chimney, allowing for efficient fuel combustion and a controlled flame. Trimming too close to the chimney can impede fuel flow, while leaving the wick too high can create a sooty flame and waste fuel. Think of a candle wick; if it’s too long, it produces a large, unsteady flame. If it’s too short, the flame may be extinguished. Similar principles apply to a Zippo wick; correct trimming ensures optimal burn and fuel conservation. This step is not merely cosmetic; it directly influences the lighter’s usability and longevity.
In conclusion, trimming the wick correctly is a crucial element of the broader process of changing a large Zippo lighter wick. This precise action has significant repercussions on the lighter’s functionality, fuel efficiency, and safety. Understanding the relationship between wick length and flame characteristics allows for informed decision-making during the trimming process. The practical application of this step requires precision and attention to detail, ensuring the desired outcome of a functional and efficient lighter. Mastering this step is paramount to achieving a successful wick replacement and maintaining optimal lighter performance.
5. Reassemble lighter
Reassembling the lighter represents the culmination of the wick replacement process in a large Zippo lighter. This final step directly links to the overall objective of restoring full functionality after addressing a worn or damaged wick. Failure to correctly reassemble the lighter negates the preceding steps, rendering the wick replacement futile. The process of reassembling the lighter is inextricably linked to the overall goal of “how to change big daddy zippo wick;” it is the crucial final act that translates the new wick into a working lighter. Consider a car undergoing repairs; the replacement of parts achieves nothing unless the car is reassembled correctly. Similarly, a new wick offers no benefit unless the lighter is put back together properly, enabling the integrated system to function as intended. Reassembly is not merely an afterthought; it is the essential final step that completes the maintenance procedure.
The practical application of reassembling a Zippo lighter involves carefully placing the insert back into the casing and ensuring all components are correctly aligned and secured. This requires attention to detail and a methodical approach. For instance, improper placement of the insert can lead to friction against the flint wheel, hindering spark generation or causing premature flint wear. Just as a misplaced gear in a clockwork mechanism disrupts its function, an improperly seated lighter insert compromises the lighter’s operation. Correct reassembly ensures that all components work in harmony, from the flint striking the steel to the fuel saturating the wick and ultimately producing a flame. This step’s precision directly impacts the lighter’s reliability and longevity.
In conclusion, reassembling the lighter correctly is the essential final step in the process of changing a large Zippo lighter wick. This stage signifies the transition from maintenance to functionality, bringing the newly installed wick into active service. The careful and methodical execution of reassembly is crucial for ensuring the lighter operates as intended. Challenges such as misalignment or improper seating of components can compromise performance, underscoring the practical significance of understanding and implementing correct reassembly techniques. This final act completes the “how to change big daddy zippo wick” process and restores the lighter to its intended function, highlighting the importance of this often-overlooked step in the broader context of lighter maintenance.
Frequently Asked Questions
This section addresses common queries regarding wick replacement in large Zippo lighters, offering clarity and practical guidance for effective maintenance.
Question 1: What type of wick should be used as a replacement?
Genuine Zippo wicks are recommended for optimal performance and compatibility. Using other materials may impede fuel flow and negatively impact lighter function.
Question 2: How often should the wick be changed?
Wick replacement frequency depends on usage. A good rule of thumb is to replace the wick when the flame becomes unreliable, produces excessive soot, or the lighter struggles to ignite.
Question 3: What tools are required for wick replacement?
Few tools are necessary. Small pliers or tweezers can assist with wick removal, and scissors or nail clippers are needed to trim the new wick to the correct length. A clean work surface is also recommended.
Question 4: Can any type of lighter fluid be used with a new wick?
Zippo premium lighter fluid is formulated for optimal performance and is recommended for use with Zippo lighters. Other lighter fluids may damage the wick or other internal components.
Question 5: What indicates a need for wick replacement?
Signs of a worn wick include difficulty igniting, a low or sputtering flame, excessive soot production, and a persistent odor of burnt fuel even when the lighter is not in use.
Question 6: How can one ensure the new wick is inserted correctly?
The new wick should be threaded through the lighter insert following the same path as the old wick. It should be snug but not overly tight, allowing for proper fuel flow and contact with the flint wheel.
Regular maintenance, including wick replacement, ensures long-term lighter reliability and optimal performance. Addressing these common queries proactively helps maintain the lighter’s functionality and longevity.
The following section offers additional tips for maintaining your Zippo lighter.
Conclusion
This exploration of replacing wicks in large Zippo lighters has covered essential aspects, from understanding the importance of regular maintenance to the practical steps involved in the process. Key takeaways include recognizing the signs of a worn wick, accessing the lighter insert, proper wick insertion and trimming techniques, and the importance of correct reassembly. Emphasis has been placed on the interconnectedness of these steps and their direct impact on lighter functionality, fuel efficiency, and longevity.
Proper lighter maintenance, including timely wick replacement, ensures consistent performance and extends the lifespan of these classic tools. A well-maintained Zippo lighter can provide reliable service for generations, signifying the enduring value of understanding fundamental maintenance procedures. By mastering the process of wick replacement, users contribute to the continued legacy of these iconic lighters.


