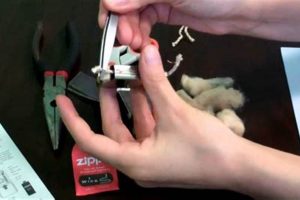
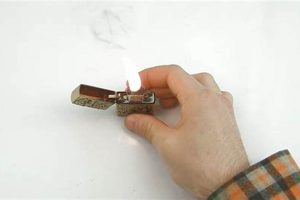
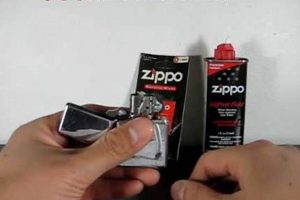
A Zippo lighter’s wick requires occasional adjustment to ensure optimal performance. This involves raising or lowering the wick to control the flame height and fuel consumption. For instance, a low flame may indicate the need to raise the wick, while a flame that’s too high or produces excessive soot suggests the wick should be lowered. This process typically requires the use of tweezers or a small tool to carefully manipulate the wick within the chimney.
Proper wick management is essential for the longevity and reliable operation of a Zippo lighter. A correctly adjusted wick provides a consistent flame for lighting cigarettes, starting fires, or other intended uses. It also prevents fuel waste and minimizes sooty residue buildup on the lighter and surrounding surfaces. Since the original Zippo lighter’s debut in the 1930s, wick maintenance has been a key aspect of its enduring popularity and functionality.
The following sections detail the necessary tools, step-by-step instructions, and troubleshooting tips for achieving optimal wick adjustment.
Tips for Zippo Wick Adjustment
Proper wick adjustment is crucial for optimal lighter function. These tips provide guidance on achieving the correct flame height and minimizing issues.
Tip 1: Use the Right Tool: Employ tweezers or a small, dedicated wick adjustment tool. Avoid using sharp or pointed objects that could damage the wick or lighter components.
Tip 2: Extinguish the Flame: Ensure the lighter is completely extinguished before attempting any adjustments to avoid burns or fire hazards.
Tip 3: Access the Wick: Remove the insert from the lighter casing to access the wick and chimney assembly.
Tip 4: Gentle Adjustments: Carefully raise or lower the wick by gently pulling or pushing it with the tool. Avoid excessive force, which could break the wick.
Tip 5: Optimal Flame Height: Aim for a flame height of approximately 1/2 inch to 3/4 inch. A lower flame may be insufficient, while a higher flame wastes fuel and creates soot.
Tip 6: Test and Re-adjust: After adjusting, reinsert the unit into the casing, test the flame, and readjust as needed until the desired flame height is achieved.
Tip 7: Trim Charred Wick: If the wick becomes excessively charred, carefully trim the charred portion with small scissors. Avoid cutting too much, as this can shorten the wick’s lifespan.
Tip 8: Replace When Necessary: Wicks eventually wear out. If a wick can no longer be adjusted to produce a consistent flame, replace it with a new one.
Following these guidelines ensures a consistently performing lighter, maximizing its lifespan and reliability.
By understanding and implementing these wick adjustment techniques, users can ensure their Zippo lighter continues to provide reliable service for years to come.
1. Extinguish Flame
Prior to any wick adjustments on a Zippo lighter, extinguishing the flame is paramount. This critical safety precaution prevents burns and potential fire hazards. It also allows safe handling of the lighter components during the adjustment process.
- Safety
Extinguishing the flame eliminates the primary source of ignition, preventing accidental burns during handling. This fundamental safety practice protects the user and surrounding materials from unintended combustion.
- Component Access
With the flame extinguished, the lighter insert can be safely removed from the casing. This provides unobstructed access to the wick and chimney assembly for necessary adjustments.
- Preventing Fuel Vapor Ignition
An extinguished flame eliminates the risk of igniting fuel vapors that may be present during wick adjustment. This reduces the potential for unexpected flare-ups or burns.
- Accurate Adjustment
A cool lighter allows for more precise and comfortable wick manipulation. This enables careful adjustments and ensures the desired flame height is achieved without the interference of heat or flame.
By prioritizing flame extinguishment before wick adjustment, users ensure a safe and effective process. This crucial first step facilitates precise wick manipulation and minimizes potential hazards associated with an open flame, contributing to a smooth and controlled adjustment experience.
2. Remove Insert
Removal of the insert is essential for Zippo wick adjustment. The insert, containing the wick, chimney, and flint assembly, sits within the outer casing. Direct access to the wick for adjustment is impossible without removing this internal component. Attempting to manipulate the wick through the casing openings risks damage and imprecise adjustment. For example, one cannot effectively grip the wick with tweezers or a specialized tool while it remains enclosed within the casing. The insert’s removal provides the necessary access and visibility for proper wick manipulation.
The process typically involves firmly grasping the lighter’s bottom and lifting the insert out of the casing. This reveals the wick, allowing for adjustments to its height. The unobstructed view afforded by insert removal enables assessment of the wick’s condition, identifying charring or other issues requiring attention. Practical implications include the ability to trim a charred wick effectively or determine if replacement is necessary, contributing to optimal lighter function.
Insert removal represents a critical step in Zippo wick adjustment. It provides the necessary access for proper manipulation and assessment of the wick. Failure to remove the insert compromises adjustment accuracy and potentially damages the wick or lighter components. Understanding this process contributes significantly to successful wick maintenance and optimal lighter performance.
3. Use Tweezers
Tweezers play a crucial role in Zippo wick adjustment. Their fine-tipped design provides the precision and control necessary for manipulating the delicate wick material. The alternative, using fingers or other coarse tools, risks damaging the wick, leading to uneven burning or premature failure. Tweezers allow for careful raising or lowering of the wick within the chimney, enabling precise adjustments to the flame height. This precision minimizes fuel waste and prevents excessive soot buildup, common issues associated with improper wick height.
For example, a wick that sits too low within the chimney may produce a weak flame or fail to ignite consistently. Using tweezers allows for incremental adjustments to raise the wick to the optimal height, restoring a strong, reliable flame. Conversely, a wick that protrudes too high can result in an excessively large flame, wasting fuel and producing soot. Tweezers enable precise lowering of the wick to the correct position, optimizing fuel efficiency and reducing soot. In cases of a charred wick, tweezers also facilitate precise trimming of the damaged portion without compromising the remaining wick length.
Effective Zippo wick adjustment hinges on the proper use of tweezers. Their precise manipulation capability ensures accurate wick positioning, directly impacting flame height, fuel efficiency, and overall lighter performance. The understanding and implementation of this technique are essential for maintaining a functional and reliable lighter.
4. Adjust Gently
The concept of “adjust gently” is paramount within the procedure of Zippo wick adjustment. The wick, a delicate fiber woven material, is susceptible to damage from excessive force. Aggressive adjustments can lead to fraying, tearing, or even complete breakage of the wick, necessitating replacement. Gentle manipulation, using appropriate tools like tweezers, preserves the wick’s integrity, ensuring its longevity and consistent performance. This careful approach prevents misalignment or deformation of the wick within the chimney, which could negatively impact fuel flow and flame stability.
Consider a scenario where excessive force is applied while raising the wick. This could result in the wick being pulled out of its base, requiring disassembly of the lighter insert for repair. Conversely, pushing down on the wick too forcefully can compact the fibers, restricting fuel flow and hindering proper combustion. Such instances illustrate the practical implications of gentle adjustment. A meticulous approach, characterized by small, controlled movements, safeguards the wick, preserving its functionality and maximizing its lifespan.
Gentle adjustment, therefore, is not merely a recommendation, but a critical component of proper Zippo wick maintenance. It safeguards the wick from damage, ensuring consistent fuel delivery and a stable flame. This understanding, coupled with the use of appropriate tools, contributes significantly to the lighter’s overall performance and longevity, preventing unnecessary repairs or replacements. A delicate touch ensures optimal functionality and extends the lifespan of this essential lighter component.
5. Optimal Height
Optimal wick height is crucial for proper Zippo lighter function. It directly influences flame size, fuel efficiency, and the overall reliability of the lighter. Understanding the appropriate height and how to achieve it through wick adjustment ensures consistent performance and maximizes the lighter’s lifespan. An incorrectly adjusted wick can lead to a variety of issues, from an inadequate flame to excessive fuel consumption and soot production.
- Flame Size and Stability
The wick height directly determines the flame size. An optimal height produces a flame that is neither too small nor too large, typically around to of an inch. A smaller flame might struggle to ignite reliably, while an excessively large flame wastes fuel and produces excessive soot. Optimal height ensures a stable, usable flame suitable for the intended purpose.
- Fuel Efficiency
Wick height significantly impacts fuel consumption. A wick set too high draws up more fuel than necessary, leading to rapid depletion of the lighter’s fuel reservoir. Conversely, a wick set too low may not draw sufficient fuel, resulting in a weak or inconsistent flame. Optimal height balances fuel draw with flame size for efficient fuel usage.
- Soot Production
Excessive soot is a common issue with improperly adjusted wicks. A wick set too high burns with a larger, hotter flame, leading to increased soot production. This soot can accumulate on the lighter’s chimney, impacting performance and requiring frequent cleaning. Maintaining the optimal wick height minimizes soot formation, keeping the lighter cleaner and functioning optimally.
- Lighter Lifespan
Correct wick height contributes to the overall lifespan of the lighter. Consistent and efficient burning, facilitated by proper wick height, reduces wear and tear on the lighter’s components. This includes the wick itself, which lasts longer when not subjected to excessive heat or fuel saturation. Optimal wick height, therefore, plays a crucial role in maximizing the lighters functional life.
Adjusting the wick to its optimal height is a fundamental aspect of Zippo lighter maintenance. This process ensures a reliable flame, efficient fuel consumption, minimal soot production, and contributes to the longevity of the lighter. Understanding the connection between wick height and these factors empowers users to maintain their lighters effectively, ensuring consistent performance and extending their useful life.
6. Trim Charred Wick
Trimming a charred wick is an integral aspect of Zippo lighter maintenance and directly relates to the broader concept of wick adjustment. Over time, the wick’s exposed end becomes charred due to repeated exposure to flame. This charring affects the lighter’s performance, leading to an inconsistent flame, increased soot production, and difficulty igniting. Trimming the charred portion restores the wick’s functionality and optimizes the lighter’s performance. This process, while seemingly simple, requires careful execution to avoid damaging the wick and impacting its lifespan.
- Performance Restoration
Charring hinders the wick’s ability to draw fuel efficiently. Trimming removes the charred portion, exposing fresh wick material, which readily absorbs fuel and facilitates a consistent, strong flame. This revitalizes the lighter’s primary function and ensures reliable ignition.
- Soot Reduction
A charred wick contributes to increased soot production, which can clog the lighter’s chimney and impact its mechanism. Trimming eliminates the primary source of this soot, promoting cleaner operation and reducing the need for frequent cleaning. This contributes to the lighter’s longevity and maintains its aesthetic appeal.
- Extending Wick Lifespan
While trimming removes a small portion of the wick, it ultimately extends its overall lifespan. By removing the charred, non-functional portion, the remaining wick material can perform optimally. This delays the need for complete wick replacement, maximizing the use of the existing wick.
- Technique and Tools
Proper trimming technique is essential. Using sharp, small scissors or specialized wick trimmers ensures a clean cut without fraying or damaging the wick. Care should be taken to avoid cutting the wick too short, as this can negatively impact flame height and fuel draw. Careful execution of this process is crucial for maintaining the wick’s integrity and maximizing its functional life.
Trimming a charred wick is not merely a cosmetic procedure but a critical aspect of wick adjustment and overall Zippo lighter maintenance. It directly influences the lighters functionality, fuel efficiency, and lifespan. Understanding the connection between trimming, wick health, and lighter performance empowers users to maintain their lighters effectively, ensuring reliable operation and maximizing their investment.
7. Replace if needed
Wick replacement is an inevitable aspect of Zippo lighter ownership, directly linked to the concept of wick adjustment. While adjustments can optimize performance and extend wick life, they cannot indefinitely postpone the need for replacement. A wick reaches the end of its useful life when it becomes excessively short, heavily charred, or persistently fails to draw fuel effectively, regardless of adjustment attempts. Recognizing this point and understanding the replacement process is crucial for maintaining a functional lighter. For instance, a wick repeatedly trimmed to maintain an appropriate flame height eventually becomes too short to function, necessitating replacement. Similarly, a wick saturated with fuel and unable to ignite despite adjustments likely requires replacement due to internal damage.
The inability to achieve a consistent flame, even after meticulous adjustment, often signals the need for a new wick. Persistent low flame, sputtering, or difficulty igniting, despite adjustments, indicate the wick’s structural integrity is compromised. Continuing to use a deteriorated wick can negatively impact other lighter components, such as the flint wheel and striker, further highlighting the practical significance of timely replacement. Consider a scenario where a worn wick fails to ignite consistently, leading to excessive flint wheel spinning. This can prematurely wear the flint and potentially damage the striker mechanism, creating additional repair needs.
Understanding the limitations of wick adjustment and the eventual necessity of replacement is essential for responsible Zippo lighter ownership. Recognizing the signs of a worn wick and performing timely replacements ensures consistent lighter function, prevents damage to other components, and ultimately prolongs the lighter’s lifespan. This knowledge empowers users to maintain their lighters effectively, preserving their reliability and extending their practical utility over time. Replacing the wick, while a simple procedure, represents a crucial aspect of long-term lighter care and complements the ongoing process of wick adjustment.
Frequently Asked Questions
This section addresses common inquiries regarding Zippo wick adjustment, providing concise and informative responses to clarify potential uncertainties and promote effective lighter maintenance.
Question 1: How often should one adjust a Zippo wick?
Wick adjustment frequency depends on usage. More frequent use necessitates more frequent adjustments. Generally, observe the flame; if it becomes too high, too low, or inconsistent, adjustment is likely needed.
Question 2: What tools are recommended for wick adjustment?
Tweezers are the ideal tool due to their precision and grip. Avoid sharp or pointed instruments that could damage the wick. Specialized Zippo wick tools are also available.
Question 3: Can one adjust the wick without removing the insert?
While possible to make minor adjustments through the chimney opening, removing the insert provides better access, visibility, and control, leading to more precise and effective adjustments.
Question 4: How much of the wick should be exposed above the chimney?
Approximately 1/8 to 1/4 inch of wick above the chimney is generally recommended. However, optimal height may vary slightly depending on individual lighter characteristics and desired flame size. Observation and adjustment are key.
Question 5: What indicates a need for wick replacement?
A wick consistently producing a low or inconsistent flame, despite adjustments, or a wick that appears excessively short or frayed, signals the need for replacement. Difficulty igniting, even with a new flint, can also indicate a worn wick.
Question 6: How does wick adjustment relate to flint replacement?
While distinct maintenance procedures, wick adjustment and flint replacement contribute to optimal lighter performance. A properly adjusted wick ensures efficient fuel delivery to the flame, while a fresh flint provides the necessary spark for ignition. Both are essential for reliable lighter function.
Addressing these common inquiries provides a foundational understanding of Zippo wick adjustment principles and promotes effective maintenance practices. Understanding these aspects contributes to a more satisfying and reliable lighter experience.
For further information or specific troubleshooting guidance, consult the official Zippo website or authorized service centers.
How to Adjust Zippo Wick
Proper wick adjustment is essential for optimal Zippo lighter performance. This process, encompassing flame extinguishment, insert removal, careful manipulation with tweezers, and achieving the correct wick height, directly impacts flame stability, fuel efficiency, and soot production. Regular trimming of charred wick material and timely replacement of worn wicks further contribute to the lighters longevity and reliable operation. Understanding these interconnected elements empowers users to maintain their lighters effectively.
Mastery of wick adjustment ensures consistent functionality and extends the lifespan of a Zippo lighter, solidifying its reputation for dependability. Continued attention to these maintenance practices preserves the lighter’s utility and contributes to its enduring legacy as a reliable and iconic tool.


