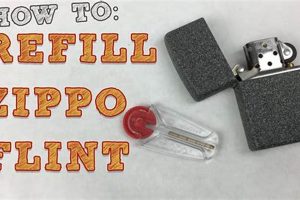
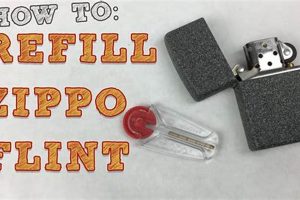
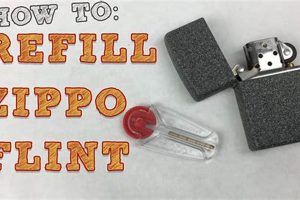
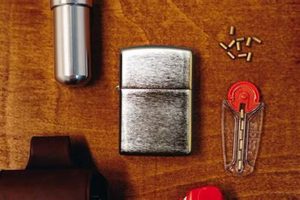
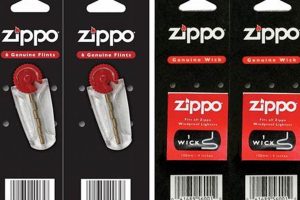
Changing the ignition source in a Zippo-style lighter involves removing the insert from the outer case, unscrewing the retaining screw at the bottom of the insert, and replacing the small metal cylinder responsible for creating sparks. This process requires only a few simple tools, typically a small screwdriver, and takes only a minute or two to complete.
Maintaining a functional lighter ensures reliable ignition when needed. The ability to easily replace this component contributes to the longevity and practicality of reusable lighters, distinguishing them from disposable alternatives. This simple maintenance task avoids the need for replacing the entire lighter, promoting both cost-effectiveness and reducing waste. Historically, replaceable flint mechanisms have played a vital role in the evolution of portable fire-starting devices, contributing to their widespread adoption and enduring popularity.
The following sections will detail the specific steps involved in this procedure, outlining the necessary tools and offering helpful tips for a smooth and successful flint replacement.
Tips for Flint Replacement
Careful execution of the flint replacement process ensures optimal lighter function and prevents damage to the unit. Attention to detail is crucial for a smooth, trouble-free operation.
Tip 1: Work on a Clean Surface: A clean, well-lit workspace helps prevent the loss of small components like the retaining screw and the flint itself.
Tip 2: Use the Correct Screwdriver: Employing a screwdriver that fits the retaining screw snugly minimizes the risk of stripping the screw head.
Tip 3: Keep Track of the Spring: The small spring located beneath the flint is essential for proper function. Ensure it is correctly positioned during reassembly.
Tip 4: Do Not Overtighten: The retaining screw should be tightened securely, but excessive force can damage the threading.
Tip 5: Use Genuine Flints: While generic flints may seem cost-effective, using flints specifically designed for the lighter ensures optimal performance and longevity.
Tip 6: Inspect the Felt Pad: If the felt pad appears worn or compressed, consider replacing it to ensure proper fuel retention and consistent sparking.
Tip 7: Test the Lighter: After reassembly, test the lighter several times to confirm proper functionality. If it does not ignite reliably, recheck the flint, spring, and screw for correct placement.
Adhering to these guidelines promotes efficient flint replacement and extends the lifespan of the lighter.
By following these practical tips, one can ensure reliable and consistent lighter operation.
1. Access the flint screw.
Accessing the flint screw is the foundational step in replacing the flint in a Zippo-style lighter. Without proper access to this screw, the subsequent steps of removal and replacement become impossible. This stage sets the groundwork for the entire process and requires careful execution.
- Locating the Insert
The flint screw is located on the bottom of the removable lighter insert. The insert must be extracted from the outer casing before the screw becomes accessible. This requires grasping the insert firmly and pulling it upwards, separating it from the case.
- Identifying the Screw
The flint screw is a small flathead screw situated at the center of the insert’s base. It is typically surrounded by a circular metal plate. Its small size necessitates the use of an appropriately sized screwdriver.
- Preparing for Removal
Once the screw is identified, the appropriate screwdriver should be selected. A snug fit is essential to avoid stripping the screw head. The surrounding area should be clean and well-lit to prevent the loss of small parts during the removal process.
- Cautions and Considerations
Applying excessive force during this stage can damage the insert. Care should be taken to ensure the screwdriver is properly seated in the screw head before attempting removal. Working over a clean surface helps prevent the loss of the screw if it is accidentally dropped.
Successful access to and removal of the flint screw is a prerequisite for flint replacement. These steps, while seemingly simple, lay the foundation for the entire process and highlight the importance of precision and attention to detail in lighter maintenance.
2. Unscrew the flint screw.
Unscrewing the flint screw is a pivotal action in the flint replacement process of a Zippo-style lighter. This action provides access to the spent flint and allows for its replacement. Proper execution of this step is crucial for maintaining the lighter’s functionality.
- Tool Selection
The correct tool is essential for this step. A properly sized flathead screwdriver that fits snugly into the screw head is necessary to prevent damage. Using an ill-fitting tool can strip the screw head, rendering it unusable and complicating the replacement process. Precision in tool selection ensures efficient removal and minimizes the risk of complications.
- Rotation and Pressure
The screw should be rotated counter-clockwise to loosen and remove it. Consistent, gentle pressure should be applied to the screwdriver to maintain contact with the screw head. Jerky or excessive force can strip the screw head or damage the surrounding components. Controlled and deliberate movements are key to successful removal.
- Screw Retention
Once unscrewed, the small screw should be placed in a secure location to prevent loss. Given its small size, it can be easily misplaced. Working over a clean, well-lit surface aids in keeping track of the screw during the replacement process.
- Component Awareness
Beneath the flint screw lies a small spring that applies pressure to the flint. Awareness of this spring is crucial, as it can be easily dislodged during screw removal. Maintaining the spring’s position is essential for proper lighter function after reassembly. Careful observation during this step helps ensure the spring remains in place.
Successfully unscrewing the flint screw, while seemingly a minor action, is paramount to the overall flint replacement procedure. Each facet of this process, from tool selection to component awareness, contributes to the successful restoration of the lighter’s functionality, demonstrating the importance of precision and care in even seemingly simple maintenance tasks.
3. Remove old flint.
Removal of the spent flint is a critical step in the process of replacing the flint in a Zippo-style lighter. This action prepares the lighter for the insertion of a new flint, which is essential for restoring its functionality. The process requires careful handling of small components and an understanding of their arrangement within the lighter insert.
- Locating the Flint
Once the retaining screw is removed, the spent flint is typically visible within a small tube or chamber within the lighter insert. It may be loose or held in place by the spring. Its location, directly beneath the screw, makes it easily accessible for removal.
- Extracting the Flint
The spent flint can usually be removed by gently tilting the insert and allowing it to fall out. Alternatively, a small tool, such as tweezers or a small screwdriver, can be used to carefully lift it out. Care should be taken not to damage the surrounding components during extraction.
- Observing the Spring
Beneath the flint lies a small spring. It is essential to ensure this spring remains in place or is carefully removed and set aside for later reassembly. This spring provides the necessary pressure against the new flint for spark generation.
- Disposing of the Old Flint
The spent flint should be disposed of properly. While seemingly insignificant, proper disposal contributes to responsible waste management. Discarding it in a designated receptacle prevents environmental contamination and potential hazards.
Proper removal of the old flint is essential for the successful replacement of the flint and the restoration of the lighter’s functionality. Careful attention to the position and handling of the spring during this process is critical for ensuring the lighter operates correctly after reassembly. This step, while simple, demonstrates the importance of precision and attention to detail in maintaining a functional lighter.
4. Insert new flint.
Insertion of a new flint is the core action in the flint replacement process for a Zippo-style lighter. This action restores the lighter’s primary function: creating a spark for ignition. Proper insertion technique ensures consistent sparking and optimal lighter performance. This stage directly addresses the core query of how one replaces the flint, making it a critical element of the overall procedure.
- Flint Placement
The new flint must be placed correctly within the designated chamber or tube in the lighter insert. This chamber is typically located directly beneath the flint screw. Precise placement ensures proper contact with the sparking wheel and consistent ignition. Incorrect placement can lead to inconsistent sparking or complete failure to ignite.
- Orientation
While flint orientation may not be strictly critical in all Zippo-style lighters, consistent orientation can contribute to even wear. Generally, inserting the flint with the striking end facing the sparking wheel is recommended. Observing the orientation of the old flint can offer guidance. Consistent practice can optimize flint longevity and performance.
- Spring Compression
As the new flint is inserted, it will compress the small spring located beneath it. This spring pressure is essential for maintaining consistent contact between the flint and the sparking wheel. Feeling the spring compress provides confirmation of correct flint placement. This tactile feedback indicates the flint is correctly positioned for optimal function.
- Confirmation of Placement
Once the new flint is inserted fully, it should sit flush with or slightly below the top edge of the flint chamber. This ensures proper alignment with the retaining screw and prevents interference with the lighter’s closing mechanism. Visual confirmation helps ensure correct placement and avoids potential mechanical issues.
Correct insertion of the new flint is paramount to the success of the entire replacement process. Each facet of this action, from proper placement to spring compression, directly contributes to the lighter’s restored functionality. This step effectively answers the central question of how to replace the flint, emphasizing the importance of precision and attention to detail in this seemingly simple maintenance task.
5. Replace the spring.
The spring plays a crucial role in the flint replacement process and the overall functionality of a Zippo-style lighter. It exerts pressure on the flint, ensuring consistent contact with the sparking wheel. Without the spring’s pressure, the flint would not engage correctly with the wheel, resulting in inconsistent sparking or complete failure to ignite. Therefore, proper placement of the spring is integral to the “how do you replace the flint in a Zippo lighter” procedure. An improperly positioned or missing spring renders the new flint ineffective, negating the entire replacement effort. For example, if the spring is bent or dislodged during the process, the lighter will likely fail to spark even with a new flint. This underscores the spring’s importance as a seemingly small but critical component.
The spring’s function extends beyond simply applying pressure. It also acts as a shock absorber, protecting the flint from excessive wear during operation. This contributes to the flint’s longevity and the overall lifespan of the lighter. Furthermore, the spring’s tension ensures consistent spark generation regardless of the lighter’s orientation. This reliability is a key characteristic of Zippo-style lighters and is directly influenced by the correct placement and function of the spring. Practical applications, such as using the lighter in windy conditions or at varying angles, rely on the spring’s consistent pressure to maintain a reliable spark.
In summary, while the flint is the primary component being replaced, the spring’s role is equally critical to the lighter’s functionality. Understanding the spring’s function and ensuring its correct placement is essential for a successful flint replacement. Overlooking this small component can lead to frustration and a non-functional lighter. Therefore, attention to the spring during the flint replacement process directly addresses the core query of “how do you replace the flint in a Zippo lighter” effectively and comprehensively. Challenges related to inconsistent sparking or failure to ignite often stem from a misplaced or damaged spring, emphasizing its practical significance within the overall maintenance procedure.
6. Tighten the screw.
Securing the flint screw is the final step in the flint replacement process for a Zippo-style lighter. This seemingly simple action is crucial for the lighters overall function and structural integrity. Incorrect tightening can lead to a range of issues, from inconsistent sparking to complete malfunction. Therefore, understanding the nuances of this final step is essential to successfully address “how do you replace the flint in a Zippo lighter.”
- Securement and Stability
Tightening the screw firmly secures the newly inserted flint and spring within the lighter insert. This stability ensures consistent contact between the flint and the sparking wheel, which is essential for reliable ignition. A loose screw can cause the flint to shift, resulting in inconsistent sparking or complete failure to create a spark. This directly impacts the lighters primary function, highlighting the importance of proper screw securement.
- Preventing Leakage
In addition to securing the flint and spring, the screw also plays a role in preventing fuel leakage. A properly tightened screw seals the flint chamber, minimizing fuel evaporation and ensuring optimal fuel retention. This contributes to the lighter’s overall efficiency and prevents fuel waste. A loose screw can compromise this seal, leading to fuel loss and reduced lighter performance.
- Protecting Internal Components
The screw acts as a protective barrier for the internal components of the lighter insert. It shields the flint, spring, and felt pad from debris and external elements. A secure screw prevents these components from becoming dislodged or damaged, maintaining the lighters long-term functionality. This protection is essential for the longevity of the lighter and contributes to its overall reliability.
- The Importance of Proper Torque
While the screw needs to be tightened securely, excessive force can strip the screw threads or damage the lighter insert. Finding the right balance between securement and over-tightening is crucial. A snug fit is sufficient; excessive tightening offers no additional benefit and can lead to irreversible damage. Therefore, controlled and deliberate tightening is recommended to avoid potential complications.
The act of tightening the screw, while seemingly trivial, is integral to the overall process of replacing the flint in a Zippo-style lighter. Each facet of this action contributes to the lighters functionality, fuel efficiency, and longevity. Understanding the importance of proper screw tightening provides a comprehensive answer to “how do you replace the flint in a Zippo lighter,” emphasizing the significance of attention to detail in even the seemingly simplest steps of the process. This seemingly minor action has significant implications for the lighter’s performance and lifespan, underscoring the interconnectedness of all steps within the replacement procedure.
7. Test the lighter.
Testing the lighter after flint replacement is a crucial final step, directly linked to the overarching process of “how do you replace the flint in a Zippo lighter.” This seemingly simple action verifies the success of the entire procedure and ensures the lighter’s restored functionality. Without this verification, one cannot definitively confirm the flint replacement’s effectiveness. A failure to ignite indicates a potential issue within the replacement process, such as a misplaced spring, improperly seated flint, or an over-tightened screw. Testing, therefore, establishes a direct cause-and-effect relationship between the replacement procedure and the lighter’s operational status. For example, if the lighter sparks consistently after reassembly, the replacement is deemed successful. However, a weak spark or failure to ignite necessitates troubleshooting the previous steps.
The practical significance of this testing phase becomes particularly evident in situations where a reliable fire source is essential. Consider a camping trip or an emergency situation requiring fire for light or warmth. A malfunctioning lighter, despite a new flint, renders it useless in such critical scenarios. Testing eliminates this potential risk, providing assurance of the lighter’s functionality when needed most. Furthermore, testing can identify subtle issues that might otherwise go unnoticed, like a slightly bent spring or a minor obstruction in the flint chamber. These subtle issues, if left unaddressed, can lead to more significant problems down the line, affecting the lighter’s long-term performance. Therefore, testing serves as a preventative measure, ensuring the longevity and reliability of the lighter.
In conclusion, the “test the lighter” step is not merely a formality but an integral component of the flint replacement procedure. It provides a practical means of verifying the effectiveness of the entire process, offering immediate feedback on the lighter’s operational status. This understanding is crucial for anyone seeking a comprehensive answer to “how do you replace the flint in a Zippo lighter,” emphasizing the importance of each step in achieving a fully functional and reliable outcome. Addressing potential challenges through systematic testing transforms a simple maintenance task into a proactive measure, ensuring the lighter’s dependable performance in various practical applications.
Frequently Asked Questions
This section addresses common queries regarding flint replacement in Zippo-style lighters, offering practical solutions and clarifying potential misconceptions.
Question 1: What type of flint is recommended for Zippo-style lighters?
Genuine Zippo flints are generally recommended for optimal performance. While generic flints might function, they may wear down faster or produce inconsistent sparks.
Question 2: How often should the flint be replaced?
Flint replacement frequency depends on usage. One might typically replace a flint after several hundred lights, or when sparking becomes unreliable.
Question 3: What can cause a lighter to fail to spark even with a new flint?
Several factors can contribute to sparking failure, including a misplaced or damaged spring, a worn felt pad, or an improperly tightened flint screw.
Question 4: Can the flint screw be damaged during replacement?
Using an incorrect screwdriver or applying excessive force can strip the screw head. Employing a properly sized screwdriver and applying gentle, consistent pressure mitigates this risk.
Question 5: Is it necessary to replace the felt pad every time the flint is replaced?
Felt pad replacement is not required with every flint change. However, inspecting the pad for wear and replacing it when compressed or damaged ensures optimal fuel retention.
Question 6: Where can replacement flints be purchased?
Replacement flints can be purchased from various retailers, including tobacco shops, convenience stores, and online marketplaces.
Addressing these common queries aims to provide a comprehensive understanding of flint replacement and ensure optimal lighter functionality. Each question highlights a specific aspect of the process, contributing to a complete and practical guide for maintaining a Zippo-style lighter.
For further assistance or specific troubleshooting, consulting the manufacturer’s instructions or contacting customer support is recommended.
Conclusion
Replacing the flint in a Zippo-style lighter is a straightforward maintenance procedure essential for reliable operation. This process involves accessing and removing the flint screw, carefully replacing the spent flint with a new one, ensuring proper spring placement, and securely tightening the screw. Each step contributes to the lighter’s continued functionality, highlighting the importance of precision and attention to detail. Understanding the role of each component, from the flint itself to the seemingly insignificant spring, ensures a successful replacement and consistent spark generation.
Mastering this simple skill empowers users to extend the lifespan of their lighters, promoting sustainability and self-sufficiency. Regular maintenance, including timely flint replacement, ensures consistent performance and underscores the value of reusable products. This knowledge contributes to a broader understanding of mechanical functionality and the importance of proper care for everyday tools. Ultimately, the ability to replace a flint allows one to rely on a consistently functional fire source, whether for practical needs or in emergency situations.


