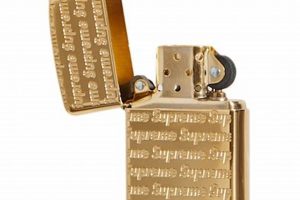
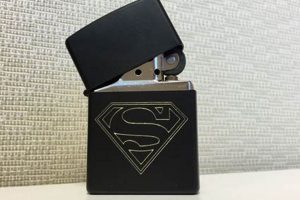
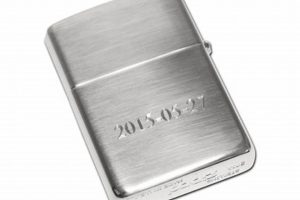
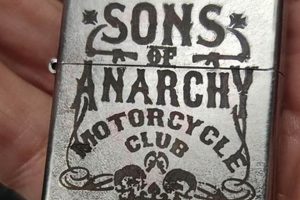
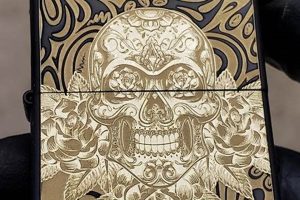
Customizing metal lighters with rotary tools allows for intricate designs and personalized artwork to be etched onto the surface. This process involves using a high-speed tool with various attachments to carefully remove material, creating detailed patterns, text, or images. An example might be a nature scene meticulously carved onto the lighter’s casing, or a monogram rendered in elegant script.
This method of personalization offers a unique way to create a cherished possession or a thoughtful gift. The precision of the tool enables a high level of detail, transforming a standard lighter into a miniature work of art. Historically, handcrafted personalization has been valued, and the ability to achieve professional-looking results with readily available tools continues this tradition. This technique offers a tangible connection to the object, adding sentimental value beyond its functional purpose.
This article will further explore the tools, techniques, and design possibilities for transforming ordinary metal lighters into personalized treasures. Topics covered will include selecting appropriate bits, mastering different engraving styles, and safety precautions to ensure a successful and enjoyable experience.
Tips for Metal Lighter Engraving
Achieving professional-looking results when customizing metal lighters requires careful planning and execution. The following tips offer guidance for a successful engraving experience.
Tip 1: Secure the Workpiece: A stable lighter is crucial for clean lines and precise detail. A vise or clamping mechanism specifically designed for small objects is recommended.
Tip 2: Practice on Scrap Metal: Before working on the lighter, practice the design and depth of engraving on similar material to gain control and confidence.
Tip 3: Use Appropriate Bits: Different engraving bits produce varied results. Diamond burrs offer fine detail, while high-speed cutters are suitable for broader strokes. Select the bit based on the desired effect.
Tip 4: Control Speed and Pressure: Excessive speed or pressure can damage the lighter or the engraving bit. Begin with lower settings and gradually adjust as needed. Consistent pressure is key to uniform lines.
Tip 5: Plan the Design: Sketching the design on paper or using a stencil can help achieve accurate placement and proportions on the lighter’s surface.
Tip 6: Consider Depth and Contrast: Varying the engraving depth creates visual interest and adds dimension to the design. Lighter areas can be achieved with shallow engravings, while deeper cuts create darker contrasts.
Tip 7: Safety First: Always wear appropriate safety glasses and a dust mask to protect against metal particles and debris. Work in a well-ventilated area.
Careful attention to these tips will significantly improve the quality of the engraving and minimize potential errors. The result will be a personalized item reflecting craftsmanship and attention to detail.
By following these guidelines, one can create a truly unique and personalized item. The article will conclude with further resources and inspiration for advanced techniques and design ideas.
1. Design Planning
Design planning forms the crucial foundation for successful Zippo engraving. A well-conceived design ensures the final product aligns with the desired aesthetic and functional goals. Without proper planning, engraving can result in uneven lines, misplaced elements, and an overall unsatisfactory outcome. Consider the difference between a meticulously planned floral pattern, precisely etched onto the lighter’s surface, and a haphazardly scratched design lacking clarity and precision. The former reflects careful forethought, while the latter demonstrates a lack of planning.
Several factors contribute to effective design planning. Scale and proportion must be considered relative to the Zippo’s limited surface area. Intricate designs require careful consideration of line thickness and spacing to ensure clarity after engraving. Transferring the design accurately from paper to the metal surface necessitates techniques like stencils or carbon paper. Material considerations also play a role; certain designs may be more suitable for brass Zippos than for chrome or brushed steel versions, due to the metal’s inherent properties and how they interact with the engraving process.
Effective design planning minimizes errors and material waste, leading to a more efficient and satisfying engraving process. It allows for greater control over the final outcome, transforming a simple lighter into a personalized piece of art. By understanding the importance of this initial stage, one can approach Zippo engraving with a higher probability of success, creating a lasting and cherished item.
2. Material Preparation
Material preparation is a critical precursor to successful Zippo engraving. The quality of the engraving hinges significantly on the state of the lighter’s surface and the stability of its positioning during the process. A properly prepared surface ensures clean lines and consistent depth, while secure placement prevents slippage and potential damage. Neglecting this stage can lead to imperfections in the engraving and compromise the overall aesthetic of the finished product.
- Cleaning
Thorough cleaning removes oils, fingerprints, and debris that can interfere with the engraving process. A clean surface allows the Dremel to maintain consistent contact, preventing skips and inconsistencies in the engraved lines. Residues can also clog the engraving bit, reducing its effectiveness and potentially overheating the metal. For example, residual lighter fluid can create an uneven surface, affecting the precision of the engraving. Common cleaning methods include using isopropyl alcohol or a specialized metal cleaner.
- Securing the Zippo
A stable Zippo is paramount for precise engraving. Movement during the engraving process can lead to unintended scratches or deviations from the planned design. A vise, clamps, or a specialized holding jig secures the lighter firmly in place, minimizing the risk of slippage. Imagine attempting to engrave intricate details on a freely moving lighter the result would likely be imprecise and potentially dangerous. Securing the Zippo eliminates this risk, facilitating clean, controlled engraving.
- Surface Masking
Applying masking tape or a specialized stencil film protects areas of the Zippo that are not intended for engraving. This is particularly useful when working with complex designs or when preserving the original finish of certain sections of the lighter. For instance, masking allows for precise engraving of a monogram while protecting the surrounding polished chrome. This technique also helps to prevent accidental scratches or slips of the Dremel.
- Pre-Engraving Inspection
A final inspection before engraving ensures the Zippos surface is free from imperfections and that the design is correctly positioned. This step allows for any necessary adjustments before beginning the engraving process, preventing wasted time and materials. Catching a minor scratch or a misaligned stencil before starting can save significant effort and ensure a satisfactory final result. This meticulous approach reduces the risk of errors and promotes a more efficient workflow.
These facets of material preparation work in concert to create an optimal environment for Zippo engraving with a Dremel. By ensuring a clean, secure, and protected surface, one maximizes the chances of achieving a precisely engraved design. A carefully prepared lighter responds predictably to the Dremel, allowing for greater control and ultimately a higher quality finished product. This attention to detail distinguishes a professional-looking engraving from an amateur attempt.
3. Tool Selection (Dremel)
The selection of appropriate Dremel tools and accessories directly influences the quality, precision, and overall outcome of Zippo engraving. Different bits offer varying levels of control, allowing for a range of engraving styles, from delicate lines to bold cuts. Understanding the capabilities and limitations of each tool is crucial for achieving the desired results. An improper bit can lead to uneven lines, surface damage, or an inability to achieve the desired level of detail. Choosing the right Dremel components ensures efficient material removal, precise line control, and ultimately, a professionally engraved Zippo.
- Engraving Cutters
Engraving cutters, available in various shapes and sizes, serve as the primary tool for removing material and creating the engraved design. High-speed steel cutters offer durability and are suitable for broader strokes and deeper engravings. Diamond-tipped cutters provide greater precision and control, ideal for intricate details and finer lines. For example, a high-speed cutter might be used for creating the outline of a design, while a diamond-tipped cutter would be employed for finer details within the pattern. The choice of cutter directly impacts the level of detail and the overall aesthetic of the final engraving.
- Collets/Chucks
Collets or chucks secure the engraving cutter in the Dremel tool. Ensuring the correct collet size for the chosen cutter is essential for secure attachment and precise operation. An improperly sized collet can lead to slippage, vibration, and potentially damage the cutter or the Zippo. For instance, using a collet too large for the cutter will result in insecure fastening, while a collet too small may damage the cutter shank. A secure fit ensures stability and control during the engraving process.
- Flexible Shaft Attachment (Optional)
The flexible shaft attachment offers greater maneuverability and control, particularly when working on intricate designs or in tight spaces. It reduces hand fatigue during extended engraving sessions and allows for more precise application of pressure and control of the tool’s angle. While not essential for all engravings, the flexible shaft provides significant ergonomic and precision advantages for detailed work. This can be particularly beneficial when engraving complex patterns or text on the curved surface of a Zippo.
- Rotary Tool Speed Control
The Dremel’s speed setting significantly influences the engraving process. Higher speeds are suitable for rapid material removal but require greater control. Lower speeds offer more precise control, especially for delicate details, but may require more time to complete the engraving. Adjusting the speed according to the material and the complexity of the design is crucial for optimal results. Engraving too quickly on a hard metal like stainless steel may lead to overheating or loss of control, whereas slower speeds are better suited for intricate details or softer metals.
The interplay of these Dremel components directly affects the precision and artistry of the engraved Zippo. Matching the appropriate tools and accessories to the specific design and material ensures a successful and aesthetically pleasing outcome. The craftsman’s understanding of these tool selections demonstrates a commitment to quality and contributes to the creation of a personalized item that reflects both skill and attention to detail.
4. Engraving Technique
Engraving technique represents the crucial link between the Dremel tool’s capabilities and the realization of a design on a Zippo lighter. The technique employed dictates the final appearance, depth, and precision of the engraving. Mastery of technique differentiates a finely executed, detailed engraving from a crude or amateurish result. This section explores the essential elements of effective engraving technique specific to customizing Zippo lighters with a Dremel.
- Depth Control
Depth control governs the visual impact of the engraving. Consistent depth creates uniform lines and predictable results. Varying the depth adds dimension and visual interest, allowing for shading and textural effects. A shallow engraving produces a subtle, delicate line, while a deeper cut results in a bolder, more pronounced mark. For example, a portrait engraved on a Zippo might utilize varying depths to create shadows and highlights, giving the image a three-dimensional appearance. Precise depth control is essential for achieving the desired aesthetic and ensuring the design’s clarity.
- Line Control and Consistency
Consistent line control ensures clean, smooth engravings. Maintaining a steady hand and consistent pressure on the Dremel prevents wavering lines and uneven etching. Overlapping strokes can create darker, more pronounced lines, while single, controlled strokes result in finer details. Imagine engraving a geometric pattern; consistent line control is crucial for maintaining the symmetry and precision of the design. Inconsistent lines detract from the overall aesthetic and diminish the perceived quality of the work.
- Angle and Orientation
The angle at which the Dremel is held relative to the Zippo’s surface impacts the width and depth of the engraved lines. A steeper angle creates a narrower, deeper cut, while a shallower angle results in a wider, less pronounced line. Maintaining a consistent angle throughout the engraving process is vital for uniformity. For example, engraving lettering requires a consistent angle to ensure each character has the same stroke weight. Variations in angle can lead to an uneven and unprofessional appearance.
- Material Response and Adjustments
Different Zippo finishes (e.g., brushed chrome, high-polish brass) respond differently to the engraving process. Understanding these material-specific responses is crucial for adjusting the Dremel’s speed and pressure accordingly. Harder finishes may require slower speeds and more pressure, while softer finishes necessitate gentler handling. Engraving a high-polish chrome Zippo requires a different approach than engraving a brass Zippo due to the inherent differences in material hardness. Adapting the technique to the specific material ensures optimal results and prevents damage to the lighter.
These facets of engraving technique are fundamental to achieving a high-quality, personalized Zippo. Mastering these elements transforms the Dremel from a simple tool into an instrument for artistic expression. The interplay of depth control, line consistency, angle management, and material awareness allows for the creation of intricate designs, personalized messages, and lasting impressions on a classic lighter. Ultimately, refined engraving technique elevates the Zippo from a functional item to a personalized work of art.
5. Safety Precautions
Safety precautions are paramount when engraving a Zippo lighter with a Dremel. The process involves high-speed rotation, metal debris, and potential heat generation, creating various hazards. Ignoring safety measures can lead to eye injuries from flying metal fragments, skin lacerations from the rotating bit, or burns from the friction-generated heat. For example, failing to wear eye protection can result in a metal shard causing corneal abrasion or even more severe eye trauma. Similarly, neglecting to secure the Zippo firmly can lead to the Dremel slipping and causing a deep cut. Understanding and implementing appropriate safety measures minimizes these risks, ensuring a safe and productive engraving experience.
Essential safety precautions include wearing appropriate eye protection, such as safety glasses or a face shield. A dust mask prevents inhalation of fine metal particles generated during engraving. Securing the Zippo in a vise or with a specialized clamping device minimizes movement and reduces the risk of slippage and injury. Operating the Dremel at the correct speed for the material and bit type prevents overheating and potential burns. Working in a well-ventilated area minimizes exposure to metal dust and fumes. Additionally, maintaining a firm grip on the Dremel and using controlled movements minimizes the risk of losing control of the tool and causing accidental injury. Consider the scenario of engraving a detailed design on a highly polished Zippo; proper safety precautions are essential to prevent slips and maintain precise control, ensuring both safety and the desired outcome.
Prioritizing safety during Zippo engraving with a Dremel safeguards against potential harm. Implementing appropriate safety measures transforms a potentially hazardous activity into a controlled and enjoyable process. Consistent adherence to these precautions ensures a safe working environment and promotes a positive engraving experience, allowing focus to remain on the creative process rather than potential risks. A commitment to safety underscores a responsible approach to craftsmanship and contributes to the overall success of the project.
6. Finishing Touches
Finishing touches represent the final stage in the process of creating an engraved Zippo lighter with a Dremel, transforming a functionally engraved piece into a polished, refined object. These finishing processes protect the metal, enhance the design’s visibility, and add a professional touch, increasing the perceived value and longevity of the customized lighter. The difference between a simply engraved Zippo and one with carefully executed finishing touches is significant, akin to the distinction between a rough sketch and a finished painting. This stage is crucial for maximizing the visual impact and durability of the engraved design.
- Polishing
Polishing smooths the engraved surfaces, removes minor imperfections, and enhances the contrast between engraved lines and the surrounding metal. This process can involve using polishing compounds, fine-grit sandpaper, or specialized polishing tools like felt wheels attached to the Dremel. For example, polishing a brass Zippo after engraving a floral design highlights the intricate details and adds a warm sheen to the metal. Polishing also removes any remaining metal burrs, leaving a smooth, refined surface that is pleasing to the touch and enhances the overall aesthetic.
- Cleaning and Sealing
Cleaning removes any residual metal dust or polishing compound, ensuring the engraved design is clearly visible. Applying a sealant, such as a clear lacquer or wax, protects the metal from oxidation and corrosion, preserving the finish and extending the life of the engraving. This is particularly important for Zippos exposed to varying environmental conditions. For example, sealing a brushed chrome Zippo after engraving prevents fingerprints and smudges, maintaining the lighter’s pristine appearance. Cleaning and sealing represent essential steps in preserving the engraved design and ensuring its longevity.
- Inking/Color Filling (Optional)
Inking or color filling the engraved lines enhances their visibility and adds a decorative element. Specialized enamel paints or inks designed for metal adhesion are applied to the engraved grooves, then the excess is carefully removed, leaving the color solely within the design. This technique can create striking contrasts and highlight intricate details, transforming a simple engraving into a vibrant, eye-catching design. Imagine a silver Zippo with a deeply engraved Celtic knot; filling the knot with black enamel creates a bold, visually arresting contrast, emphasizing the intricate pattern. This optional step allows for greater creative expression and personalization.
- Protective Case/Storage
While not strictly a finishing touch to the Zippo itself, storing the engraved lighter in a protective case or pouch safeguards it from scratches, dents, and general wear and tear. This helps preserve the quality of the engraving and extends the life of the personalized lighter. A custom-fitted case further enhances the perceived value of the engraved Zippo, transforming it into a cherished keepsake. This final consideration demonstrates a commitment to preserving the artistry and craftsmanship of the engraved design.
These finishing touches elevate the engraved Zippo from a customized item to a treasured possession. They enhance the design’s visual appeal, protect the metal from environmental damage, and add a layer of refinement that reflects the care and attention invested in its creation. By attending to these final details, the engraver transforms a functional object into a personalized work of art, demonstrating a dedication to craftsmanship and ensuring the longevity of the design.
Frequently Asked Questions
This section addresses common inquiries regarding the process of engraving Zippo lighters using a Dremel rotary tool.
Question 1: What type of Dremel bit is recommended for engraving Zippo lighters?
Diamond-tipped engraving bits are generally recommended for their precision and ability to create fine details on metal surfaces. High-speed steel cutters are suitable for broader strokes and less intricate designs.
Question 2: How can one prevent the Zippo from moving during the engraving process?
Securing the Zippo in a vise or using a specialized clamping device designed for small objects is crucial for preventing movement and ensuring clean, controlled engraving.
Question 3: Is it necessary to disassemble the Zippo before engraving?
Disassembly is recommended. This protects the internal components from metal dust and debris and provides better access to the surface for engraving. Ensure the lighter is empty of fuel before disassembly.
Question 4: What speed setting should be used on the Dremel for optimal engraving results?
The optimal speed depends on the material of the Zippo and the complexity of the design. Starting with a lower speed and gradually increasing it allows for greater control and prevents overheating the metal. Practice on scrap metal is advisable to determine the optimal speed.
Question 5: How can deep or uneven engravings be corrected?
Deep or uneven engravings are difficult to correct completely. Careful planning and practice on scrap metal are crucial for preventing these issues. In some cases, sanding or polishing can minimize minor imperfections, but significant errors may require professional repair or replacement of the Zippo casing.
Question 6: What safety precautions should be observed when engraving a Zippo with a Dremel?
Always wear safety glasses or a face shield to protect eyes from metal debris. A dust mask is essential to prevent inhalation of metal particles. Work in a well-ventilated area and ensure the Zippo is securely clamped to prevent accidental slippage and injury.
Careful consideration of these frequently asked questions and their corresponding answers equips individuals with the knowledge necessary to undertake Zippo engraving safely and effectively. A thorough understanding of the process contributes to achieving professional-looking results and creating a personalized item of lasting value.
Further resources and tutorials on advanced engraving techniques and design inspiration can be found in the following section.
Conclusion
Customizing metal lighters using rotary tools offers a unique avenue for personal expression. This article explored the multifaceted process, from initial design considerations and material preparation to the intricacies of tool selection and engraving techniques. Emphasis was placed on the importance of safety precautions, ensuring a secure and controlled working environment. The exploration extended to finishing techniques, highlighting methods for refining and preserving the engraved design. Understanding each stage, from conceptualization to final polish, contributes to a successful and rewarding outcome.
The ability to transform a utilitarian object into a personalized piece of art represents a tangible connection to craftsmanship. This exploration encourages further experimentation and exploration within the realm of personalized engraving, fostering an appreciation for the fusion of artistry and functionality. The potential for creative expression, coupled with the durability and inherent value of the medium, establishes personalized engraving as a lasting and evolving art form.


