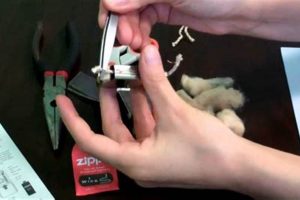
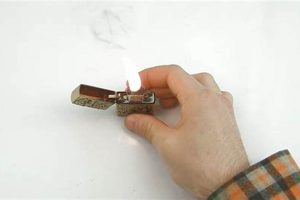
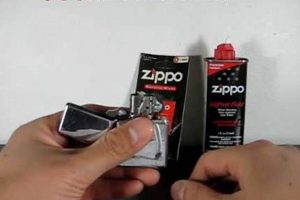
Restoring a Zippo lighter’s wick involves addressing issues like a charred, short, or improperly burning wick. This process typically includes removing the insert unit from the lighter casing, carefully pulling out the old wick using pliers, and threading a new wick through the flint tube and wick tube. The new wick is then trimmed to the appropriate length and the lighter is reassembled. This ensures optimal fuel flow and a consistent flame.
A properly functioning wick is essential for reliable ignition and a clean burn. A damaged or worn wick can lead to poor fuel delivery, a weak flame, or difficulty in lighting. Maintaining the wick contributes to the longevity of the lighter and ensures its continued functionality. Zippo lighters, known for their durability and refillable design, have a long history, and proper wick maintenance is a key aspect of preserving their classic appeal and performance.
The following sections will delve into the required tools, materials, and step-by-step instructions for replacing a Zippo lighter wick, offering clear guidance for maintaining this iconic lighter.
Tips for Zippo Wick Replacement
Ensuring proper wick replacement requires attention to detail and the correct procedures. The following tips provide guidance for successful wick maintenance.
Tip 1: Use the correct replacement wick. Authentic Zippo wicks are recommended for optimal performance and compatibility.
Tip 2: Employ proper tools. Needle-nose pliers are essential for careful wick removal and insertion without damaging the lighter components.
Tip 3: Remove the insert unit from the lighter casing before starting the wick replacement process. This allows for unobstructed access and easier manipulation of the wick.
Tip 4: Thread the new wick completely through the flint tube and wick tube, ensuring it extends sufficiently from both ends.
Tip 5: Trim the wick to the correct length. An excessively long wick can lead to a large, sooty flame, while a short wick may be difficult to ignite.
Tip 6: After trimming, fluff the wick slightly to ensure proper fuel absorption and a consistent flame.
Tip 7: Saturate the new wick with lighter fluid before reassembling the lighter. This primes the wick for immediate use.
Adhering to these guidelines will ensure efficient and effective wick replacement, contributing to the longevity and reliable performance of the lighter.
By following these steps and tips, one can maintain optimal lighter function and extend its lifespan.
1. Remove Insert
Insert removal is a crucial initial step in addressing wick-related problems in a Zippo lighter. The insert houses the wick, flint, and packing material, all essential for proper lighter function. Accessing and replacing the wick, the primary component requiring maintenance, necessitates the insert’s removal from the lighter casing. This allows for careful manipulation of the wick and other internal components without the risk of damaging the exterior casing or hinge. A lighter exhibiting a weak flame or difficulty igniting may indicate a problem with the wick, necessitating insert removal for inspection and potential replacement.
Consider a scenario where a Zippo lighter produces a weak, sputtering flame. This could indicate a clogged or damaged wick. Removing the insert allows for close examination of the wick’s condition and facilitates replacement if necessary. Attempting to manipulate the wick without removing the insert risks further damage and complicates the repair process. Furthermore, access to the rayon balls surrounding the wick, which hold the lighter fluid, is only possible with the insert removed. These balls may need replacement or adjustment during wick maintenance.
In summary, insert removal is fundamental to accessing and addressing wick-related issues. It provides the necessary access for proper inspection, replacement, and maintenance of the wick and related components. This process directly contributes to restoring the lighter’s optimal functionality and ensures its continued reliability. Understanding the importance of this step simplifies troubleshooting and enables effective maintenance, contributing to the longevity of the Zippo lighter.
2. Pull old wick
Extracting the old wick is a critical step in the process of repairing a Zippo lighter. This action directly addresses the core issue of a malfunctioning wick, which can manifest as a weak flame, difficulty igniting, or an uneven burn. Removing the old wick prepares the lighter for the installation of a fresh wick, essential for restoring optimal functionality. This stage requires careful execution to avoid damaging the lighter’s internal components.
- Necessary Tools
Appropriate tools are essential for successful wick removal. Needle-nose pliers offer the precision and grip needed to extract the wick without damaging surrounding components. Improvised tools may lack the necessary finesse and could lead to complications, such as bending the wick tube. The correct tools ensure a clean removal, minimizing disruption to the lighter’s internal mechanism.
- Wick Condition Assessment
The condition of the old wick offers valuable diagnostic information. A charred wick indicates potential issues with fuel flow or excessive burning. A frayed wick suggests wear and tear from repeated use. Observing the wick’s state provides insight into the underlying problem and helps determine the necessary corrective actions. This assessment informs the subsequent repair process and helps prevent future issues.
- Complete Removal
Ensuring complete wick removal is crucial. Any remaining fragments can obstruct the insertion of the new wick and impede proper fuel flow. Thorough removal prevents future performance problems and sets the stage for a successful repair. Incomplete removal can lead to recurring ignition issues and necessitate further disassembly, prolonging the repair process.
- Handling the Wick
The old wick, often saturated with lighter fluid, requires careful handling. Proper disposal prevents accidental ignition and minimizes the risk of staining surfaces. Caution in handling the wick contributes to a safe and efficient repair process. Using a small container or wrapping the wick in a disposable material prevents unwanted fuel leakage and promotes a clean work area.
Proper wick removal is a foundational element in restoring a Zippo lighters functionality. Each facet of this process, from tool selection to careful handling, plays a critical role in ensuring the successful installation of a new wick and the subsequent restoration of the lighter’s performance. This meticulous approach preserves the longevity and reliable operation of the lighter.
3. Insert new wick
Inserting a new wick forms the core of addressing wick-related malfunctions in Zippo lighters. This action directly resolves issues stemming from a worn, charred, or improperly trimmed wick. A new wick restores the critical function of fuel delivery to the flint wheel, enabling reliable ignition and a consistent flame. Without a properly functioning wick, the lighter fails its primary purpose. Consider a lighter that struggles to ignite or produces a weak, sputtering flame. These symptoms frequently indicate a failing wick. The act of inserting a new wick directly remedies this, thereby restoring the lighter to working order. This process forms the crux of the “how to fix wick on zippo” procedure, highlighting its pivotal role.
The insertion process requires precision. The new wick must be threaded correctly through the wick tube, ensuring appropriate contact with the lighter fluid reservoir and the flint wheel. Insufficient threading can result in inadequate fuel supply, while excessive threading can hinder the flint’s spark. Practical implications of incorrect insertion include difficulty in lighting, inconsistent flame height, and potential fuel leakage. For example, a loosely threaded wick might lead to fuel starvation, causing the flame to extinguish quickly. Conversely, a tightly packed wick may restrict fuel flow, resulting in a weak flame. Therefore, proper wick insertion is crucial for optimal lighter performance.
In conclusion, the “insert new wick” step is inextricably linked to the overall process of fixing a Zippo wick. It is the central action that addresses the root cause of common lighter malfunctions. Understanding its importance, coupled with proper execution, ensures the lighters continued functionality and reliability. This reinforces the practical significance of this seemingly simple step within the broader context of Zippo lighter maintenance. Challenges may arise from improper threading or using a non-standard wick, underscoring the importance of following established procedures and using genuine replacement parts for optimal results.
4. Trim wick
Trimming the wick is an integral component of “how to fix wick on zippo,” directly influencing lighter functionality and longevity. This seemingly minor adjustment plays a crucial role in optimizing fuel delivery, flame height, and overall performance. An improperly trimmed wick can lead to a range of issues, from difficulty igniting to excessive fuel consumption, highlighting the importance of this precise step within the broader repair process. Understanding the nuances of wick trimming ensures a successful repair and contributes to the long-term reliability of the lighter.
- Optimal Flame Height
Achieving the correct flame height necessitates precise wick trimming. An excessively long wick can produce a large, sooty flame, wasting fuel and potentially creating a fire hazard. Conversely, a wick that is too short may be difficult to ignite or produce a weak flame, rendering the lighter ineffective. The optimal flame height allows for practical use while minimizing fuel consumption. For instance, a flame that extends significantly beyond the chimney can pose a safety risk, while a barely visible flame hinders functionality. Therefore, precise trimming is crucial for balancing performance and safety.
- Fuel Efficiency
Wick length directly impacts fuel consumption. A longer wick draws up more fuel, leading to faster depletion of the lighter’s reservoir. Proper trimming minimizes fuel waste and extends the time between refills. This is particularly relevant for frequent users, where an improperly trimmed wick can lead to significant fuel expenditure over time. Consider a scenario where two identical lighters are used with equal frequency, one with a correctly trimmed wick and the other with an excessively long wick. The latter will require more frequent refills, demonstrating the practical impact of proper wick trimming on fuel efficiency.
- Preventing Malfunctions
Correct wick trimming mitigates the risk of various lighter malfunctions. An overly long wick can contribute to clogging, impacting fuel flow and hindering ignition. Additionally, it can lead to excessive carbon buildup, affecting the lighter’s mechanism. Correct trimming ensures a clean, efficient burn and prolongs the lifespan of the lighter. For example, a long wick can cause the lighter fluid to pool around the flint wheel, potentially hindering its rotation and leading to ignition failures.
- Cleanliness and Aesthetics
Trimming the wick contributes to maintaining the cleanliness and aesthetic appeal of the lighter. A properly trimmed wick produces a clean, controlled flame, minimizing soot and residue buildup on the lighter’s exterior. This preserves the lighter’s appearance and contributes to its overall functionality. An untrimmed wick often produces a smoky flame, leaving black residue on the lighter casing and surrounding surfaces, detracting from its appearance.
In the context of “how to fix wick on zippo,” trimming the wick is the final, yet crucial step that bridges the gap between replacing the wick and restoring optimal lighter function. It directly influences fuel efficiency, flame stability, and overall performance. Each facet of trimmingfrom achieving optimal flame height to minimizing malfunctionscontributes to the lighter’s longevity and reliability. Mastering this skill ensures the long-term functionality and preserves the classic appeal of the Zippo lighter. This step’s precision underscores its significant role in the broader maintenance process, solidifying its position as a pivotal element in “how to fix wick on zippo.”
5. Reassemble lighter
Reassembling the Zippo lighter correctly after wick replacement is the crucial final step in addressing wick-related issues. This seemingly straightforward action directly impacts the lighter’s functionality and longevity. Failure to properly reassemble the components can negate the entire wick replacement process, rendering the lighter inoperable or causing further complications. The connection between reassembly and the overarching goal of fixing the wick lies in the restoration of the lighter’s integrated system, where each component contributes to proper fuel delivery, ignition, and flame control. Without proper reassembly, the new wick cannot function effectively, rendering the prior steps futile.
Consider a scenario where the insert is not securely placed back into the casing. This can lead to fuel leakage, hindering ignition and potentially creating a fire hazard. Similarly, incorrect placement of the flint wheel can prevent sparking, rendering the lighter useless despite a new wick. Real-world examples such as these demonstrate the practical significance of proper reassembly within the context of wick replacement. Further highlighting this connection, an improperly tightened screw can impede the smooth opening and closing of the lighter, affecting its usability. Each element of reassembly, from securing the insert to ensuring proper alignment of all components, directly influences the lighter’s performance and longevity.
In summary, reassembling the lighter correctly is not merely the last step but an integral part of “how to fix wick on zippo.” It signifies the completion of the repair process and the restoration of the lighters functionality. Challenges in reassembly, such as misplaced components or incorrect alignment, can lead to persistent malfunctions. Therefore, understanding the importance of precise reassembly is paramount to a successful wick replacement and ensures the lighter’s continued reliable operation. This final step, when executed correctly, reinforces the overall objective of maintaining the Zippo lighter’s enduring functionality.
Frequently Asked Questions
This section addresses common inquiries regarding Zippo wick replacement and maintenance, providing concise and informative responses to facilitate effective lighter care.
Question 1: What indicates a need for wick replacement?
Several factors indicate a failing wick: difficulty igniting, a weak or inconsistent flame, excessive fuel consumption, or a persistent burning smell even when unlit. A visibly charred or frayed wick also necessitates replacement.
Question 2: Can any type of wick be used in a Zippo lighter?
While some generic wicks might fit, using genuine Zippo wicks is strongly recommended. These wicks are specifically designed for optimal performance and compatibility with Zippo lighters, ensuring proper fuel flow and a consistent flame.
Question 3: How often should the wick be replaced?
Wick replacement frequency depends on usage. Heavy users might need to replace the wick every few months, while occasional users might find yearly replacement sufficient. Observing the wick’s condition provides the best indication of when replacement is necessary.
Question 4: Is it necessary to replace the flint when replacing the wick?
While not strictly required, replacing the flint simultaneously with the wick is often beneficial. This ensures optimal ignition performance and avoids the need for separate maintenance procedures in the near future.
Question 5: What tools are essential for wick replacement?
Needle-nose pliers are crucial for carefully extracting the old wick and inserting the new one without damaging the lighter’s internal components. A small screwdriver may also be helpful for certain models.
Question 6: What can cause a new wick to malfunction?
Improper wick installation, such as incorrect threading or trimming, can lead to malfunctions. Using non-genuine Zippo wicks can also contribute to performance issues. Ensuring proper installation and using authentic replacement parts are essential for optimal function.
Understanding these common queries empowers individuals to perform effective wick maintenance and ensures the long-term functionality of their Zippo lighters. Consistent care and attention to these details contribute significantly to the longevity and reliability of these classic lighters.
For further maintenance information or troubleshooting specific issues, consult official Zippo resources or contact authorized service centers.
Conclusion
Maintaining a Zippo lighter’s functionality requires periodic attention to the wick. This article has explored the process of replacing a Zippo wick, outlining the necessary steps and highlighting the importance of using correct procedures and genuine parts. From removing the insert and carefully extracting the old wick to inserting and trimming the new wick, each action contributes to the lighter’s optimal performance. Understanding the nuances of wick replacement, such as achieving proper flame height and fuel efficiency, ensures the longevity and reliability of this iconic lighter.
Proper wick maintenance ensures continued reliable operation, preserving the Zippo lighter’s enduring utility. Attention to detail in each step, from tool selection to final reassembly, contributes significantly to the lighter’s lifespan and classic appeal. By following the outlined procedures, users can maintain their lighters’ optimal performance, ensuring continued functionality for years to come. This reinforces the importance of understanding “how to fix wick on zippo” as a crucial element of responsible lighter ownership.


