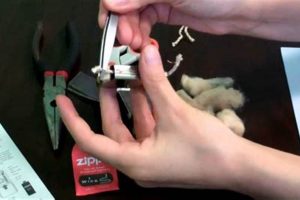
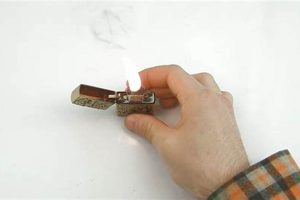
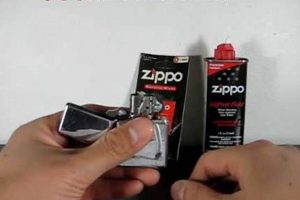
Restoring a Zippo lighter’s wick involves carefully adjusting or replacing the charred portion to ensure proper fuel delivery and a consistent flame. This typically entails removing the insert, raising the wick using tweezers or small pliers, trimming the frayed end, and ensuring it remains evenly positioned within the chimney. Sometimes, complete wick replacement becomes necessary if the existing wick is too short or damaged.
A properly maintained wick is crucial for optimal lighter function. It directly impacts fuel efficiency, flame height, and overall reliability. A clean, correctly positioned wick ensures a clean burn and prevents fuel from being wasted. Since the development of the Zippo lighter in the 1930s, maintaining the wick has been an essential aspect of ownership, contributing to the lighter’s long-lasting reputation.
The following sections will detail the tools required, step-by-step instructions for both wick adjustment and replacement, and troubleshooting tips for common issues encountered during the process.
Tips for Zippo Wick Maintenance
Proper wick maintenance ensures reliable lighter function and longevity. These tips provide guidance on achieving optimal performance.
Tip 1: Use the right tools. Precision is key. Employ needle-nose pliers or tweezers designed for small, delicate tasks. Avoid using tools that could damage the wick or lighter components.
Tip 2: Don’t over-trim. Remove only the frayed or charred portion of the wick. Excessive trimming shortens the wick’s lifespan and can lead to fuel starvation.
Tip 3: Maintain wick height. Ensure the wick extends approximately 1/8 inch above the chimney. This height facilitates proper ignition and flame regulation.
Tip 4: Address uneven burning. If the flame burns unevenly, gently adjust the wick’s position within the chimney using the pliers or tweezers to ensure uniform fuel distribution.
Tip 5: Know when to replace. If the wick is excessively short, severely frayed, or unable to draw fuel effectively, complete replacement is necessary.
Tip 6: Use appropriate replacement wicks. Utilize genuine Zippo replacement wicks or high-quality alternatives specifically designed for Zippo lighters to ensure compatibility and proper function.
Tip 7: Exercise caution with flint wheel. When reinserting the insert, avoid turning the flint wheel, as this can prematurely wear the flint and potentially damage the wick.
Following these guidelines contributes to consistent lighter performance and extends the lifespan of the wick and other components.
This attention to detail ensures a consistently reliable flame and optimal fuel efficiency.
1. Access the wick.
Accessing the wick is the foundational step in any Zippo lighter maintenance procedure involving the wick. Without proper access, adjustments or replacements are impossible. This process lays the groundwork for addressing issues like uneven burning, low flame height, or difficulty igniting.
- Removing the Insert
The insert, containing the wick, fuel chamber, and flint assembly, must be removed from the outer casing. This involves firmly grasping the lighter’s bottom and pulling the insert upward. This exposes the wick and related components for manipulation. Failure to remove the insert prevents any direct access to the wick.
- Protecting the Lighter
While handling the insert, avoid touching the flint wheel. Unintentional sparking can deplete the flint and potentially ignite residual fuel. Placing the lighter on a protective surface like a soft cloth prevents scratches to the casing. Careful handling ensures both the lighter and the user remain safe during the process.
- Identifying Key Components
Once the insert is removed, locate the wick, typically positioned within the chimney. Familiarize yourself with the surrounding components, such as the rayon balls and felt pad, to avoid disturbing them unnecessarily during maintenance. Understanding the layout of the insert facilitates efficient and accurate wick adjustments.
- Preparing for Adjustment
With the wick accessible, ensure appropriate tools are available, such as tweezers or needle-nose pliers. These tools allow for precise manipulation of the wick without causing damage. Preparation ensures a smooth and effective maintenance procedure.
Successfully accessing the wick allows for subsequent steps in the maintenance process, such as raising, trimming, or replacing the wick. This initial step is essential for addressing any wick-related issues and restoring the lighter’s functionality. Without this initial access, any further attempts to fix the wick are rendered impossible.
2. Raise the wick.
Raising the wick is a critical step in Zippo lighter maintenance, directly addressing issues like low flame or difficulty igniting. This process allows access to the charred portion of the wick, enabling trimming or replacement for restored functionality. The following facets detail the intricacies of this procedure.
- Utilizing Proper Tools
Employing appropriate tools, such as needle-nose pliers or specialized Zippo wick tools, is essential for safely and effectively raising the wick. Attempting to raise the wick with improper tools can damage the wick, the surrounding rayon balls, or the felt pad. Precision and control are paramount to prevent further complications.
- Grasping the Wick Securely
A firm, yet gentle, grip on the wick is crucial. Excessive force can deform or sever the wick, necessitating complete replacement. Conversely, a loose grip can cause slippage, hindering the process. The correct pressure ensures the wick is raised without damage.
- Extent of Elevation
The wick should be raised sufficiently to expose the charred portion for trimming or to allow for complete removal if necessary. However, over-extension can dislodge the wick from its base, creating further difficulties. Careful judgment is required to determine the appropriate amount of elevation.
- Maintaining Wick Integrity
Throughout the raising process, preserving the wick’s overall integrity is paramount. Avoid bending, twisting, or otherwise deforming the wick. Maintaining its original shape ensures proper fuel flow and a consistent flame after trimming or replacement.
Successfully raising the wick sets the stage for subsequent maintenance steps, ensuring effective trimming or complete replacement, and ultimately restoring the Zippo lighter to optimal working condition. This seemingly simple action plays a significant role in the overall process of maintaining a functional and reliable lighter.
3. Trim frayed ends.
Trimming frayed ends is an integral component of Zippo wick maintenance and directly addresses the core objective of “how to fix the wick in a zippo.” A frayed wick end leads to an uneven burn, potentially producing excessive soot and a less efficient flame. This frayed material can also contribute to fuel evaporation. The act of trimming these frayed ends restores the wick’s structural integrity, promoting a cleaner, more consistent flame. For instance, a lighter exhibiting a flickering, yellow flame often benefits from a simple wick trimming. Trimming eliminates the source of the uneven burn, improving both functionality and fuel efficiency.
The process involves carefully removing only the damaged portion of the wick. Over-trimming can shorten the wick’s lifespan, necessitating more frequent replacements. Precision tools, such as sharp scissors or specialized wick trimmers, ensure a clean cut, minimizing further fraying. The resulting even edge promotes optimal fuel delivery to the flame. Consider a scenario where a wick is left untrimmed. The frayed ends continue to deteriorate, exacerbating the uneven burn and potentially leading to ignition difficulties. Trimming, therefore, acts as a preventative measure, ensuring consistent performance and extending the wick’s usable life.
Trimming frayed ends, while a seemingly minor task, plays a significant role in the overall health and longevity of a Zippo lighter. This simple procedure directly impacts the quality of the flame, fuel efficiency, and the overall reliability of the lighter. It underscores the importance of regular maintenance in preserving the functionality of this iconic device. Ignoring this crucial step can lead to further complications and ultimately shorten the lifespan of the wick and potentially impact other components of the lighter.
4. Adjust wick height.
Adjusting wick height is paramount when addressing “how to fix the wick in a zippo.” Optimal wick height ensures a balance between flame size, fuel efficiency, and consistent lighter function. Incorrect wick height can lead to various issues, from difficulty igniting to excessive fuel consumption and sooting. This adjustment forms a crucial step in maintaining a properly functioning Zippo lighter.
- Impact on Flame Size
Wick height directly correlates with flame size. A higher wick results in a larger flame, while a lower wick produces a smaller flame. Consider a scenario requiring a larger flame for lighting a campfire versus a smaller flame for lighting a cigarette. Adjusting the wick height caters to these specific needs, highlighting its practical importance.
- Fuel Efficiency Considerations
Wick height significantly influences fuel consumption. An excessively high wick draws up more fuel than necessary, leading to rapid depletion and potential spillage. Conversely, a wick set too low may struggle to draw sufficient fuel, resulting in a weak flame or failure to ignite. Finding the optimal height maximizes fuel efficiency and extends the time between refills.
- Sooting and Cleanliness
An improperly adjusted wick height can contribute to sooting. A wick that is too high often produces a yellow, sooty flame, leaving black residue on the lighter and surrounding surfaces. Correct wick height minimizes soot formation, maintaining the lighter’s cleanliness and preventing clogging of the wick and surrounding components.
- Role in Ignition Reliability
Wick height plays a crucial role in ignition reliability. A wick set too low might not catch the spark from the flint wheel, leading to ignition failures. Proper height ensures the wick is readily accessible to the spark, promoting consistent and reliable ignition. This aspect is fundamental to the lighter’s core functionality.
In conclusion, adjusting the wick height forms an integral part of “how to fix the wick in a zippo.” This seemingly minor adjustment significantly impacts flame size, fuel efficiency, cleanliness, and ignition reliability. Mastering this step contributes to optimal lighter performance and longevity, demonstrating its importance in overall lighter maintenance.
5. Reassemble the lighter.
Reassembling the Zippo lighter correctly after wick maintenance is the crucial final step in “how to fix the wick in a zippo.” This seemingly straightforward process directly impacts the lighter’s functionality and long-term reliability. Failure to correctly reassemble the components can negate the prior efforts invested in wick repair or replacement. For example, an improperly seated insert can lead to fuel leaks, while an incorrectly positioned flint spring can result in ignition failures. The reassembly process, therefore, is not merely a concluding step, but an integral part of the overall wick fixing procedure. Its proper execution ensures the efficacy of the preceding steps and restores the lighter to full working order.
Practical considerations during reassembly include ensuring the insert sits flush within the casing, preventing fuel evaporation and ensuring smooth operation of the lid. The flint spring must be correctly positioned to engage the flint wheel effectively. Furthermore, care should be taken to avoid pinching the wick between the insert and the casing, which can obstruct fuel flow and hinder ignition. A methodical approach, verifying the placement of each component, ensures the lighter functions as intended after maintenance. Overlooking these details can lead to frustrating malfunctions and negate the benefits of the wick repair. For instance, a misaligned flint spring can result in repeated sparking failures, rendering the lighter unusable despite a perfectly trimmed wick. Therefore, meticulous reassembly is essential for achieving the desired outcome: a reliably functioning lighter.
In summary, the process of reassembling the lighter after wick maintenance forms an inseparable part of “how to fix the wick in a zippo.” Its significance lies not just in concluding the procedure, but in ensuring the effectiveness of the wick adjustments. Correct reassembly safeguards against fuel leaks, ignition problems, and other malfunctions, directly impacting the lighter’s reliability and longevity. This final step, executed with precision and care, ultimately determines the success of the entire wick fixing endeavor.
Frequently Asked Questions
This section addresses common queries regarding Zippo wick maintenance, providing concise and informative responses to facilitate effective troubleshooting and ensure optimal lighter performance.
Question 1: How often should one replace a Zippo wick?
Wick replacement frequency depends on usage. Generally, replacement is necessary when the wick becomes too short to trim, excessively frayed, or fails to draw fuel effectively. Regular inspection helps determine the need for replacement.
Question 2: Can any type of wick be used in a Zippo lighter?
While some alternatives exist, genuine Zippo wicks or those specifically designed for Zippo lighters are recommended. Using incompatible wicks can negatively impact performance and potentially damage the lighter.
Question 3: Why is the flame sooty even after trimming the wick?
Excessive sooting can indicate several issues beyond a frayed wick, such as contaminated fuel, a clogged chimney, or improper wick height. Addressing these potential causes ensures a clean burn.
Question 4: What causes the wick to become charred quickly?
Rapid charring often results from over-trimming, using low-quality fuel, or a malfunctioning flint wheel causing excessive sparking. Addressing these underlying issues prolongs wick lifespan.
Question 5: How can one prevent the wick from drying out?
Ensuring the lighter remains adequately fueled prevents wick drying. Regularly filling the lighter keeps the wick saturated and ready for use. Storing the lighter in a cool, dry place also helps preserve fuel and wick integrity.
Question 6: Is it necessary to replace the felt pad when replacing the wick?
While not always mandatory, replacing the felt pad simultaneously with the wick is often advisable. This ensures optimal fuel retention and prevents leaks, maximizing lighter performance.
Addressing these common concerns provides a comprehensive understanding of Zippo wick maintenance, facilitating effective troubleshooting and ensuring long-lasting lighter performance.
The following section delves into advanced troubleshooting techniques for more complex wick-related issues.
Conclusion
Proper wick maintenance is essential for optimal Zippo lighter function. This exploration has detailed the process of addressing wick-related issues, from identifying the need for adjustment or replacement to the intricacies of reassembly. Key aspects highlighted include the importance of using appropriate tools, exercising precision during trimming and adjustment, and understanding the impact of wick height on flame characteristics and fuel efficiency. Regular maintenance, as outlined, ensures reliable ignition, consistent flame performance, and extended lighter lifespan.
The seemingly simple act of maintaining a Zippo wick reflects a broader commitment to preserving functionality and appreciating the craftsmanship inherent in this iconic lighter. Through diligent care and attention to detail, one ensures not only a reliable flame but also the enduring legacy of a timeless design. Continued exploration of proper maintenance techniques further empowers users to sustain the performance and longevity of their Zippo lighters.


