The process of replacing a worn lighter wick involves removing the old wick and inserting a new one, typically made of cotton, to ensure proper fuel delivery and a consistent flame. This maintenance procedure is essential for any refillable lighter using a wick-based fuel delivery system.
Regular replacement of the wick contributes significantly to a lighter’s longevity and optimal performance. A fresh wick absorbs fuel efficiently, producing a clean, strong flame, while a deteriorated wick can lead to a weak, flickering flame or no flame at all. Historically, maintaining a lighter’s functionality has been crucial, particularly in situations where producing a flame reliably is essential, from lighting cigarettes and cigars to starting campfires. This underscores the importance of understanding this simple yet essential maintenance procedure.
This article will delve into the specific steps required to perform this replacement procedure effectively, providing clear instructions and highlighting potential troubleshooting tips.
Tips for Wick Replacement
The following tips provide guidance for a smooth and successful wick replacement process.
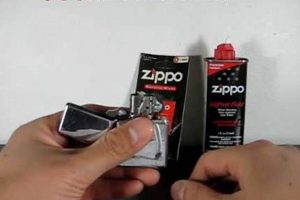
Tip 1: Gather necessary materials. This includes a fresh wick, tweezers or small pliers, and a small flathead screwdriver (if required for lighter disassembly). Having these items readily available streamlines the process.
Tip 2: Work in a well-lit area. Adequate lighting ensures clear visibility of the wick and internal lighter components, promoting precision and minimizing errors.
Tip 3: Exercise caution when handling the lighter insert. Avoid applying excessive force, which could damage internal components. Gentle, deliberate movements are recommended.
Tip 4: Trim the new wick to the correct length. The wick should extend slightly above the chimney but not so high that it interferes with the lid closure.
Tip 5: Ensure proper wick placement. The wick should be threaded through the felt pad and rest at the bottom of the lighter insert, making contact with the flint wheel.
Tip 6: Saturate the new wick with lighter fluid after installation. This primes the wick and allows for immediate functionality.
Tip 7: Test the lighter after reassembly. Confirm proper ignition and flame height. Adjustments may be necessary if the flame is too high or too low.
Adhering to these tips ensures a successful wick replacement, extending the life and reliable operation of the lighter.
By following these steps, users can maintain their lighters effectively, contributing to long-term functionality and reliable flame production.
1. Remove insert.
Accessing and replacing the wick necessitates removing the internal assembly, commonly referred to as the insert, from the Zippo lighter casing. This initial step is crucial for successful wick replacement, providing access to the internal components requiring maintenance.
- Accessing Internal Components
Removing the insert exposes the wick, flint, and packing material, enabling direct interaction with these elements. This access is fundamental to replacing the wick and performing other maintenance tasks.
- Protecting the Casing
Separating the insert safeguards the external casing from potential fuel spills or damage during the wick replacement process. This preservation maintains the lighter’s aesthetic value and structural integrity.
- Facilitating Wick Manipulation
With the insert removed, the wick can be easily manipulated, allowing for straightforward removal of the old wick and insertion of the new one. This ease of access simplifies the replacement procedure.
- Ensuring Proper Reassembly
The removal process also familiarizes the user with the insert’s proper placement within the casing, contributing to correct reassembly following wick replacement. This familiarity minimizes potential complications during the reassembly process.
Removing the insert is therefore not merely a preliminary step, but an integral part of the wick replacement process. It ensures access, protects the lighter casing, facilitates wick manipulation, and promotes correct reassembly. Proper execution of this step contributes significantly to the overall success of maintaining a functional Zippo lighter.
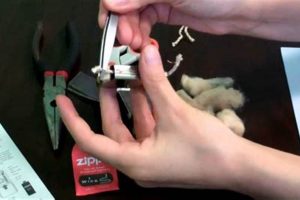
2. Extract old wick.
Extracting the old wick is a critical stage in the process of replacing a Zippo lighter wick. The deteriorated wick, often blackened from use, must be completely removed to ensure the new wick functions correctly. Failure to remove the old wick completely can obstruct fuel flow to the new wick, resulting in a weak flame or no flame at all. This step is analogous to replacing a clogged fuel filter in an engine the old, ineffective component must be removed for the new one to perform its intended function. A common issue encountered during this process is the wick becoming fragmented within the lighter insert. Using appropriate tools, such as tweezers, helps to grip and remove all remnants effectively.
The significance of complete wick extraction becomes apparent when considering the mechanics of a Zippo lighter. The wick acts as a conduit, drawing fuel from the cotton packing to the flint wheel, where it ignites. A partially removed, fragmented, or clogged wick disrupts this fuel flow, hindering the lighter’s functionality. For instance, an improperly extracted wick can leave residue that interferes with the new wick’s capillary action, its ability to draw fuel upwards. This can lead to inconsistent burning or even prevent the lighter from lighting altogether. The practical implication of this understanding lies in the ability to maintain a consistently functional lighter. Complete extraction contributes directly to reliable ignition and a strong, consistent flame.
Complete removal of the old wick is essential for optimal lighter performance following a wick change. This procedure ensures unobstructed fuel flow to the new wick, promoting reliable ignition and a consistent flame. While minor challenges like wick fragmentation may arise, utilizing appropriate tools facilitates thorough extraction, ultimately contributing to the lighter’s long-term functionality.
3. Insert new wick.
Inserting a new wick is the core component of the wick replacement process in a Zippo lighter. This action directly replaces the worn, fuel-saturated wick with a fresh length of wicking material, typically cotton. The cause-and-effect relationship is straightforward: the insertion of a new wick restores the lighter’s capacity to draw fuel effectively, enabling reliable ignition and a consistent flame. Without this crucial step, the lighter remains non-functional. Consider a kerosene lamp; without a fresh wick, the fuel cannot reach the flame. Similarly, a Zippo lighter requires a new wick to deliver fuel to the flint wheel for ignition.
The new wick must be correctly positioned within the lighter insert. It should be threaded through the felt pad, ensuring sufficient material extends to contact the flint wheel while leaving an appropriate length protruding above the chimney. Practical examples illustrating the importance of correct insertion include ensuring the wick doesn’t impede the flint wheel’s rotation or prevent the lighter from closing properly. An improperly inserted wick can lead to fuel leakage, inconsistent flame height, or difficulty igniting the lighter. A properly inserted wick, conversely, facilitates efficient fuel delivery, resulting in a consistent and reliable flame.
Understanding the importance of proper wick insertion translates directly to the practical application of maintaining a functional Zippo lighter. This seemingly simple act is the linchpin of the entire replacement process. Correct insertion, combined with other necessary steps, ensures the lighter performs as intended. Challenges may include manipulating the wick within the confined space of the insert, but using tweezers or small pliers aids accurate placement and minimizes frustration. Ultimately, correct wick insertion restores the lighter’s functionality, demonstrating the practical significance of this essential maintenance procedure.
4. Trim wick.
Trimming the wick is an essential step in the Zippo lighter maintenance process, directly linked to the overall wick replacement procedure. The length of the wick directly influences flame height and fuel consumption. An excessively long wick produces a large, sooty flame and depletes fuel rapidly. Conversely, a wick that is too short may not ignite reliably or produce a flame at all. This cause-and-effect relationship underscores the importance of trimming the wick to the correct length, ensuring optimal lighter performance. Consider a candle wickif too long, it produces a large, unsteady flame; if too short, the flame may extinguish. The same principle applies to a Zippo lighter wick.
The practical implications of proper wick trimming extend beyond flame height and fuel efficiency. A correctly trimmed wick also ensures the lighter closes properly. An overlong wick can prevent the lid from sealing completely, leading to fuel evaporation and potential fire hazards. Furthermore, proper trimming prevents the wick from interfering with the flint wheel mechanism, ensuring reliable sparking. Practical examples include observing the flame height after trimming, verifying smooth lid closure, and confirming consistent sparking. These checks demonstrate the tangible benefits of accurate wick trimming.
Proper wick trimming, a seemingly minor detail, plays a significant role in maintaining a functional Zippo lighter. This step directly influences flame height, fuel consumption, and the lighter’s ability to close securely. Challenges may include achieving the ideal wick length, but careful observation and minor adjustments ensure optimal performance. Ultimately, understanding the importance of wick trimming translates to a practical skill that contributes to the lighter’s longevity and reliable operation. This reinforces the significance of seemingly small details within the broader context of lighter maintenance.
5. Reassemble lighter.
Reassembling the lighter is the final step in the wick replacement process, signifying the completion of essential maintenance and the restoration of the lighter to its functional state. This procedure, while seemingly straightforward, holds significant importance as it directly impacts the lighter’s performance and longevity. Incorrect reassembly can negate the benefits of a new wick, leading to malfunctions, fuel leaks, and potential safety hazards. Therefore, careful attention to detail during reassembly is paramount.
- Ensuring Proper Component Placement
Correct placement of the insert within the casing is crucial for proper functionality. The insert houses the freshly replaced wick, and its proper alignment ensures the flint wheel engages correctly and the lid closes securely. Misalignment can lead to friction, hindering the flint wheel’s rotation and impeding spark generation. For example, an improperly seated insert can prevent the cam spring from functioning correctly, leading to difficulties in opening and closing the lighter.
- Securing the Lighter Casing
The casing protects the internal components and provides a housing for the fuel reservoir. Securely closing the casing prevents fuel evaporation and safeguards against accidental ignition. A loose casing can also allow dust and debris to enter the lighter, potentially affecting the wick and flint mechanism. Similar to a car’s engine cover, the Zippo casing protects vital internal components from external elements and damage.
- Verifying Functionality
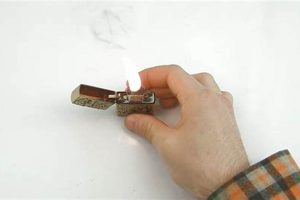
Following reassembly, testing the lighter verifies the success of the wick replacement and the reassembly process. This involves opening the lid, spinning the flint wheel, and observing the flame. A strong, consistent flame indicates a successful procedure. Conversely, a weak flame, inconsistent sparking, or fuel leakage suggests an issue with either the wick replacement or the reassembly. This test is analogous to a systems check in a vehicle, confirming all components are functioning harmoniously.
- Maintaining Longevity
Proper reassembly contributes to the lighter’s longevity by protecting internal components from damage and wear. A correctly assembled lighter minimizes friction between moving parts, reducing wear and tear on the flint wheel, cam spring, and other internal mechanisms. This proactive maintenance, akin to regular oil changes in a vehicle, extends the lighter’s operational lifespan.
Reassembling the lighter, while the final step, is integral to the overall success of changing the wick. Each component plays a vital role in restoring the lighter’s functionality and ensuring long-term reliability. Attention to detail during this stage maximizes the benefits of the new wick, contributing to a consistently functional and durable lighter. Neglecting this final stage can compromise the entire process, highlighting the interconnectedness of each step in maintaining a Zippo lighter.
Frequently Asked Questions
This section addresses common inquiries regarding Zippo wick replacement, offering concise and informative responses to facilitate a comprehensive understanding of the process.
Question 1: How often should a Zippo wick be replaced?
Wick replacement frequency depends on usage. Heavier usage necessitates more frequent changes. A general guideline is to replace the wick when the flame becomes weak, inconsistent, or produces excessive soot, or when the wick appears significantly charred.
Question 2: What type of wick is recommended for a Zippo lighter?
Authentic Zippo wicks are recommended for optimal performance. These wicks are specifically designed for Zippo lighters and ensure proper fuel flow and consistent burning. Using alternative materials may compromise functionality.
Question 3: What tools are required for wick replacement?
Essential tools include tweezers or small pliers for gripping and manipulating the wick. A small flathead screwdriver may be necessary for certain lighter models. These tools facilitate safe and efficient wick replacement.
Question 4: How can one determine the correct wick length?
The wick should extend slightly above the chimney, allowing for proper ignition. It should not be so long as to impede lid closure or interfere with the flint wheel. Trimming to the correct length ensures optimal flame height and fuel efficiency.
Question 5: What are common issues encountered during wick replacement?
Common challenges include difficulty extracting the old wick, especially if fragmented. Ensuring complete removal is crucial. Another potential issue is inserting the new wick correctly through the felt pad. Patience and precision mitigate these challenges.
Question 6: How can one confirm successful wick replacement?
Following reassembly, testing the lighter confirms successful replacement. A strong, consistent flame and smooth lid closure indicate proper installation. Any issues with ignition or flame height suggest the need for further adjustment.
Understanding these frequently asked questions contributes to a smoother, more successful wick replacement experience. Addressing potential challenges proactively ensures optimal lighter functionality and longevity.
The following section provides step-by-step instructions, enhancing the practical application of the knowledge gained from these FAQs.
Changing a Zippo Wick
This exploration of Zippo wick replacement has detailed the necessary procedures, from extracting the old wick to inserting and trimming the new one, culminating in the lighter’s reassembly. Emphasis has been placed on the interconnectedness of each step, highlighting the importance of precision and attention to detail. The significance of using appropriate tools and understanding the function of each component has been underscored. Frequently asked questions have addressed common challenges and provided practical solutions for ensuring successful wick replacement.
Maintaining a Zippo lighter, exemplified by the wick replacement process, demonstrates a commitment to functionality and longevity. This seemingly simple act of maintenance underscores the value of understanding the mechanics of everyday objects. Through proper care and attention, a Zippo lighter can provide reliable service for years to come, solidifying its status as a timeless and dependable tool.


