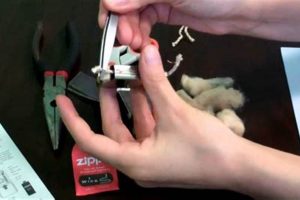
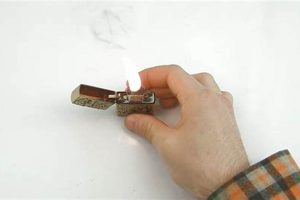
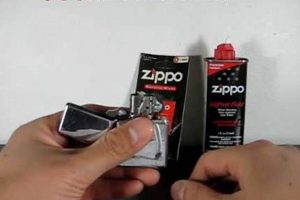
The process of installing a new wick in a Zippo-style lighter involves removing the old, deteriorated wick and inserting a fresh one, ensuring proper fuel flow and a consistent flame. This typically includes extracting the lighter insert from the case, carefully pulling the old wick out using pliers or tweezers, and threading the new wick through the felt pad and flint tube, trimming the excess material.
Maintaining a functional wick is vital for the lighter’s performance. A fresh wick ensures reliable ignition, prevents fuel leaks, and contributes to a clean, even burn. Historically, wicks have been essential components of fire-starting devices, evolving from simple twisted fibers to the more complex, woven materials used in modern lighters. Their consistent performance is crucial for the dependable operation of these everyday tools.
The following sections will detail the necessary tools, materials, and step-by-step instructions to execute this procedure effectively and safely.
Tips for Zippo Wick Replacement
Proper wick replacement ensures optimal lighter function. Attention to detail during this process prevents damage and maximizes the lifespan of the lighter.
Tip 1: Gather necessary materials. This includes a fresh Zippo wick, tweezers or small pliers, a small flathead screwdriver (optional), and a clean work surface.
Tip 2: Remove the insert unit. Firmly grasp the lighter case and pull the insert unit out. Avoid using excessive force.
Tip 3: Extract the old wick. Use tweezers or pliers to carefully grasp the charred end of the old wick and gently pull it upwards. Avoid pulling too hard, which could damage the rayon balls.
Tip 4: Thread the new wick. Insert the fresh wick through the flint tube and feed it down through the felt pad, ensuring it extends slightly at the bottom.
Tip 5: Pack the rayon balls. If the rayon balls have become loose, repack them around the wick using the flathead screwdriver or a similar tool. Ensure proper density for optimal fuel flow.
Tip 6: Trim the wick. Cut the wick at the top so it sits just below the chimney, allowing sufficient exposure for ignition. Avoid cutting the wick too short.
Tip 7: Reassemble the lighter. Slide the insert unit back into the case, ensuring it fits snugly.
Tip 8: Test the lighter. Add lighter fluid, allow the wick to saturate, and test the ignition. If issues persist, re-examine the wick installation.
Careful execution of these steps ensures a smooth and effective wick replacement, contributing to a consistently reliable lighter operation.
By understanding these essential tips, one can perform the replacement efficiently and safely, maintaining the lighters functionality for extended use.
1. Remove the insert.
Wick replacement necessitates accessing the lighter’s internal components. Removing the insert, the self-contained unit holding the wick, fuel, and flint assembly, represents the crucial initial step in this process. This action provides the necessary access for subsequent steps.
- Accessing the Wick
The insert’s removal exposes the wick, enabling its extraction and replacement. Without this access, manipulation of the wick becomes impossible. This initial action sets the stage for the core task of wick replacement.
- Protecting the Case
Separating the insert safeguards the lighter’s outer casing from potential fuel spillage or damage during the wick replacement process. This precautionary measure preserves the lighter’s aesthetic and structural integrity.
- Handling the Insert
The detached insert allows for easier and more precise manipulation during wick replacement. Handling the smaller, lighter unit simplifies the delicate process of threading the new wick and packing the rayon balls.
- Observing Internal Components
Removal of the insert offers an opportunity to inspect other components, such as the flint wheel and rayon balls, for wear or damage. This allows for proactive maintenance and potential replacement of other parts as needed.
Successfully removing the insert establishes the foundation for a streamlined wick replacement process. This essential first step facilitates access, protects the lighter’s exterior, and provides a clear view of the internal components. Failure to properly remove the insert can impede subsequent steps, potentially leading to damage or improper wick installation.
2. Extract old wick.
Old wick extraction represents a critical stage in Zippo lighter maintenance. A deteriorated wick impedes optimal lighter function, leading to inconsistent flames, fuel leakage, and difficulty igniting. Therefore, removal of the spent wick is a prerequisite for installing a fresh one, restoring the lighter to proper working order. A charred, brittle wick, for instance, restricts fuel flow, resulting in a weak, sputtering flame. Extracting this wick paves the way for a new wick to draw fuel effectively.
The process of extracting the old wick requires precision and care. Pulling too forcefully can dislodge or damage the rayon balls surrounding the wick, which are crucial for fuel retention. Employing appropriate tools, such as tweezers or needle-nose pliers, allows for controlled removal, minimizing the risk of disturbing these essential components. Furthermore, careful extraction prevents damage to the flint tube, preserving the lighter’s sparking mechanism. For example, using tweezers to gently grasp and pull the exposed end of the wick minimizes the risk of dislodging the rayon balls.
Successful old wick extraction lays the groundwork for subsequent steps in the replacement process. It allows for proper insertion and positioning of the new wick within the lighter’s mechanism, ensuring optimal fuel flow and a consistent flame. Failure to extract the old wick completely can hinder the performance of the new wick, leading to similar issues as the deteriorated one. This step, though seemingly simple, is fundamental to the overall success of the wick replacement procedure and the continued reliability of the lighter.
3. Insert new wick.
Insertion of the new wick constitutes the core of the Zippo lighter wick replacement process. This action directly addresses the original issue of a deteriorated wick, restoring the lighter’s functionality. Proper wick insertion ensures consistent fuel flow to the flame, facilitating reliable ignition and a steady burn. The following facets illuminate the key aspects of this crucial step.
- Threading the Wick
Threading the new wick correctly through the flint tube and felt pad ensures proper fuel delivery. The wick acts as a conduit, drawing fuel from the reservoir to the tip for ignition. Incorrect threading can impede fuel flow, resulting in a weak flame or failure to ignite. For example, if the wick is not threaded completely through the felt pad, it may not absorb sufficient fuel.
- Positioning the Wick
Precise wick positioning within the lighter’s mechanism is crucial for optimal performance. The wick should extend slightly beyond the bottom of the insert to ensure contact with the fuel reservoir. Furthermore, the wick’s position relative to the flint wheel influences spark efficiency. Improper positioning can lead to ignition failures or inconsistent flames. For instance, a wick positioned too far from the flint wheel may not ignite reliably.
- Material Considerations
Using a genuine Zippo wick is recommended for optimal performance and compatibility. These wicks are designed specifically for Zippo lighters, ensuring proper fuel flow and burn characteristics. Substitute materials may not absorb fuel efficiently or withstand the heat generated during ignition, potentially leading to malfunctions or damage. An example of this is using a cotton wick which, while absorbent, burns too quickly and produces excessive ash.
- Handling the Wick
Careful handling of the new wick prevents damage and ensures proper installation. Avoid bending or kinking the wick, as this can restrict fuel flow. Using tweezers or needle-nose pliers aids in precise placement and prevents contamination from oils or dirt on fingers. Contaminated wicks can affect fuel flow and burn quality. For example, handling the wick with oily fingers can clog the wick’s pores and hinder fuel absorption.
Accurate wick insertion, encompassing precise threading, proper positioning, appropriate materials, and careful handling, directly impacts the lighter’s functionality. Correct execution of this stage restores the lighter’s ability to produce a consistent flame, fulfilling the primary objective of the wick replacement process. Failure at this stage negates previous efforts and necessitates repeating the procedure.
4. Trim wick properly.
Proper wick trimming represents a crucial final step in Zippo lighter wick replacement. This seemingly minor action significantly impacts the lighter’s functionality, influencing flame height, fuel consumption, and overall performance. Trimming establishes the correct length of exposed wick, optimizing the balance between fuel delivery and ignition. An improperly trimmed wick, whether too long or too short, directly affects the lighter’s ability to produce a consistent, usable flame. This connection between wick trimming and successful lighter operation underscores the importance of this often-overlooked detail.
A wick trimmed too long results in an excessively high flame, increasing fuel consumption and posing a safety hazard. The extended wick draws up more fuel than necessary, leading to rapid depletion of the fuel reservoir. Moreover, a large flame increases the risk of accidental burns or ignition of nearby materials. Conversely, a wick trimmed too short may prevent the lighter from igniting altogether. Insufficient wick exposure limits fuel access to the spark, hindering the ignition process. Even if ignition occurs, the flame may be too small for practical use. For example, attempting to light a cigarette with a minimally exposed wick proves difficult and inefficient. These examples illustrate the direct impact of wick trimming on practical lighter functionality.
Achieving the correct wick trim length requires precision and attention to detail. The wick should be trimmed flush with the top of the chimney, ensuring sufficient exposure for ignition while mitigating the risks associated with an overly long wick. This balance optimizes both performance and safety. Furthermore, using sharp scissors or clippers ensures a clean cut, preventing frayed wick fibers which can impede fuel flow. Proper wick trimming, therefore, constitutes a critical component of successful wick replacement, directly impacting the lighter’s reliability and longevity. This final step completes the process, transforming a lighter with a spent wick into a fully functional tool.
5. Reassemble lighter.
Reassembling the Zippo lighter after wick replacement constitutes the final step in restoring the device to working order. This process, though seemingly simple, plays a critical role in the overall success of the wick replacement procedure. Proper reassembly ensures the secure and correct placement of the insert within the case, allowing for the intended interaction between the various components and facilitating proper fuel containment. Failure to correctly reassemble the lighter can negate the preceding efforts of wick replacement, rendering the lighter non-functional.
- Securing the Insert
The insert must be firmly seated within the case to prevent movement or dislodgment during use. A loose insert can disrupt fuel flow, impede ignition, and potentially lead to fuel leakage. Secure placement ensures the consistent delivery of fuel to the wick and maintains the integrity of the lighter’s sealed environment. For example, an improperly seated insert can cause the flint wheel to rub against the case, hindering spark generation.
- Aligning Components
Correct alignment of the insert within the case ensures proper interaction between the various components, such as the flint wheel, chimney, and wick. Misalignment can obstruct the sparking mechanism, restrict airflow, or prevent the wick from contacting the flint, all of which impede lighter function. For instance, a misaligned chimney can obstruct airflow, leading to an inefficient burn.
- Preventing Fuel Leakage
Proper reassembly seals the lighter, preventing fuel evaporation and leakage. A secure fit between the insert and case ensures the integrity of the fuel reservoir, maximizing the time between refills and preventing unwanted fuel spillage. Leaking fuel can damage the lighter’s finish and pose a fire hazard. For example, a loose-fitting insert can allow fuel to seep out, especially when the lighter is stored horizontally.
- Restoring Functionality
Reassembly signifies the culmination of the wick replacement process, marking the transition from a disassembled state to a functional lighter. This final action restores the lighter’s intended purpose: to provide a reliable source of ignition. The reassembled lighter, now equipped with a fresh wick, stands ready for use. For instance, after proper reassembly, the lighter should produce a consistent flame upon striking the flint wheel.
Correct reassembly, therefore, plays a pivotal role in the success of the “how to replace a wick in a Zippo lighter” process. This final step ensures the seamless integration of the new wick within the lighter’s mechanism, restoring full functionality and guaranteeing reliable performance. The now-functional lighter, ready for use, demonstrates the practical value of precise reassembly following wick replacement. This concluding action underscores the interconnectedness of each step in the process, highlighting the importance of attention to detail throughout the procedure.
Frequently Asked Questions
This section addresses common inquiries regarding Zippo lighter wick replacement, providing concise and informative responses to facilitate a comprehensive understanding of the process.
Question 1: What type of wick should be used in a Zippo lighter?
Genuine Zippo wicks are recommended for optimal performance and compatibility. They are specifically designed for Zippo lighters, ensuring proper fuel flow and burn characteristics.
Question 2: How often should the wick be replaced?
Wick replacement frequency depends on usage. Generally, replacement is necessary when the flame becomes weak, inconsistent, or difficult to ignite. A heavily charred or brittle wick indicates a need for replacement.
Question 3: Can any type of tweezers or pliers be used for wick extraction?
While various tools can be used, fine-tipped tweezers or needle-nose pliers offer the best control and minimize the risk of damaging internal components.
Question 4: What happens if the rayon balls become dislodged during wick replacement?
Dislodged rayon balls should be carefully repacked around the new wick using a small flathead screwdriver or similar tool. Proper packing ensures optimal fuel retention.
Question 5: How can one determine the correct wick trimming length?
The wick should be trimmed flush with the top of the chimney, ensuring adequate exposure for ignition while preventing an excessively high flame.
Question 6: What should be done if the lighter still malfunctions after wick replacement?
If problems persist, re-examine the wick installation, ensuring proper threading, positioning, and trimming. Inspect other components, such as the flint and fuel supply, for potential issues. If the problem persists, consult Zippo’s official resources or a qualified repair professional.
Addressing these frequently asked questions aims to clarify common uncertainties associated with Zippo wick replacement. Proper understanding of these aspects contributes to a smoother, more successful outcome.
The subsequent section will offer additional tips and troubleshooting advice for addressing potential challenges encountered during the wick replacement process.
Conclusion
Successful wick replacement in a Zippo lighter hinges upon a methodical approach, emphasizing precision and attention to detail. From initial insert removal to final reassembly, each step contributes to the overall success of the procedure. Proper wick threading, positioning, and trimming ensure optimal fuel delivery and a consistent flame. Careful handling of components minimizes the risk of damage and preserves the lighter’s longevity. Understanding the nuances of each stage, from extracting the old wick to securing the new one, empowers individuals to maintain their lighters effectively, ensuring reliable performance.
Mastery of this seemingly simple yet crucial maintenance task contributes to the extended lifespan and consistent functionality of these iconic lighters. Regular maintenance, including timely wick replacement, allows these tools to continue serving their intended purpose reliably. Diligence in preserving these mechanisms ensures their continued utility for years to come.


