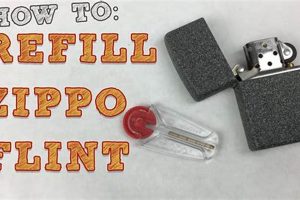
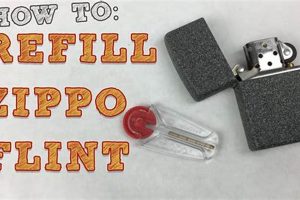
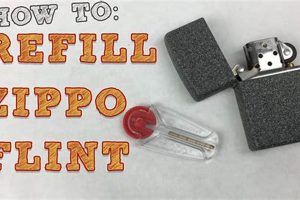
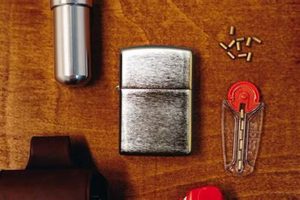
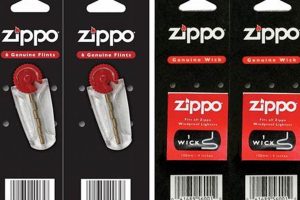
Replacing the ignition source in a Zippo-style lighter involves accessing the flint tube located within the lighter casing. This is typically achieved by removing the lighter’s insert from its outer shell. The spent piece is then removed from the tube, often with a small screwdriver or similar tool, and a fresh one inserted. The retaining spring is then carefully repositioned, ensuring it secures the new piece in place.
Maintaining a functional lighter relies on this readily replaceable component. Without a proper spark, the lighter becomes unusable. This small, hardened metal rod, struck against the lighter’s wheel, creates the necessary spark to ignite the lighter fluid. The ease of replacement contributes to the longevity and practicality of these lighters, a design feature that has remained largely unchanged since their inception.
The following sections will detail the process with step-by-step instructions, accompanied by visual aids for clarity. Further information regarding troubleshooting common issues and selecting appropriate replacement components will also be provided.
Tips for Flint Replacement
Ensuring proper function requires attention to detail during flint replacement. These tips offer guidance for a smooth, trouble-free process.
Tip 1: Use the correct replacement component. Genuine Zippo flints are recommended for optimal performance and longevity. Using substandard materials can lead to premature wear and inconsistent sparking.
Tip 2: Exercise caution when removing the insert. The insert should slide out easily; excessive force may damage the lighter.
Tip 3: Keep track of the small screw. This screw secures the flint spring and can be easily lost during replacement. Working over a surface that will help contain small parts is recommended.
Tip 4: Ensure the new piece is firmly seated within the flint tube before replacing the spring. This ensures consistent sparking and prevents the piece from shifting during use.
Tip 5: Do not overtighten the screw. Overtightening can damage the threading or the spring itself. Snug but not overly tight is the ideal setting.
Tip 6: Test the lighter after replacement. Several test sparks confirm proper installation and function. If the lighter does not spark consistently, re-examine the and spring assembly.
Tip 7: Store replacement flints in a dry, secure location. Exposure to moisture can degrade the flint’s effectiveness over time.
Adhering to these guidelines ensures consistent performance and extends the lifespan of the lighter. Careful handling and the use of proper materials are key to a successful flint replacement process.
By understanding the mechanism and following these practical tips, one can maintain a Zippo-style lighter in optimal working order for years to come.
1. Access the flint tube.
Accessing the flint tube is the foundational step in replacing a Zippo lighter’s flint. Without proper access to this component, replacement is impossible. This process initiates the entire refilling procedure and requires a clear understanding of the lighter’s construction.
- Removing the Lighter Insert
The flint tube is housed within the lighter insert. To access it, the insert must be carefully removed from the outer casing. This typically involves gripping the lighter’s bottom and pulling the insert upward. Variations may exist depending on the specific lighter model, but the general principle remains consistent. Failure to remove the insert properly can hinder access to the flint tube and potentially damage the lighter.
- Locating the Flint Tube
Once the insert is removed, the flint tube becomes visible. It is a small, cylindrical component typically located at the bottom of the insert. Its precise location can vary slightly based on the lighter model. Correct identification of the flint tube is essential for proceeding with the replacement process.
- Understanding the Mechanism
The flint tube houses the flint, spring, and retaining screw. The spring applies pressure to the flint, ensuring consistent contact with the striker wheel. The screw secures the spring and flint within the tube. Understanding this mechanism is crucial for proper disassembly and reassembly during flint replacement.
- Handling the Components
Care must be taken when handling the components of the flint tube assembly. The screw is small and can be easily lost. The spring requires delicate handling to avoid damage or misplacement. Maintaining control of these small components is vital for successful flint replacement.
Successfully accessing the flint tube establishes the groundwork for proper flint replacement. Each subsequent step hinges upon this initial action. A clear understanding of this process, coupled with careful execution, ensures a smooth and efficient flint replacement, ultimately contributing to the continued functionality of the Zippo lighter.
2. Remove old flint.
Removal of the spent flint is a necessary prerequisite within the broader process of flint replacement in a Zippo-style lighter. The spent flint, having lost its sharpness and structural integrity through use, no longer produces the spark required for ignition. Its removal, therefore, directly enables the insertion of a fresh flint, restoring the lighter’s functionality. Failure to remove the old flint prevents the new one from seating correctly within the flint tube, rendering the replacement attempt futile. For example, attempting to insert a new flint on top of an existing, worn-down flint would obstruct the spring mechanism and prevent proper sparking.
This step’s significance lies in its direct contribution to the lighter’s operational restoration. The act of removing the spent flint isn’t merely a procedural formality but a crucial element that facilitates the installation of the fresh ignition source. The practical implication of this understanding is straightforward: a new flint cannot fulfill its purpose without the prior removal of its predecessor. Consider a scenario where a user attempts to ignite a Zippo lighter repeatedly without success. If the flint is suspected as the cause, proper diagnosis and replacement, beginning with the removal of the old flint, are essential troubleshooting steps.
In conclusion, the seemingly simple act of removing the old flint represents a pivotal stage in the flint replacement process. Its successful execution is indispensable for the lighter’s continued operation, highlighting the interconnectedness of each step within the overall maintenance procedure. Difficulties encountered during removal, such as a tightly lodged flint, may necessitate the use of a small tool for extraction, reinforcing the importance of precision and appropriate tools in this process. This steps successful completion lays the groundwork for the subsequent insertion of a new flint, bringing the lighter one step closer to restored functionality.
3. Insert new flint.
Insertion of a fresh flint represents the core action within the Zippo lighter refill process. This action directly addresses the functional deficit caused by a depleted flint, effectively restoring the lighter’s ability to generate a spark. Understanding the nuances of proper flint insertion is crucial for ensuring reliable and consistent ignition. This stage follows the removal of the old flint and precedes the reassembly of the lighter’s internal components.
- Orientation and Placement
Correct orientation of the new flint within the flint tube is paramount. The flint must be inserted with the angled end facing downwards, towards the sparking wheel. This ensures proper contact between the flint and the wheel when the lighter is activated. Inserting the flint upside down will prevent spark generation. For instance, if the lighter produces a grinding sound but no spark, an incorrectly oriented flint is a likely culprit.
- Securing the Flint
Once correctly positioned, the flint must be securely held in place by the spring. This constant pressure ensures the flint remains in contact with the sparking wheel, enabling consistent spark generation. Insufficient spring pressure can lead to intermittent sparking or failure to ignite. A loose flint, for example, might rattle within the tube and produce inconsistent sparks, even if oriented correctly.
- Compatibility and Material
Using the correct type of flint is essential for optimal performance. Genuine Zippo flints, or those specifically designed for Zippo-style lighters, are recommended. Incompatibility can lead to diminished spark quality, excessive wear on the sparking wheel, or even damage to the lighter’s internal mechanisms. Using a flint of incorrect diameter, for instance, could prevent proper seating within the tube or hinder the spring’s function.
- Verification of Placement
After insertion, a visual check can confirm proper placement. The flint should be fully seated within the tube, with the spring visibly applying pressure. This simple verification step can prevent issues arising from a partially inserted or misaligned flint. For example, if a portion of the flint protrudes from the tube, it is likely not fully seated and will not function correctly.
Correct flint insertion is integral to the overall success of the Zippo lighter refill process. Each aspect, from orientation to compatibility, contributes to the restoration of the lighter’s functionality. Overlooking these details can lead to operational issues, highlighting the significance of precise execution during this critical stage. A correctly inserted flint, in conjunction with the other components, ensures the lighter performs as intended, producing a reliable spark for ignition.
4. Replace the spring.
The spring within a Zippo-style lighter plays a crucial role in the flint replacement process. This component exerts pressure on the flint, ensuring consistent contact with the sparking wheel. Replacing the spring correctly is essential for reliable spark generation and overall lighter functionality. An improperly installed or damaged spring can lead to inconsistent sparking or complete failure to ignite. This step follows the insertion of the new flint and precedes securing the flint screw.
- Spring Compression and Flint Contact
The spring’s primary function is to maintain consistent pressure against the flint. This compression ensures the flint remains in contact with the sparking wheel, even after repeated use. Adequate pressure is essential for reliable spark generation. Insufficient compression, for example, might result in intermittent sparking or a weak spark that fails to ignite the lighter fluid. Conversely, excessive compression could cause premature wear of the flint or hinder the smooth rotation of the sparking wheel.
- Proper Spring Placement and Alignment
Correct placement of the spring within the flint tube is critical for proper function. The spring must be seated correctly to exert the appropriate pressure on the flint. Misalignment can lead to uneven pressure distribution, affecting spark consistency. For instance, a tilted or off-center spring might cause the flint to contact the sparking wheel at an incorrect angle, resulting in a weak or misdirected spark.
- Spring Integrity and Durability
The spring must be in good condition to function effectively. A damaged or weakened spring may not provide sufficient pressure or could break during use. Inspecting the spring for signs of wear or damage, such as bending or corrosion, is essential. A broken spring, for example, would render the lighter unusable, requiring replacement before the lighter can function again.
- Interaction with Other Components
The spring interacts directly with the flint and indirectly with the sparking wheel. Its proper function influences the performance of these other components, highlighting the interconnectedness of the lighter’s internal mechanism. A worn spring, for example, might not only affect spark generation but could also contribute to uneven wear on the sparking wheel over time.
Proper spring replacement is therefore integral to the overall success of the flint replacement process in a Zippo-style lighter. Each aspect, from its compression to its interaction with other components, contributes to the lighter’s ability to generate a consistent and reliable spark. A correctly installed and functional spring ensures the new flint engages effectively with the sparking wheel, restoring the lighter to its intended operational state.
5. Secure the screw.
Securing the screw in a Zippo-style lighter finalizes the flint replacement process. This seemingly minor action plays a critical role in maintaining the lighter’s functionality. The screw secures the flint spring and tube, ensuring consistent pressure against the newly installed flint. This pressure is essential for reliable spark generation. Failure to secure the screw adequately can lead to a range of issues, impacting the lighter’s performance and longevity. For example, a loose screw can allow the spring and flint to dislodge, preventing spark formation or causing inconsistent ignition. Conversely, over-tightening can damage the screw, spring, or flint tube, potentially rendering the lighter unusable.
The screw’s role extends beyond simply holding components in place; it directly influences the lighter’s ability to create a spark. By maintaining appropriate pressure on the flint, the screw ensures consistent contact with the sparking wheel. This consistent contact is fundamental to the lighter’s operation. Consider a scenario where a lighter fails to ignite consistently. A loose screw, allowing the flint to shift within the tube, could be the root cause. In such cases, tightening the screw often resolves the issue, restoring reliable spark generation. This illustrates the practical significance of understanding the screw’s function within the broader context of flint replacement.
In conclusion, securing the screw is not merely the final step in the process; it is a crucial element ensuring the efficacy of the flint replacement. It directly affects the lighter’s ability to generate a spark, highlighting the interconnectedness of each component within the system. Understanding this connection emphasizes the importance of proper screw placement and tightness. This seemingly small detail has significant implications for the lighter’s overall functionality and longevity. Attention to this detail, therefore, contributes to the long-term reliable performance of the lighter.
6. Test the lighter.
Testing the lighter after flint replacement represents the crucial final step in the process. This verification stage confirms the efficacy of the entire procedure, ensuring the lighter functions as intended. Testing establishes whether the flint replacement successfully restored the lighter’s ability to generate a spark, thereby completing the maintenance cycle. Without this final validation, one cannot definitively ascertain the success of the flint replacement. A failure to test could leave a malfunction undiagnosed, rendering the lighter unusable despite the attempted repair. For example, a lighter might appear to be correctly reassembled, yet produce no spark upon testing. This could indicate an incorrectly installed flint, a damaged spring, or another issue that would remain undetected without a test.
The test itself is straightforward, involving the activation of the lighter’s sparking mechanism. This typically involves rotating the striker wheel against the flint. A successful test results in a visible spark, indicating proper flint installation and spring tension. Conversely, a lack of spark, a weak spark, or an inconsistent spark suggests an issue within the flint assembly. A grinding sound without a spark, for instance, might indicate a misaligned flint, highlighting the diagnostic value of the testing phase. This feedback allows for immediate corrective action, such as readjusting the flint or spring, ensuring the lighter’s functionality is restored before continued use.
In conclusion, testing the lighter after flint replacement serves as a critical validation step. It directly connects the procedural aspects of flint replacement to the desired outcome a functioning lighter. This seemingly simple action provides valuable feedback, allowing for immediate diagnosis and correction of potential issues. A thorough test confirms the success of the entire process, ensuring the lighter is ready for use. Omitting this final step introduces an element of uncertainty, potentially leading to future operational failures. Therefore, testing the lighter solidifies the entire flint replacement process, bridging the gap between maintenance and functionality.
Frequently Asked Questions
Addressing common queries regarding flint replacement in Zippo-style lighters ensures proper maintenance and optimal functionality. The following responses aim to clarify potential uncertainties and provide practical guidance.
Question 1: What type of flint is recommended for Zippo lighters?
Genuine Zippo flints, or those specifically designed for Zippo-style lighters, are recommended for optimal performance and longevity. Using substandard materials can lead to inconsistent sparking and premature wear of the sparking wheel.
Question 2: How often should the flint be replaced?
Flint replacement frequency depends on usage. One might typically replace a flint after several hundred ignitions or when the lighter fails to produce a consistent spark. Observing a decrease in spark quality signals the need for replacement.
Question 3: What tools are required for flint replacement?
While a small screwdriver or similar tool can assist in removing the spent flint, it is often not strictly necessary. Most Zippo-style lighters allow for flint removal by simply applying pressure to the spring and sliding out the old flint. However, a small tool can be helpful in cases where the flint is tightly lodged.
Question 4: Why does the lighter produce a grinding sound but no spark?
A grinding sound without a spark often indicates a misaligned or improperly seated flint. The flint may be upside down, preventing contact with the sparking wheel, or not fully inserted into the flint tube. Repositioning the flint typically resolves this issue.
Question 5: What can cause inconsistent sparking?
Inconsistent sparking can result from several factors, including a worn or damaged spring, a loose flint screw, or a low-quality flint. Checking the spring’s integrity and ensuring the screw is properly tightened often rectifies the problem. Replacing the flint with a genuine Zippo flint is also recommended.
Question 6: Can the flint tube itself be replaced?
While less common, the flint tube can be replaced if damaged or worn. Replacement tubes are available and can be installed with relative ease. However, this is typically only necessary in cases of significant wear or damage to the tube itself.
Understanding these common queries ensures effective maintenance and prolonged functionality of Zippo-style lighters. Proper flint replacement contributes significantly to the lighter’s reliability and lifespan.
For further assistance or specific troubleshooting guidance, consult the comprehensive Zippo lighter maintenance guide available online or through authorized retailers.
Flint Replacement in Zippo Lighters
Proper flint replacement is essential for maintaining the functionality of a Zippo-style lighter. This process involves accessing the flint tube, removing the spent flint, inserting a new flint correctly, replacing the spring, securing the screw, and testing the lighter. Each step contributes to the overall success of the procedure and ensures reliable spark generation. Using genuine Zippo flints and understanding the function of each component contributes to optimal performance and longevity. Addressing common issues, such as inconsistent sparking or a grinding sound, often involves verifying correct flint placement, spring tension, and screw tightness.
Maintaining a Zippo lighter demonstrates an appreciation for its classic design and dependable mechanism. The straightforward nature of flint replacement underscores the lighter’s enduring practicality. Through diligent maintenance and an understanding of its essential components, a Zippo lighter can provide reliable service for years to come. This seemingly simple act of replacing a flint embodies the ethos of maintaining functional objects, emphasizing the value of understanding and caring for the tools one uses.


