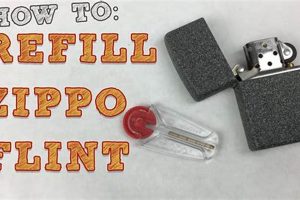
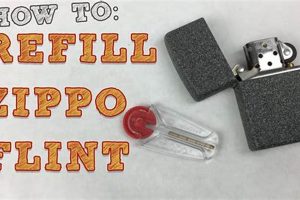
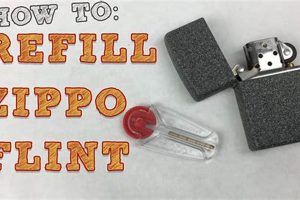
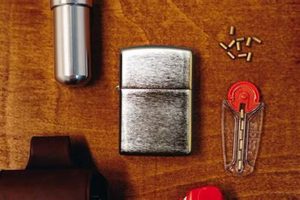
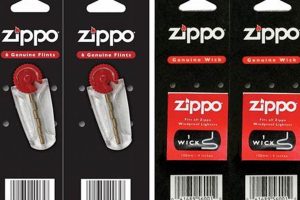
Replacing the ignition source in a Zippo lighter involves removing the insert from the case, unscrewing the flint spring screw at the bottom, and replacing the exhausted flint with a new one. A small felt pad beneath the flint should also be checked for wear and replaced if necessary. Finally, the flint spring is screwed back in, and the insert is returned to the case.
Maintaining a functional lighter is essential for reliable fire starting in various situations, from lighting cigarettes and candles to igniting campfires or stoves. The flint, a small, hard steel rod, is crucial for generating the spark that ignites the lighter fluid. Regular replacement ensures consistent sparking and prevents frustrating failures. This process, unchanged for decades, testifies to the enduring design of the Zippo lighter.
The following sections will provide a detailed, step-by-step guide to this simple yet essential maintenance procedure, covering necessary tools, proper handling techniques, and troubleshooting common issues.
Tips for Flint Replacement
Proper flint replacement ensures consistent lighter function. These tips offer guidance for a smooth, trouble-free process.
Tip 1: Use genuine Zippo flints. These are designed specifically for the lighter’s mechanism and provide optimal performance and longevity.
Tip 2: Keep the lighter upright during flint replacement to prevent losing the spring or other small components.
Tip 3: Do not overtighten the flint spring screw. This can damage the screw or the spring itself, leading to malfunctions.
Tip 4: Inspect the felt pad under the flint. A worn or damaged pad can impact spark generation and should be replaced.
Tip 5: Store replacement flints in a dry place to prevent corrosion, ensuring they are ready when needed.
Tip 6: If the lighter still does not spark after replacing the flint, check for other potential issues, such as insufficient lighter fluid or a clogged wick.
Following these guidelines ensures a straightforward flint replacement process, maintaining reliable lighter performance and extending its lifespan.
By understanding the nuances of flint replacement, users can keep their Zippo lighters functioning optimally for years to come. The final section offers concluding remarks and additional resources.
1. Remove Insert
Removal of the insert is the foundational step in replacing a Zippo lighter’s flint. The insert, containing the flint wheel, spring, and flint itself, is inaccessible while housed within the lighter’s outer case. Extracting the insert allows access to the flint screw, a critical component in the replacement process. Without removing the insert, the flint, spring, and felt pad remain concealed, preventing any maintenance. This initial action enables subsequent steps and is essential for accessing and replacing the spent flint. For example, attempting to change the flint without removing the insert would be akin to attempting to repair a car engine without opening the hood impossible and potentially damaging. The insert acts as a barrier protecting the internal components; its removal grants access to the elements requiring attention.
The insert’s design, a self-contained unit within the lighter’s casing, necessitates its removal for any internal maintenance. This design feature protects the functional elements from accidental damage and debris while facilitating easy access for replacement of consumables. The removable insert simplifies what could otherwise be a complex disassembly process, allowing users to maintain their lighters without specialized tools or technical expertise. This design element exemplifies the blend of practicality and durability characteristic of Zippo lighters.
Successful flint replacement hinges on proper insert removal. Challenges may arise if the insert is stuck due to residue buildup or deformation. In such cases, gentle pressure and appropriate tools, such as a small flathead screwdriver, may be necessary. Forcing the insert can lead to damage. Understanding the inserts role and the correct method for its removal ensures a smooth flint replacement process and preserves the lighters integrity. This fundamental step lays the groundwork for accessing and replacing the flint, ultimately ensuring continued functionality.
2. Unscrew flint screw
Accessing the replaceable flint within a Zippo lighter requires removal of the flint screw. This small screw, located at the base of the lighter insert, secures the flint spring and provides access to the spent flint. Unscrewing it is a crucial step in the flint replacement process, bridging the removal of the insert and the actual replacement of the flint. A clear understanding of this step ensures efficient and damage-free maintenance.
- Accessing the Flint Spring:
The flint screw’s primary function is to retain the flint spring, which applies pressure to the flint, ensuring consistent contact with the flint wheel. Unscrewing the flint screw releases the spring’s tension and allows access to both the spring and the flint itself. This access is essential for replacing the flint and inspecting the spring for wear or damage. Without this access, the flint would remain captive within the lighter.
- Importance of Correct Tools:
A properly sized flathead screwdriver is essential for removing the flint screw. Using an incorrect tool risks damaging the screw head, making removal difficult or impossible. This can render the lighter unusable until the damaged screw is replaced. The correct tool ensures a smooth, damage-free process, preserving the lighter’s functionality.
- Preventing Component Loss:
Unscrewing the flint screw requires careful handling. The spring, flint, and a small felt pad are under tension and can be easily ejected when the screw is fully removed. Keeping the lighter upright during this process minimizes the risk of losing these small components. Losing any of these parts necessitates replacement before the lighter can function correctly.
- Avoiding Over-tightening:
When replacing the flint screw, it’s crucial to avoid over-tightening. Excessive force can damage the screw threads, the spring, or the lighter casing. This delicate balance requires a firm yet gentle approach, ensuring secure fastening without causing damage. Over-tightening can lead to functional issues and necessitate repairs.
Successfully unscrewing and subsequently replacing the flint screw are integral parts of maintaining a Zippo lighter. These seemingly minor actions ensure the lighter remains a dependable tool. Difficulties encountered during this process often stem from using incorrect tools or applying excessive force. Adhering to the proper procedures preserves the lighter’s functionality and longevity, illustrating the significance of these small yet essential steps.
3. Replace old flint
Flint replacement represents the core of Zippo lighter maintenance. A fresh flint is essential for reliable spark generation, making this process crucial to the lighter’s functionality. Understanding the nuances of replacing the old flint ensures consistent performance. The following facets explore the components, procedures, and implications involved in this essential task.
- Identifying a Spent Flint:
A spent flint loses its sharp edges, becoming rounded and smooth. This wear reduces its ability to create friction against the flint wheel, resulting in diminished or absent sparks. Recognizing a spent flint involves visual inspection and observing the lighter’s sparking performance. Continued use of a depleted flint can lead to frustration and ultimately render the lighter inoperable until replaced. For example, a lighter failing to ignite despite ample fuel likely indicates a spent flint.
- Handling the New Flint:
New flints are small and can be easily dropped or misplaced. Careful handling is essential during the replacement process. Holding the lighter upright and using a designated flint tube or small container to store new flints can prevent loss. Maintaining an organized approach ensures smooth replacement and minimizes the risk of misplacing these essential components. For instance, dropping a new flint into grass or a cluttered workspace can make retrieval challenging.
- Proper Flint Placement:
Correct placement of the new flint is vital for proper lighter function. The flint must be positioned beneath the flint spring, ensuring adequate pressure against the flint wheel. Inserting the flint incorrectly can prevent spark generation, even with a new flint. Understanding the mechanics of the flint, spring, and wheel interaction underscores the importance of accurate placement. An improperly placed flint can lead to the same issues as a spent flint, rendering the lighter ineffective.
- Verifying Functionality:
After replacing the flint, verifying proper functionality is essential. Testing the lighter several times confirms that the new flint is correctly positioned and generating sparks consistently. This simple check avoids the inconvenience of discovering a malfunctioning lighter later. Consistent sparking confirms successful flint replacement. For instance, if the lighter still fails to ignite after replacing the flint, it indicates an issue beyond a spent flint, such as a problem with the wick or lighter fluid.
These facets collectively illustrate the significance of replacing the old flint within the broader context of Zippo lighter maintenance. Each step contributes to the lighter’s overall reliability and longevity. Mastery of these seemingly minor details ensures consistent performance and extends the lifespan of this dependable tool. Proper flint replacement, therefore, is not merely a maintenance task but a critical practice that ensures the lighter remains a reliable source of ignition.
4. Check felt pad
The felt pad, an often-overlooked component within a Zippo lighter, plays a crucial role in reliable flint performance. Checking the felt pad during flint replacement is a key aspect of proper lighter maintenance. This seemingly minor detail significantly impacts the lighter’s long-term functionality and warrants careful attention. The following facets explore the importance of checking the felt pad and its connection to successful flint replacement.
- Purpose of the Felt Pad:
The felt pad sits beneath the flint, providing a consistent, controlled feed toward the flint wheel. This regulated pressure ensures optimal contact between the flint and wheel, generating the spark required for ignition. Without the felt pad, the flint might not engage correctly with the wheel, resulting in inconsistent or absent sparks. The pad acts as a buffer and guide, facilitating the mechanical interaction necessary for spark creation. A worn or damaged pad compromises this crucial function, impacting the lighter’s reliability.
- Signs of Wear and Tear:
A worn felt pad exhibits signs of compression, fraying, or tearing. These signs indicate diminished functionality and necessitate replacement. Continued use with a worn pad can lead to inconsistent sparking, increased flint wear, and potential damage to other lighter components. Recognizing these signs is crucial for preemptive maintenance, ensuring continued lighter performance. A compressed pad, for example, may not provide adequate pressure for reliable flint-to-wheel contact.
- Impact on Flint Performance:
The felt pad directly influences flint performance. A properly functioning pad ensures consistent pressure and precise alignment of the flint against the flint wheel, optimizing spark generation. Conversely, a worn pad can cause the flint to slip, wear unevenly, or fail to engage the wheel entirely. This underscores the direct correlation between the felt pad’s condition and the lighter’s ability to produce a reliable spark. A damaged pad can lead to premature flint depletion and unreliable lighter function.
- Replacing the Felt Pad:
Replacing the felt pad is a straightforward process typically performed during flint replacement. New felt pads are readily available and easily installed. Removing the old, worn pad and replacing it with a new one ensures optimal flint performance and extends the life of the lighter. Neglecting this small but crucial step can lead to ongoing ignition issues. Similar to replacing a worn-out gear in a machine, replacing the felt pad ensures smooth and efficient operation.
Checking and replacing the felt pad, though a seemingly minor task, is integral to successful flint replacement and overall Zippo lighter maintenance. This small component significantly influences the lighter’s reliability and longevity. Understanding its role and the signs of wear empowers users to maintain their lighters effectively, ensuring consistent and dependable performance for years to come. Neglecting the felt pad, on the other hand, can compromise the entire ignition system, rendering the lighter unreliable or even unusable.
5. Tighten screw
Securing the flint spring screw after flint replacement is a seemingly minor yet crucial step in the process. This action directly impacts the lighter’s functionality and longevity. The screw’s tightness dictates the flint spring’s tension against the flint, influencing spark generation. Insufficient tightening can lead to inconsistent sparking or complete ignition failure. Conversely, over-tightening can damage the screw, spring, or lighter casing. Finding the correct balance ensures optimal performance and longevity.
This seemingly simple task has significant practical implications. A loose screw can cause the flint and spring to dislodge, rendering the lighter unusable. This can be particularly inconvenient in situations where a reliable fire source is essential. Furthermore, a loose screw can lead to excessive wear on the flint and spring, necessitating more frequent replacements. Conversely, a damaged screw due to over-tightening can require professional repair or replacement, incurring unnecessary costs and downtime. Consider a camping scenario: a loose flint screw could compromise fire starting, impacting safety and comfort. Conversely, a stripped screw head due to over-tightening could render the lighter useless in a crucial moment. These examples underscore the importance of proper screw tightening.
The act of tightening the flint screw embodies the delicate balance essential in mechanical systems. It highlights the interplay between seemingly small components and their impact on overall functionality. Mastery of this seemingly trivial task ensures the lighter’s continued reliability. Challenges arise when this balance is disrupted, whether through negligence or excessive force. Therefore, understanding the significance of proper screw tightening, coupled with careful execution, is paramount for maintaining a functional and dependable Zippo lighter.
6. Reinsert insert
Reinserting the insert represents the final step in the flint replacement process, directly impacting the Zippo lighter’s functionality and structural integrity. This action completes the maintenance procedure, restoring the lighter to its operational state. The insert, containing the newly replaced flint, spring, and felt pad, must be securely positioned within the lighter casing for proper function. Failure to correctly reinsert the insert can lead to a range of issues, from impaired ignition to potential damage of internal components.
The connection between reinserting the insert and changing the flint lies in the dependent relationship between these actions. Flint replacement necessitates removing the insert to access the flint screw. Reinserting the insert, therefore, is not merely an afterthought but a crucial final step that completes the maintenance cycle. Without correctly reinserting the insert, the flint replacement process remains incomplete, and the lighter will not function as intended. The insert’s proper placement ensures that the flint wheel, flint, and spring align correctly, enabling spark generation upon striking the wheel. Furthermore, the insert’s snug fit within the casing protects the internal components from debris and damage, maintaining the lighter’s structural integrity. For instance, a loosely inserted insert can rattle within the casing, potentially damaging internal parts and compromising the lighter’s ability to create a consistent spark.
Proper reinsertion of the insert ensures the lighter’s functionality and protects internal components, underscoring its significance in the broader context of flint replacement. This seemingly simple action completes the maintenance process and ensures the lighter’s continued reliability. Challenges may arise if the insert is not aligned correctly or if there is debris obstructing the insertion process. Careful attention to these details ensures successful reinsertion and avoids potential damage to the lighter. Understanding the integral role of reinserting the insert within the overall flint replacement process ensures successful maintenance and preserves the lighter’s longevity. This seemingly simple action contributes significantly to the lighter’s continued operation, highlighting the interconnectedness of each step in the maintenance procedure.
Frequently Asked Questions
This section addresses common inquiries regarding Zippo lighter flint replacement, providing clear and concise answers to facilitate proper maintenance and troubleshooting.
Question 1: How often should a Zippo lighter’s flint be replaced?
Flint replacement frequency depends on usage. Heavier use necessitates more frequent replacement. Generally, replacing the flint every few weeks is advisable for average use. Observing diminished spark production serves as a reliable indicator of flint depletion.
Question 2: Can any type of flint be used in a Zippo lighter?
While some generic flints might fit, using genuine Zippo flints is strongly recommended. These flints are specifically engineered for optimal performance and compatibility with Zippo lighters, ensuring consistent sparking and longevity.
Question 3: What causes a Zippo lighter to spark inconsistently even with a new flint?
Inconsistent sparking, even with a new flint, often indicates a worn or damaged felt pad. Replacing the felt pad usually resolves this issue. Other potential causes include a misaligned flint, insufficient lighter fluid, or a clogged wick.
Question 4: How can one avoid losing the small components during flint replacement?
Keeping the lighter upright during flint replacement minimizes the risk of losing the spring, flint, or felt pad. Performing the replacement over a clean, well-lit surface further aids in preventing component loss.
Question 5: What should be done if the flint screw becomes stripped or damaged?
A stripped or damaged flint screw typically requires replacement. Contacting Zippo’s customer service or consulting a qualified repair technician offers the most effective solutions for this issue.
Question 6: Why does the lighter still not work after replacing the flint and fluid?
If the lighter remains non-functional after replacing the flint and fluid, the wick might be clogged or improperly positioned. Consult Zippo’s troubleshooting resources or a qualified repair technician for further assistance.
Understanding these common queries empowers users to perform flint replacement effectively and troubleshoot potential issues. Proper maintenance ensures the lighter’s reliability and longevity.
This concludes the frequently asked questions section. Subsequent sections will provide additional resources and support information.
Conclusion
Mastery of flint replacement ensures continued reliable operation of Zippo lighters. This process, involving insert removal, flint screw manipulation, flint and felt pad replacement, and careful reassembly, requires attention to detail. Each component plays a crucial role in the lighter’s sparking mechanism, highlighting the integrated nature of the system. Understanding the function and interaction of these elements empowers users to maintain their lighters effectively.
Reliable ignition sources remain essential tools in various contexts. Regular maintenance, exemplified by proper flint replacement, safeguards this reliability, contributing to the enduring utility of Zippo lighters. Continued functionality depends on user diligence in performing this essential maintenance procedure. Proper execution of these steps sustains the lighter’s performance, preserving its role as a dependable fire-starting implement.


